Premium Members Charles Papert Posted August 27, 2010 Premium Members Report Share Posted August 27, 2010 Looking forward to seeing those pix. Jess, my system sends separate rods fore and aft so you can adjust for different lenses or different components on the back without having to reset either. Components mount via velcro to vertical plates with 15mm quick release bases so they can be stacked in a row, removed independently etc. The center section that supports the rods allows for enough space behind the camera to get your fingers in to make adjustments before the components at the rear begin. Picture an SR, or an Aaton--the center section is something like the body of the camera with the gate and pulldown, and the rear components are like the mag. It's expandable horizontally for more or less inertia and length. Instead of components being distributed like "odds and ends", everything is neat and tidy and in a straight line. The new version will have complete power management including high-end regulation for the components that require it (camera, BM box etc) and numerous regulated 12v outputs for everything else. It will have a rigid structure for top mounting and handle that doesn't require locking the camera away into a cage--you can easily pull it out as needed. Will also manage any of the three Canon models with quick change between them. Don't want to go into too much more detail on this just yet! Quote Link to comment Share on other sites More sharing options...
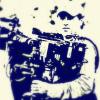
Premium Members Scott Dropkin Posted August 27, 2010 Premium Members Report Share Posted August 27, 2010 Here is the pic of the DSLR cage. Sorry about that. First time trying to post pics... Quote Link to comment Share on other sites More sharing options...
Premium Members Scott Dropkin Posted August 27, 2010 Premium Members Report Share Posted August 27, 2010 The other side of the box... Quote Link to comment Share on other sites More sharing options...
Premium Members Thomas English Posted August 28, 2010 Premium Members Report Share Posted August 28, 2010 Scott, is it really that sunny where you live? I might cry. Quote Link to comment Share on other sites More sharing options...
Premium Members Charles Papert Posted August 28, 2010 Premium Members Report Share Posted August 28, 2010 Quite a comprehensive setup Scott (internal HDMI conversion AND downconversion!). I would be leery about building the guts of the Blackmagic into an internal package though, those electronics are not the most reliable--have seen quite a failure rate with them (including one of my two). Hope it's not a monster to replace if that time comes. Quote Link to comment Share on other sites More sharing options...
Premium Members James Davis Posted August 28, 2010 Premium Members Report Share Posted August 28, 2010 Looking forward to seeing those pix. Jess, my system sends separate rods fore and aft so you can adjust for different lenses or different components on the back without having to reset either. Components mount via velcro to vertical plates with 15mm quick release bases so they can be stacked in a row, removed independently etc. The center section that supports the rods allows for enough space behind the camera to get your fingers in to make adjustments before the components at the rear begin. Picture an SR, or an Aaton--the center section is something like the body of the camera with the gate and pulldown, and the rear components are like the mag. It's expandable horizontally for more or less inertia and length. Instead of components being distributed like "odds and ends", everything is neat and tidy and in a straight line. The new version will have complete power management including high-end regulation for the components that require it (camera, BM box etc) and numerous regulated 12v outputs for everything else. It will have a rigid structure for top mounting and handle that doesn't require locking the camera away into a cage--you can easily pull it out as needed. Will also manage any of the three Canon models with quick change between them. Don't want to go into too much more detail on this just yet! You can't possibly tell us such juicy details and not provide pics! Very very interested, seeing as I use the 5D on a lot of jobs, will it take "other" SLR's (Nikon) and other small HD camera's or is it Canon SLR specific? Also do you think it would be possible to build this cage/bracket unit into a shoulder mount as well, if I frankensteined on some redrock/zacuto components to provide a shoulder pad, handles and monitor mount? Seeing as we seem to be using shoulder mount kits quite regularly for various jobs it would be great to have one professional solution that you could easily switch from steadicam to shoulder mount. Quote Link to comment Share on other sites More sharing options...
Premium Members Charles Papert Posted August 28, 2010 Premium Members Report Share Posted August 28, 2010 James: This is a total solution for the cameras, in that it is quickly switchable from studio to handheld to Steadicam mode (2 to 3 minutes per mode). In handheld, the goal is to be completely balanced on the shoulder so that it only requires fingertips on the handles rather than the front-heavy death grip. I've been using my prototype this way for six months or so and it's been great as we regularly move between modes very quickly. The idea is really simple--virtually everything rides onboard the whole time, so you don't have to reconfigure much. The only things that swap are the onboard monitor for studio/handheld that comes off for Steadicam, and the handles and viewfinder hood that go on for handheld. I use the Preston (receiver stays onboard) for every mode, so no need to swap to a hard follow focus--the Preston is many times more effective as it expands the short range of the still lenses and maps them to boot. I saw so many handheld rigs being sold but no studio ones, which is why I started designing this one. It seemed to me that even with everything onboard, the package would still be considered light enough to be not just manageable for handheld and Steadicam, but actually ideal--there is after all a minimum weight for both modes where it's preferable to have a bit of heft to aid in stability. Fully loaded I'm up around 15 lbs for camera payload, which is "just right". My basic onboard package is the Preston MDR, Blackmagic converter and a Dionic to power everything including camera, with a Marshall 7" HDSDI monitor for studio/handheld. However I can and have added: Decimator downconverter and Modulus for standard def transmission; Camwave for HD transmission; Zoom H4N for self-contained audio recording; one or two Sennheiser wireless lav receivers and a Mini Litepanel for eyelight. All of the above power off the single battery, and even with everything onboard the rig is still tidy and "logical" i.e. things aren't bandied onto the sides like an afterthought. Many feel that the "point" of these cameras is lost with a full-size setup like this--that you lose the advantages of the small form factor. My feeling is that for the vast majority of work I do with them, I have no need to keep things tiny and nimble, actually quite the opposite--as noted before, they behave much better for handheld and Steadicam when in an extended and inert mode. However, there are times when one needs to strip things down as much as possible. The new version of the base has a breakaway mode which separates the support components from the camera into a backpack for compact shooting. Pictures--I only have some of the old prototype, the new one is quite different but still in the works. Also I was going for a high-inertia mode with this setup so the components are spread out a bit more than I usually fly it, making the whole thing longer. And most egregiously for this forum--the socket adjustments in the arm were in a neutral vehicle-mount mode so I had to affect a lean to fly the rig for this pic--as soon as I took it off I made the proper adjustments (Chris Fawcett, please ignore my posture)!!! Nothing is truly revolutionary about my design but I believe that it simply "makes sense" and will help make these cameras significantly more usable in every shooting environment. Quote Link to comment Share on other sites More sharing options...
Premium Members James Davis Posted August 29, 2010 Premium Members Report Share Posted August 29, 2010 James: This is a total solution for the cameras, in that it is quickly switchable from studio to handheld to Steadicam mode (2 to 3 minutes per mode). In handheld, the goal is to be completely balanced on the shoulder so that it only requires fingertips on the handles rather than the front-heavy death grip. I've been using my prototype this way for six months or so and it's been great as we regularly move between modes very quickly. The idea is really simple--virtually everything rides onboard the whole time, so you don't have to reconfigure much. The only things that swap are the onboard monitor for studio/handheld that comes off for Steadicam, and the handles and viewfinder hood that go on for handheld. I use the Preston (receiver stays onboard) for every mode, so no need to swap to a hard follow focus--the Preston is many times more effective as it expands the short range of the still lenses and maps them to boot. I saw so many handheld rigs being sold but no studio ones, which is why I started designing this one. It seemed to me that even with everything onboard, the package would still be considered light enough to be not just manageable for handheld and Steadicam, but actually ideal--there is after all a minimum weight for both modes where it's preferable to have a bit of heft to aid in stability. Fully loaded I'm up around 15 lbs for camera payload, which is "just right". My basic onboard package is the Preston MDR, Blackmagic converter and a Dionic to power everything including camera, with a Marshall 7" HDSDI monitor for studio/handheld. However I can and have added: Decimator downconverter and Modulus for standard def transmission; Camwave for HD transmission; Zoom H4N for self-contained audio recording; one or two Sennheiser wireless lav receivers and a Mini Litepanel for eyelight. All of the above power off the single battery, and even with everything onboard the rig is still tidy and "logical" i.e. things aren't bandied onto the sides like an afterthought. Many feel that the "point" of these cameras is lost with a full-size setup like this--that you lose the advantages of the small form factor. My feeling is that for the vast majority of work I do with them, I have no need to keep things tiny and nimble, actually quite the opposite--as noted before, they behave much better for handheld and Steadicam when in an extended and inert mode. However, there are times when one needs to strip things down as much as possible. The new version of the base has a breakaway mode which separates the support components from the camera into a backpack for compact shooting. Pictures--I only have some of the old prototype, the new one is quite different but still in the works. Also I was going for a high-inertia mode with this setup so the components are spread out a bit more than I usually fly it, making the whole thing longer. And most egregiously for this forum--the socket adjustments in the arm were in a neutral vehicle-mount mode so I had to affect a lean to fly the rig for this pic--as soon as I took it off I made the proper adjustments (Chris Fawcett, please ignore my posture)!!! Nothing is truly revolutionary about my design but I believe that it simply "makes sense" and will help make these cameras significantly more usable in every shooting environment. Interesting, glad i'm not the only one who thinks the H4N is an awesome little bit of kit :) I like the sound of a setup with adjustable inertia, and the base with sliding rails, previously only the preserve of the rig itself, and only then if you owned a rig capable of it. I also like the sound of breakaway mode, that could be invaluable in certain situations, look forward to seeing the finished version, something that can switch from studio to handheld, to steadicam in a heartbeat sounds ideal, one thing you didn't mention though Charles, is this rig universal, or is it DSLR specific? Really looking forward to seeing the progress/finished version of this. Quote Link to comment Share on other sites More sharing options...
Premium Members Charles Papert Posted August 29, 2010 Premium Members Report Share Posted August 29, 2010 James, I'm designing it to work with the 5D/7D/1D, so any DSLR that will fit roughly within the height of those cameras should work. Proper voltage and cable for the individual camera would be another factor, but you could always use the internal camera battery. Quote Link to comment Share on other sites More sharing options...
Premium Members Tom Wills Posted August 29, 2010 Premium Members Report Share Posted August 29, 2010 Hey Charles, Love the rig! Much better than what I cobbled together with velcro for a shoot I did on the 5D. One question though - is the top rod necessary? For this last shoot, the DP had a build-up that he liked for his camera (offset shoulder plate, monitor, handgrips, etc...), and so when we went to Steadicam I just pulled the camera (which was mounted to the rods) off of the rods and put it on my rig. With a top rod in place, that would have taken a lot longer. Also, I know it's not final, but what would be the weight of just the plate with front and back rods? It's easy enough to add on a bunch of weight to make it fly well on a heavier-duty rig, but I think there could be a market for this kind of kit on rigs like the Pilot too - not enough inertia with a bare SLR, but most buildups making it a little too heavy. Quote Link to comment Share on other sites More sharing options...
Premium Members Charles Papert Posted August 29, 2010 Premium Members Report Share Posted August 29, 2010 Hey, wasn't this thread supposed to be about the MKV cage??!! One question though - is the top rod necessary? For this last shoot, the DP had a build-up that he liked for his camera (offset shoulder plate, monitor, handgrips, etc...), and so when we went to Steadicam I just pulled the camera (which was mounted to the rods) off of the rods and put it on my rig. With a top rod in place, that would have taken a lot longer. I'm not doing a top rod setup like you see there, but I do feel that top rods in general are useful for this setup. The still lenses are so short from front to back that it's tight getting motors in just with bottom rods, especially with a mattebox in play. However in the new version the rods are supported via the base and not the camera--you should still be able to slide the camera out (via the Really Right Stuff quick release) without affecting the rods. However, again it's designed to stay all together when switching between mode (studio/handheld/Steadi). Also, I know it's not final, but what would be the weight of just the plate with front and back rods? It's easy enough to add on a bunch of weight to make it fly well on a heavier-duty rig, but I think there could be a market for this kind of kit on rigs like the Pilot too - not enough inertia with a bare SLR, but most buildups making it a little too heavy. I won't know until we are done just how heavy it will be, but it's just aluminum, no lead or brass involved for weighting purposes. I don't believe it will be ideal for a Pilot, think it will tip the scales a bit for that, but I don't want to compromise the design for its intended purpose so probably a Flyer will be the smallest rig that can manage it. Honestly I think it will probably cost more than the average Pilot user will be interested in spending or renting. This is not intended to be a budget setup, it's aimed at making these cameras work efficiently and tidily within a high-end environment. Anyway--hopefully I'll have more information on this soon, once the prototype is complete. Got some other bits of gear I'm working on also, including a VERY interesting new concept in handheld that will be ideal for the DSLR's and other awkward-to-hold small form factor cameras like the 1/3" camcorders. That one will require a functional prototype to determine if it will actually work.... Quote Link to comment Share on other sites More sharing options...
Premium Members James Davis Posted October 9, 2010 Premium Members Report Share Posted October 9, 2010 Hey, wasn't this thread supposed to be about the MKV cage??!! One question though - is the top rod necessary? For this last shoot, the DP had a build-up that he liked for his camera (offset shoulder plate, monitor, handgrips, etc...), and so when we went to Steadicam I just pulled the camera (which was mounted to the rods) off of the rods and put it on my rig. With a top rod in place, that would have taken a lot longer. I'm not doing a top rod setup like you see there, but I do feel that top rods in general are useful for this setup. The still lenses are so short from front to back that it's tight getting motors in just with bottom rods, especially with a mattebox in play. However in the new version the rods are supported via the base and not the camera--you should still be able to slide the camera out (via the Really Right Stuff quick release) without affecting the rods. However, again it's designed to stay all together when switching between mode (studio/handheld/Steadi). Also, I know it's not final, but what would be the weight of just the plate with front and back rods? It's easy enough to add on a bunch of weight to make it fly well on a heavier-duty rig, but I think there could be a market for this kind of kit on rigs like the Pilot too - not enough inertia with a bare SLR, but most buildups making it a little too heavy. I won't know until we are done just how heavy it will be, but it's just aluminum, no lead or brass involved for weighting purposes. I don't believe it will be ideal for a Pilot, think it will tip the scales a bit for that, but I don't want to compromise the design for its intended purpose so probably a Flyer will be the smallest rig that can manage it. Honestly I think it will probably cost more than the average Pilot user will be interested in spending or renting. This is not intended to be a budget setup, it's aimed at making these cameras work efficiently and tidily within a high-end environment. Anyway--hopefully I'll have more information on this soon, once the prototype is complete. Got some other bits of gear I'm working on also, including a VERY interesting new concept in handheld that will be ideal for the DSLR's and other awkward-to-hold small form factor cameras like the 1/3" camcorders. That one will require a functional prototype to determine if it will actually work.... Hi Charles, I was just wondering if you had any further news on this cage/set-up you have been working on, after the last two jobs I have worked on, I am thinking a weight plate and my cobbled together rails/riser plate etc etc set-up is really not cutting it, and looking for a more professional solution, seeing as it looks I will be doing more and more work with SLR's it makes sense to be properly equipped, although this new panasonic camera coming out may change things a bit. Quote Link to comment Share on other sites More sharing options...
Premium Members Charles Papert Posted October 9, 2010 Premium Members Report Share Posted October 9, 2010 Hi James: Thanks for checking in on this. The design team I am working with has seemingly dropped the ball on this so it's still a bit distant. I've been focusing on another gadget of late which is very exciting--along with full-time work, my attention to the DSLR base has been back-seat. Hoping to resuscitate it shortly. Quote Link to comment Share on other sites More sharing options...
Premium Members James Davis Posted October 9, 2010 Premium Members Report Share Posted October 9, 2010 Hi James: Thanks for checking in on this. The design team I am working with has seemingly dropped the ball on this so it's still a bit distant. I've been focusing on another gadget of late which is very exciting--along with full-time work, my attention to the DSLR base has been back-seat. Hoping to resuscitate it shortly. Ok cool, thanks for taking the time to respond Charles, would be interested to hear more when things change, it seems like there aren't many good professional options out there for people shooting with SLR's on steadicam at the moment, do you have a blog at all by the way? Quote Link to comment Share on other sites More sharing options...
Premium Members Osvaldo Silvera SOC Posted March 1, 2011 Premium Members Report Share Posted March 1, 2011 The viewfactor 5d/7d cage is great, The non powered cage fits both cameras, Pair that up with a weight plate milled and machined just right and you can change batteries without pulling the rig off the sled. I'm planning on installing some rods from the rear of the cage to a vertical AB plate for more Mass and accessory power up top. Ozzie Quote Link to comment Share on other sites More sharing options...

Recommended Posts
Join the conversation
You can post now and register later. If you have an account, sign in now to post with your account.