Tom Wills
-
Posts
472 -
Joined
-
Last visited
-
Days Won
55
Everything posted by Tom Wills
-
While it is definitely possible to remove the Archer 2 stage (Tiffen is able to put Volt gimbals on it, after all!) it is not absolutely necessary to remove the gimbal from the post to clean the pan bearing. You can in fact remove the top cap of the gimbal and remove the pan bearing housing off of the gimbal grip, then wrap the top and bottom stages of the post in plastic trash bags and paper towels and spray out the bearing without having to remove anything. It will require a considerable amount more work since you’re working around the gimbal grip, and you will have to use more cleaner since you’re not going to be as readily able to spin the bearing, but it can absolutely be done. I did this procedure to fix a sticky pan bearing on Larry McConkey’s Ultra2 sled as well, which we didn’t want to fully disassemble.
-
I’ve been starting up a small maintenance shop in my workshop in New Jersey, doing maintenance and mods for quite a few operators. Obviously I can’t do warranty service, but for out of warranty repairs and maintenance and especially modifications, I’m happy to throw my hat in the ring if it makes sense geographically. If you’re on the west coast, I might check with the folks at Apex Cinema Gear, since I know they are working with Robert Luna who is an incredible resource for rig mechanicals (As well as both Justin and Stephen at Apex who do great work). There may be other resources (especially elsewhere in the world), and lead times may vary, but at least there are options!
-
If these are for a Tiffen M1/M2’s sled rods, I would use Zacuto rods. Tiffen standardized on the 1/2”x13 thread standard, which Zacuto is one of only a few companies to use, unlike most companies which seem to use the M12 thread standard. I source mine from B&H as I’m in the NY area, and they are findable as “Zacuto extension rods”
-
I would doubt that - the Flyer LE handle is a much thicker aluminum part with approximately 1/8” thick walls of aluminum, whereas the Pilot’s gimbal is a very thin bent aluminum tube, and seems like it would easily break under extended loads. The Pilot really was built down in weight so that the sled could be as light as possible. It’s actually quite impressive! But it does make sense that to save cost Tiffen would use the same bearings - they are a commodity part and only come in certain sizes anyways.
-
 I’m hosting another end of year “yard sale” to clear out more of my storage space. Posted up currently is a ton of gear ranging from quick release plates and weight plates all the way up to Preston and Teradek gear, monitors, a Wave, and a ZeeGee. Lots of great deals to be had. More gear is likely to be posted soon! Check out my website below for the latest list of what’s available and more info. https://twsteadi.com/used-gear-yard-sale-2024
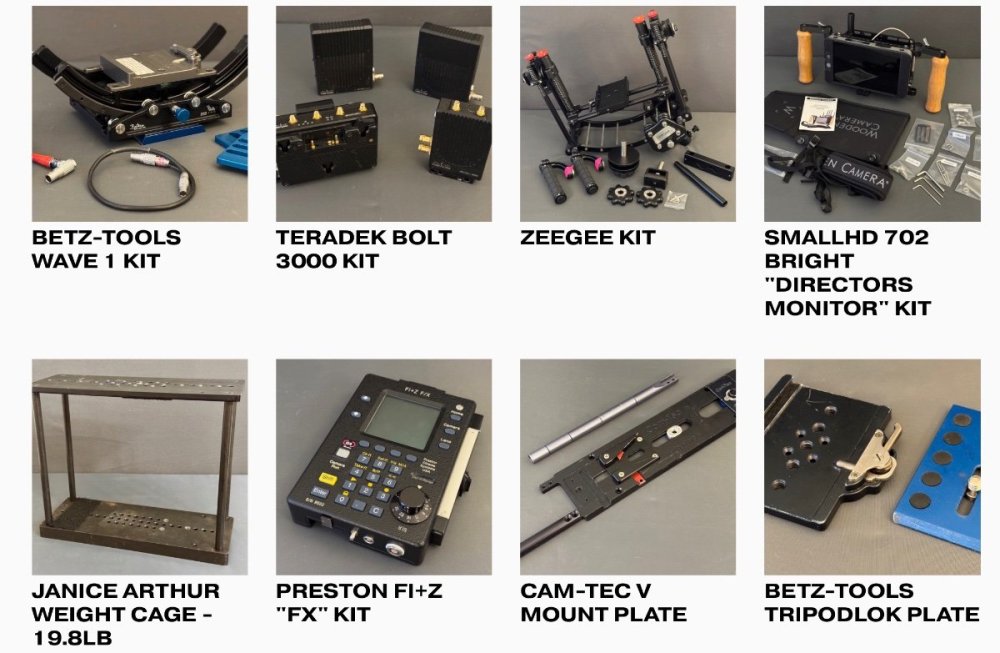
-
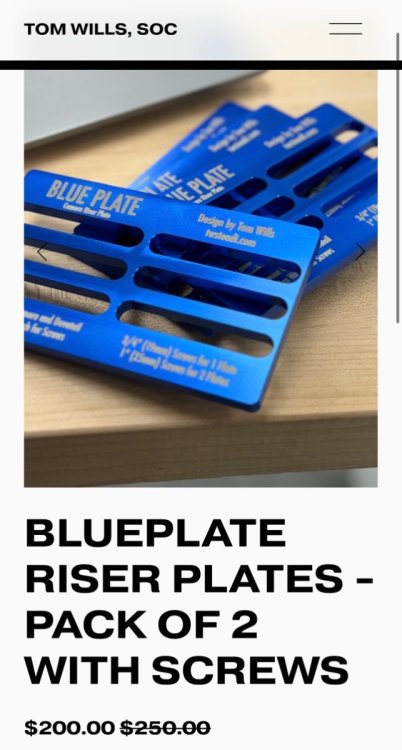
If you’ve heard of my “Blue Plate” riser plates, but haven’t picked them up yet, here’s your guide opportunity to pick up a set for 20% off before the end of the year. These plates raise the camera in 1/4” increments off of your top stage, and allow for both balancing rotating rigs like the Wave, Omega, Cyclo 1, and Trinity, but also for clearing the top stage with film cameras, allowing rods to clear the dovetail on low camera builds, and much more. They’re incredibly handy pieces of gear to have in your kit, and this is the cheapest I’ve ever sold them for! Kit includes 2 plates, along with screws to mount them. Easiest checkout and more info is on my website here: https://twsteadi.com/tw-rigworks-store/p/blueplate-riser-plates
-
I have a few of the brackets to go from MK-V junction boxes to Betz stage rods from upgrading some rigs a while back. Send me an email and I can sell you one. Tom.Wills.Soc@gmail.com
-
It sounds like the batteries were passing 24v through the normal 12v pins on your battery plates. The M2 as a rig is not designed for 24v batteries, and in fact if you switched the rig into “24v” mode would get 48v out of the 24v pins on the sled. Assuming that your batteries are 24v only and not “dual voltage”, when you put your 24v battery on, it is going to output 24v on all the 12v output pins on the sled. This could do damage to any electronics not designed as multi-voltage capable. This is a big problem, and could easily damage a camera or accessory - in fact I’m not sure if you’ve damaged your Volt since you put 26v into the input pins where it was expecting 12-16v. Again, unless your batteries are dual-voltage and smartly sense what type of plate they are on (like the Helix dual-voltage type) I absolutely would not use them on your rig!
-
Hello friends! In early May, Megan Masur, SOC organized a get-together of the NYC Steadicam Operators Practice Group where I lead a class on Steadicam Maintenance and Modifications. We recorded the class for those who could not make it, and also for broader distribution. Here it is, in video form, a nearly 50 minute video talking about the theory and practice of gimbal cleaning and lubrication. Please as always cross-reference my techniques with what is referenced from your manufacturer, and this information is presented without warranty and for educational purposes only.
-
GPI Pro Titan Arm (8 Canister) with Accessories
Tom Wills replied to Tom Wills's topic in Steadicam Marketplace - For Sale
No longer available. Thanks! -
GPI Pro Titan Arm (6 Canister) - Huge price drop!
Tom Wills replied to Tom Wills's topic in Steadicam Marketplace - For Sale
Sold quite quickly! Thanks! -
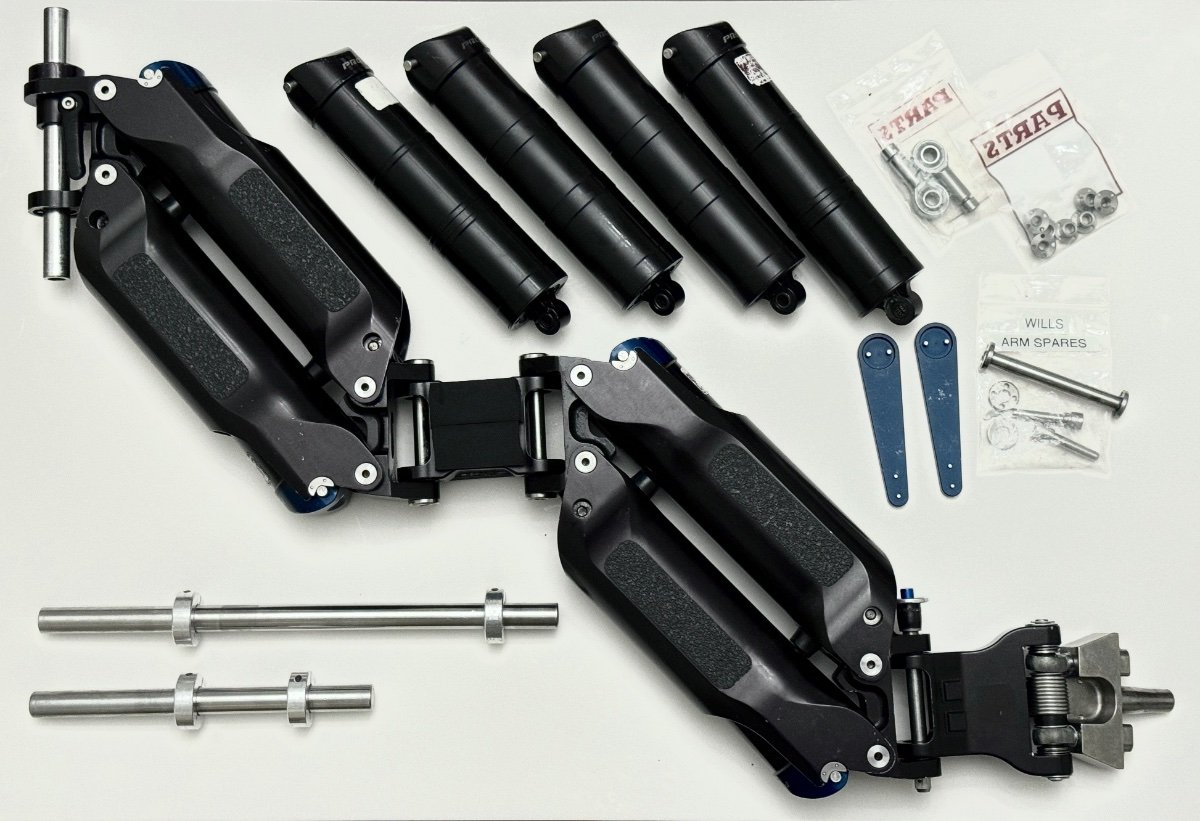
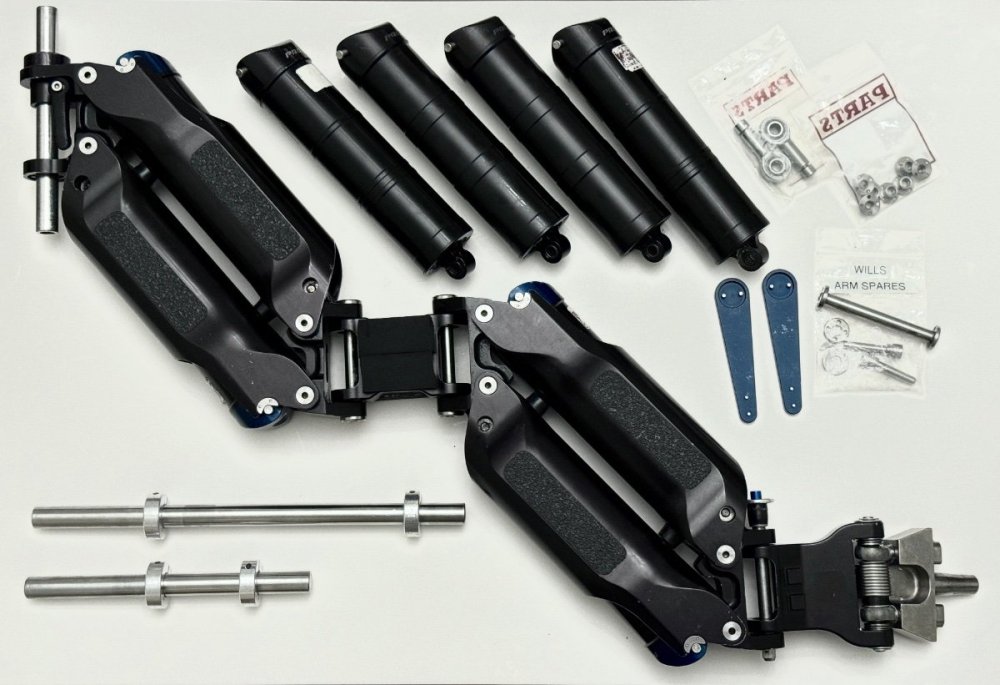
This arm was purchased new in 2014. It has been my personal arm ever since and was never abused, and it still works great. It went back for service in late 2019, and has been remarkably trouble-free through its life, only having one part fail, which was replaced under warranty. I am reposting this with a crazy price drop, because I’ve had a lot of interest, but several buyers backing out for personal reasons (I get it - it’s an uncertain time!). I am asking only $12,000 for the arm and all of these accessories, which is a crazy deal, but I have a new arm and need this one sold before the end of the month. This deal will expire in 2 weeks! The arm includes 6 canisters, which means it can carry loads between 13 and 63 pounds - enough to carry almost any modern camera build. I am also including quite a few spares, tools, brand new parts, and upgrades, which you can easily swap in. I am including several of my own precision-machined Stainless Steel arm posts, which are much stronger and tougher than the original aluminum versions. The arm has special neoprene rubber bumpers on the center section to prevent vibration from moving down the arm when running, and rubber grip tape on the bones of the arm to allow for better grip, especially in cold climates or with sweaty hands. The arm also has an updated arm post friction system, which allows the arm post to be tightened more easily (with a tools-free Kipp handle) as well as having more friction available via a custom-machined sleeve inside of the arm. With a half turn of the Kipp handle, the arm post goes from completely free to fully locked, and can be set anywhere in between at a moments notice. Please note that the picture includes 8 canisters, but 2 have been removed from the kit, commensurate with the price drop. Please contact me via email at tom.wills.soc@gmail.com if you're interesting. Includes: GPI PRO Titan Arm Chassis # 639 4x Blue Canisters 2x Black Canisters 6” Arm Post w/ 2 Collars 8” Arm Post w/ 2 Collars 12” Arm Post w/ 2 Collars Spare Rod Ends and Screws for Socket Block (brand new) QR Pin for Socket Block Adapter (allows for quick switching from regular to goofy) 7 Spare Pivot Nuts (a part often lost if it loosens up in travel) 2 Spare Canister Pins Kit of standard spare parts (washers, clips, etc…) 2 PRO Arm Tools Soft Bag for Arm Soft Bag for Canisters PRO Arm 5/32” wrench

-
GPI Pro Titan Arm (8 Canister) with Accessories
Tom Wills replied to Tom Wills's topic in Steadicam Marketplace - For Sale
Bumping the post with a price drop - $15,000. An incredible deal for an arm this complete, with these accessories. I’m also willing to throw in a day of one-on-one Steadicam coaching for any new operator who buys this in the NYC/NJ/PA area. -
GPI Pro Titan Arm (8 Canister) with Accessories
Tom Wills replied to Tom Wills's topic in Steadicam Marketplace - For Sale
Price drop for hopefully a quicker sale: asking $16,000 USD Contact me at tom.wills.soc@gmail.com -
Steadicam Master Series Vest (highly modified)
Tom Wills replied to Tom Wills's topic in Steadicam Marketplace - For Sale
Hi Blaine, sadly it is sold! -
This arm was purchased new in 2014. It has been my personal arm ever since and was never abused, and it still works great. It went back for service in late 2019, and has been remarkably trouble-free through its life, only having one part fail, which was replaced under warranty. The arm includes all 8 canisters, which means it can carry any loads between 13 and 72 pounds. This has come in quite handy for carrying both small cameras on little rigs, as well as fully built 35mm camera packages. I am also including quite a few spares, tools, brand new parts, and upgrades, which you can easily swap in. I am including several of my own precision-machined Stainless Steel arm posts, which are much stronger and tougher than the original aluminum versions. The arm has special neoprene rubber bumpers on the center section to prevent vibration from moving down the arm when running, and rubber grip tape on the bones of the arm to allow for better grip, especially in cold climates or with sweaty hands. The arm also has an updated arm post friction system, which allows the arm post to be tightened more easily (with a tools-free Kipp handle) as well as having more friction available via a custom-machined sleeve inside of the arm. With a half turn of the Kipp handle, the arm post goes from completely free to fully locked, and can be set anywhere in between at a moments notice. This arm sells new (even with GPI PRO’s recent price drops) for $21,500, and it still works as well as it did when it was new. I’ve even heard an operator with a PRO arm call mine “an especially good one”. I’m asking $18,000 or best offer for the full package, which is in line with recent sales - these arms do not lose much value, and hold up exceedingly well over time. Email me for more info. Tom.Wills.Soc@gmail.com Includes: GPI PRO Titan Arm Chassis # 639 4x Blue Canisters 4x Black Canisters 6” Arm Post w/ 2 Collars 8” Arm Post w/ 2 Collars 12” Arm Post w/ 2 Collars Spare Rod Ends and Screws for Socket Block (brand new) QR Pin for Socket Block Adapter (allows for quick switching from regular to goofy) 7 Spare Pivot Nuts (a part often lost if it loosens up in travel) 2 Spare Canister Pins Kit of standard spare parts (washers, clips, etc…) 2 PRO Arm Tools Soft Bag for Arm Soft Bag for Canisters PRO Arm 5/32” wrench
-
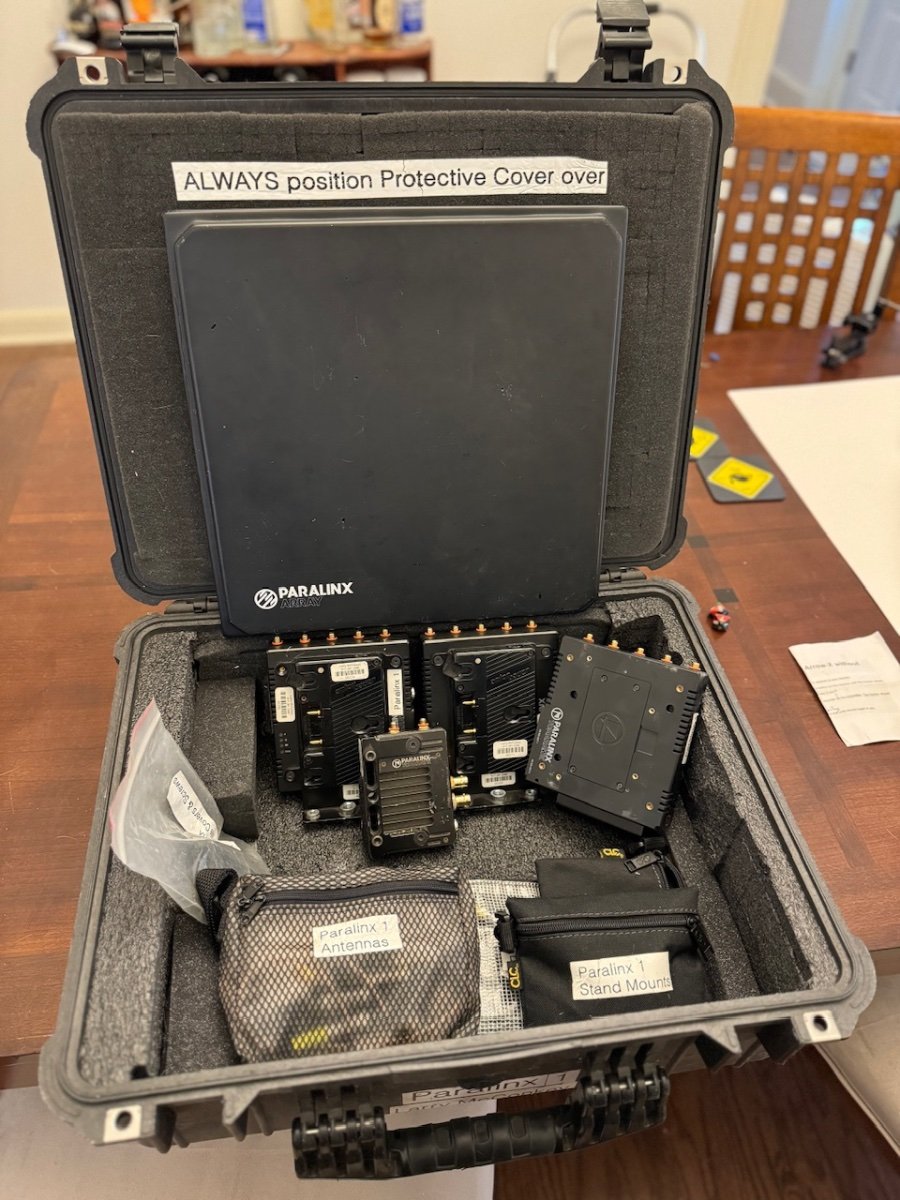
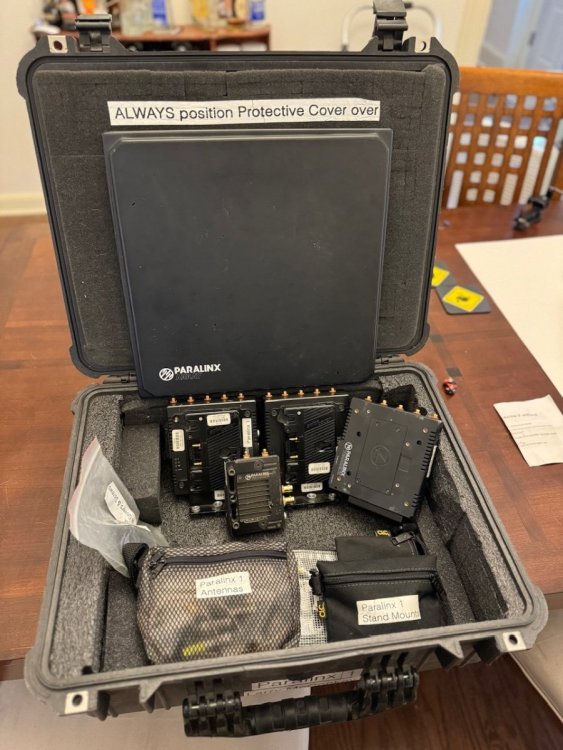
This is a Paralinx Tomahawk SDI kit with 3 receivers and a panel. This was well used on several seasons of TV, and shows some wear, but still works well. Equivalent to a Bolt 2000 in internals. 2 of the receivers have “pass through” power plates on both sides, one has only a “female” Anton Bauer plate for powering the receiver. Includes: Transmitter 2 receivers with AB Male and Female plates 1 receiver with AB Female plate 1 panel antenna with AB plate 3 stand mount receivers 2 AC Adapters Large qty. antennas (over 10) Large qty. power cables (including D Tap, 2-pin, and 3 pin) Pelican case Asking $2400 or best offer - no reasonable offer refused! Contact me at tom.wills.soc@gmail.com if you’re interested!
-
This is an ARRI SXU-1 kit with an ARRI cForce Mini motor and accessories. It was personally owned, never rented out, and rarely used. Includes: SXU Handset CForce Mini Motor 32p gear, 32p wide gear, 48p gear (Panavision iris) 2 L-Bus cables 4 Sony batteries 1 Charger 3 rings Asking $4500 for the kit. Contact me at tom.wills.soc@gmail.com if you’re interested.

-
GPI Pro Gimbal (modified - please read)
Tom Wills posted a topic in Steadicam Marketplace - For Sale
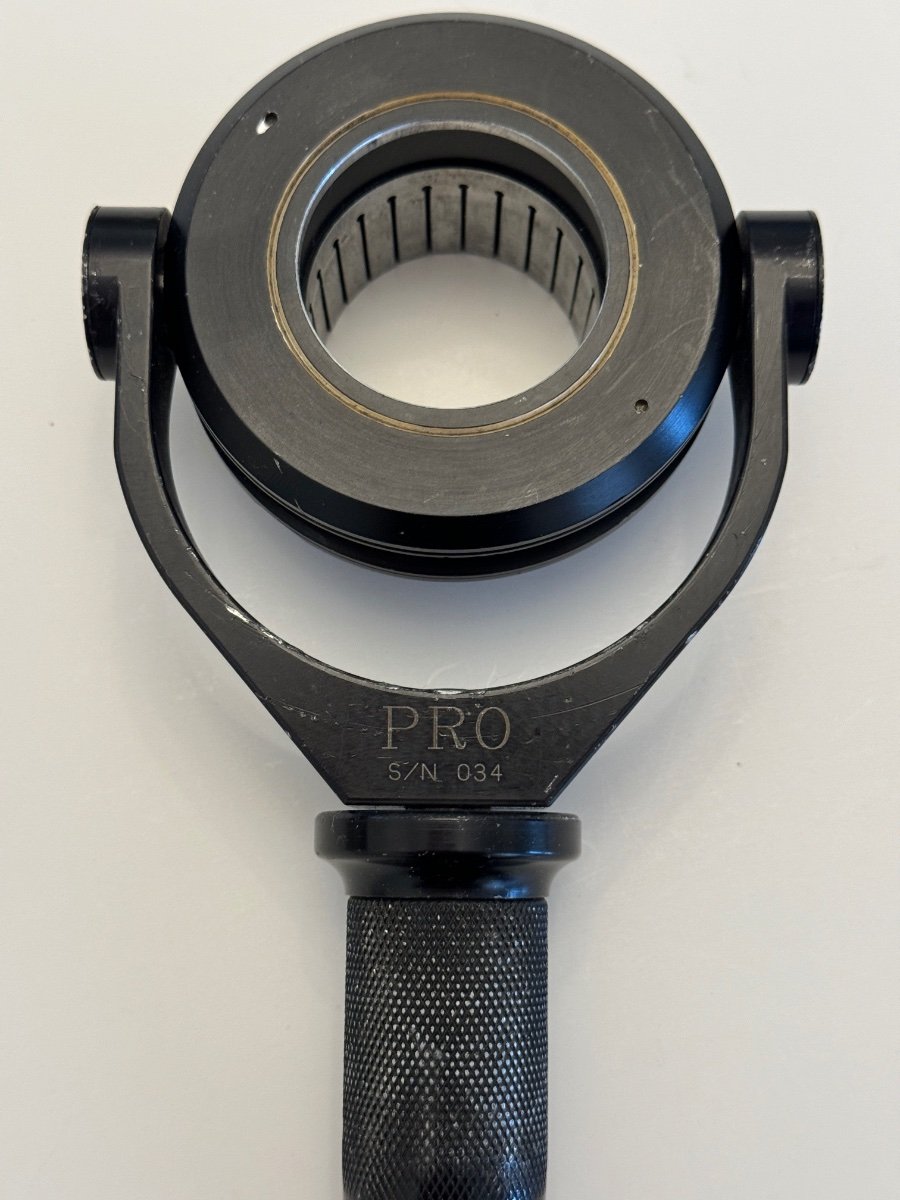
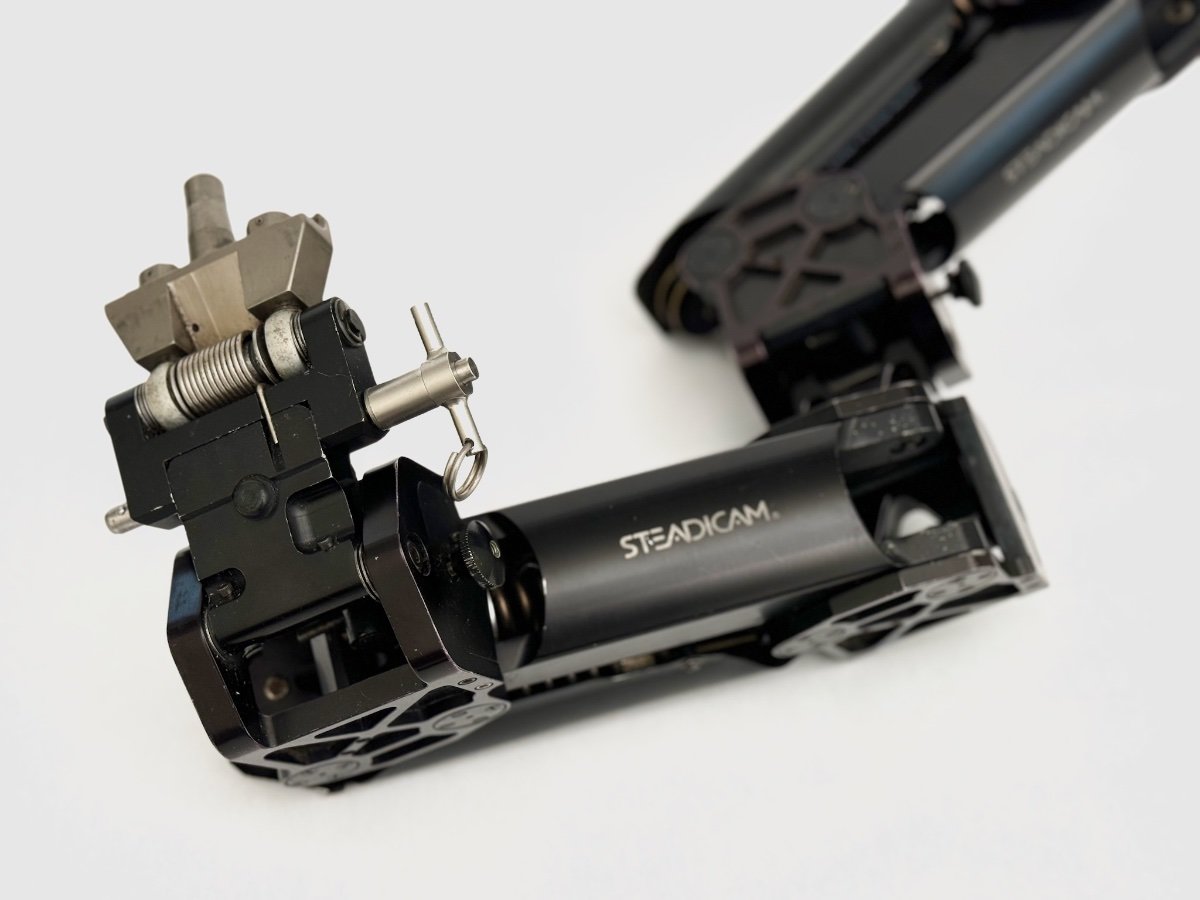
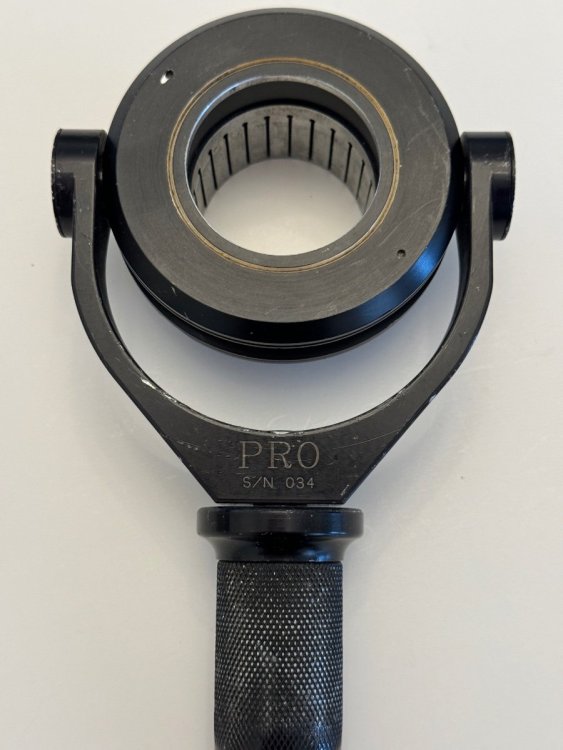
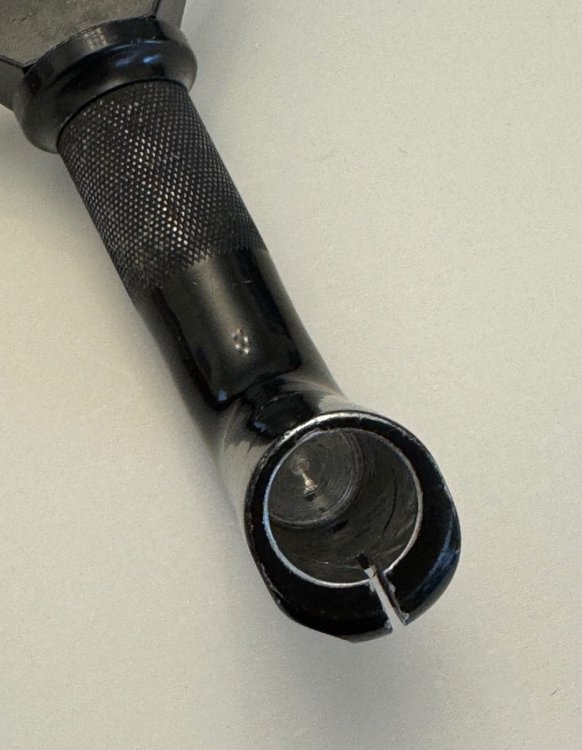
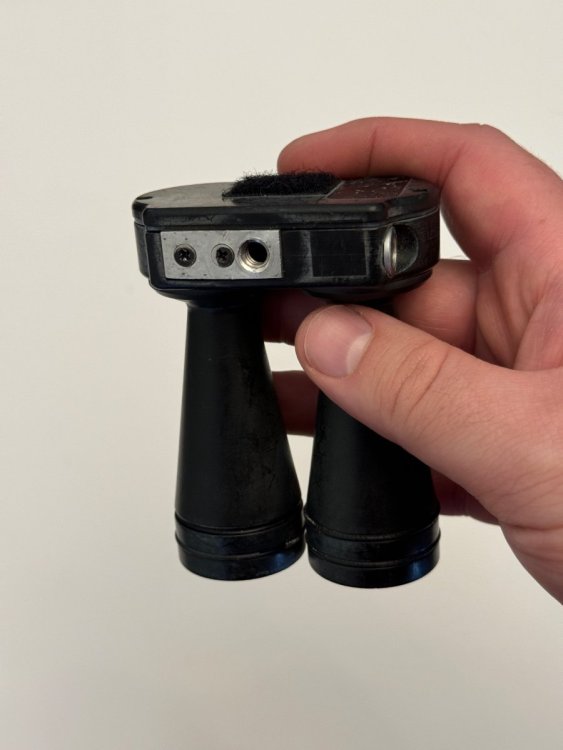
This is a gimbal owned by Larry McConkey. It’s a PRO gimbal, s/n 034, and it has the original gimbal clamp without a grip. However, as we all know, Larry modifies all of his gear, and this was no exception. This gimbal has been bored out to fit a 1.58” diameter post, and a .740” arm post size. So both the gimbal handle and post clamp are bored out. (See pictures) The bearing is in great shape and the gimbal was still in use through last year, so this is a great source for a gimbal bearing, yoke, and other parts. PRO even could sell you a new VZ gimbal sleeve and handle, and this would be a great new-functioning PRO gimbal. Lots of options here, happy to entertain offers! New PRO gimbals are about $7000 with all the parts, we are asking $2000 or best offer for this.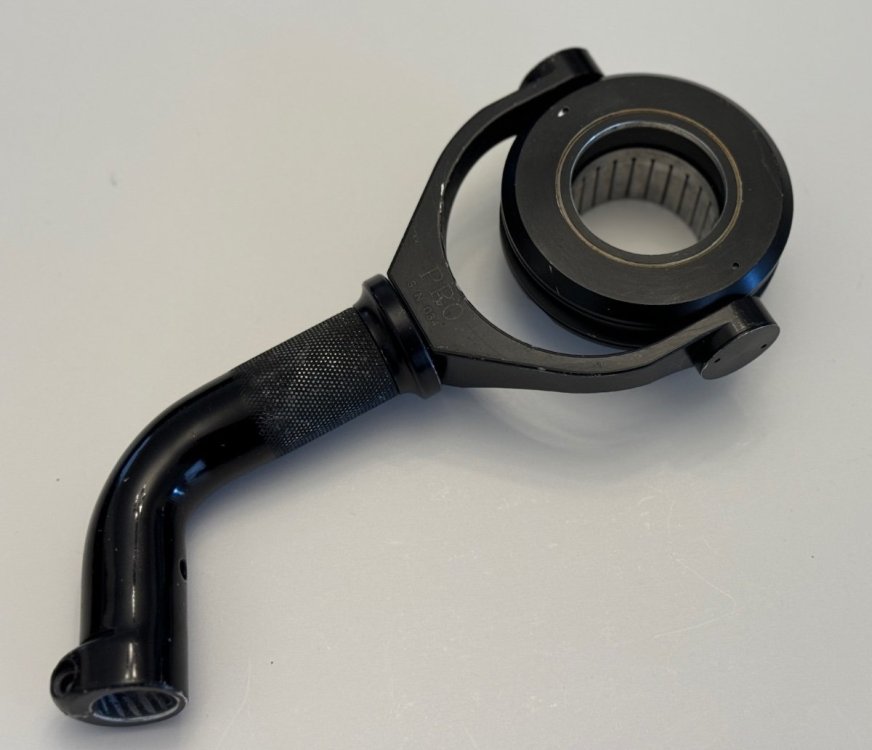
-
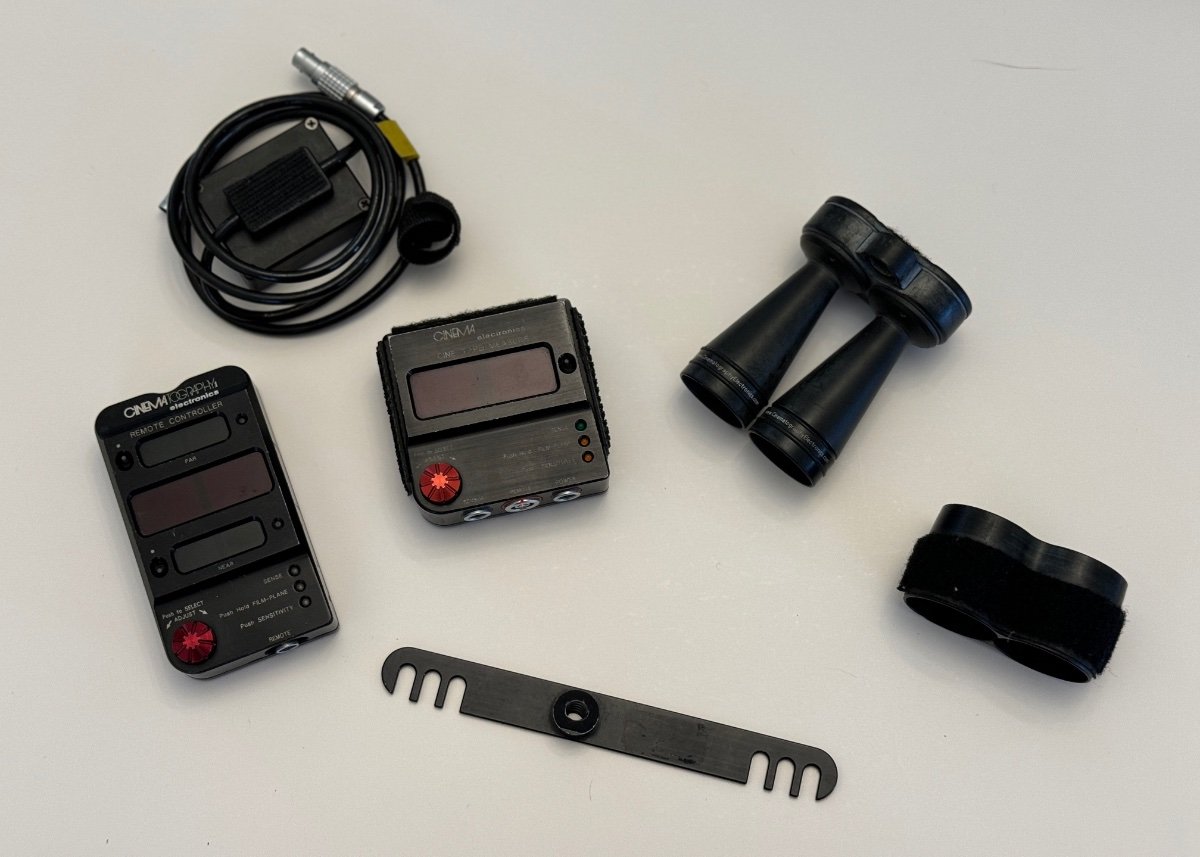
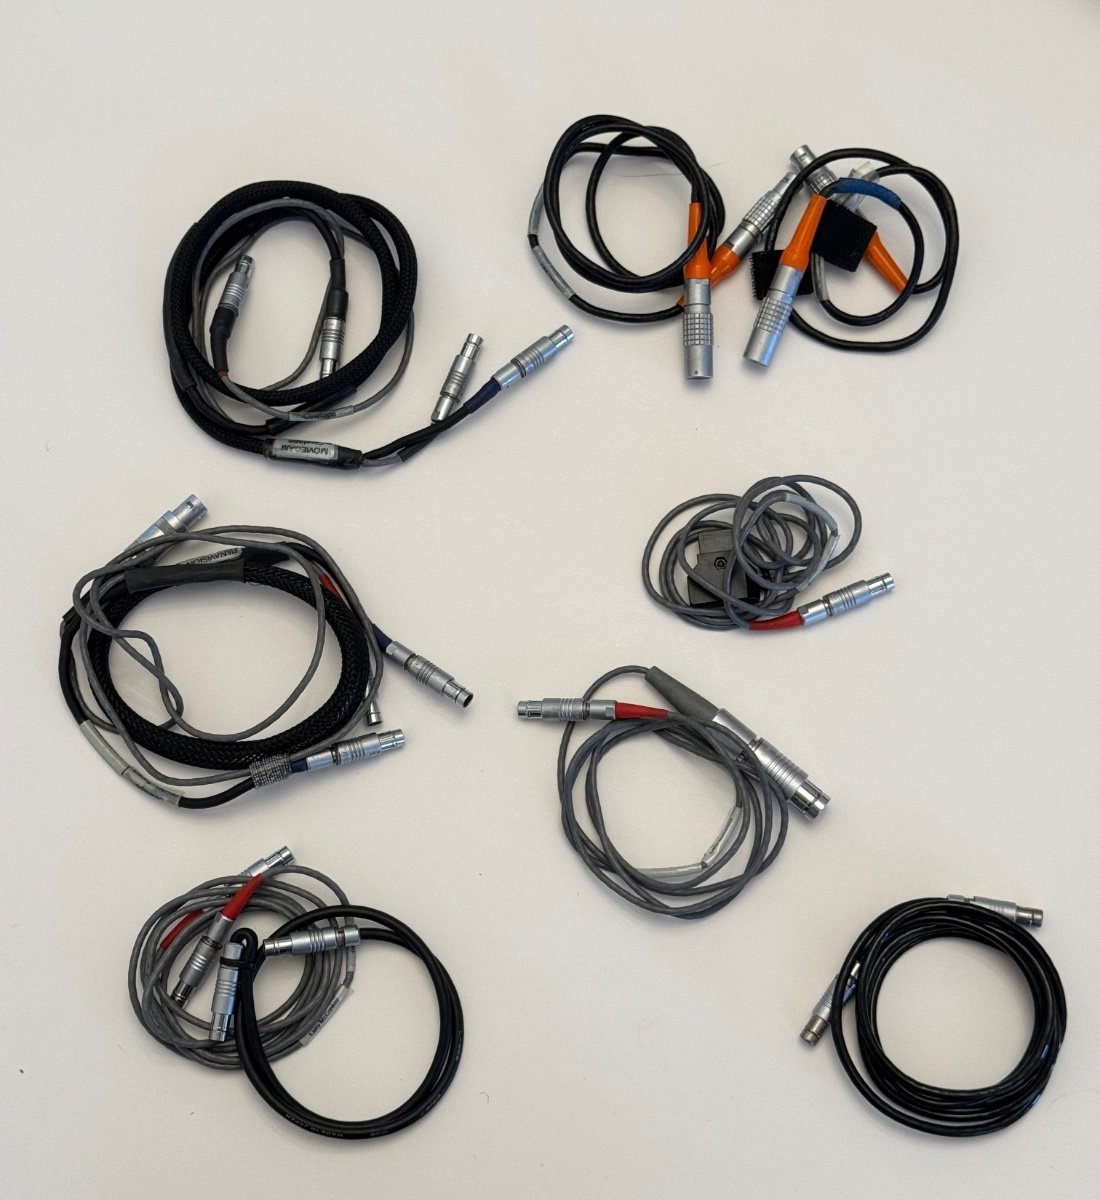
This is a personally owned Cinetape kit. It shows use, but is in good working order, and comes with an incredible quantity of accessories. Includes: Cinetape Horns (modified with 1/4” thread on base for easier mounting) Cinetape Display Unit Cinetape Remote (very handy for setting near/far distances or having readouts on both sides of the camera) LMB Eyebrow mount Horn extension tubes Small Noga arm (not pictured) Cinetape to MDR-2 cable 2x remote cables 3x horn cable (2 are loomed with other cables, one is loose) 2x 3-pin Fisher power cables 1x DTap cable 1x MovieCam power cable 1x Panavision power cable 1x 11-pin Fisher power cable Asking $2000. Contact me at tom.wills.soc@gmail.com if you’re interested!


-
If you do solid arm posts, which I think are a great option, I would absolutely drill out the end of them that goes “down” in the arm maybe 1-1.5” deep (I can get you a measurement off of the Hill dock at some point) so they can still be mounted on the arm hanger of a dock. None of my posts have ever bent on the bottom end where they go into the arm, it’s always either a general bend throughout the arm post or a bend right where the shaft collar is that prevents the arm post falling through the arm. Without a hole in the bottom of the arm post, especially on a PRO arm, it’d be an incredible pain to hang the arm up and likely open up the arm to damage as it swings around from whatever hacked way you’d have to hang the arm.
-
I think I can speak to the aluminum versus stainless debate, as I was the one who was selling stainless steel arm posts a couple of years ago. I have had several issues with aluminum arm posts over the years of using my PRO arm. For most people, I think the aluminum posts probably suit them fine. But, for people like me who tend to push their gear to the limit, I have found that every single hollow aluminum arm post I ever had eventually bent or cracked. Quite simply, with a long gimbal handle like an Ergo handle, or regularly flying 60+ pound sleds in low mode with an F bracket on longer arm posts (I spend a lot of time in high low mode with a 12" arm post), a 6061 aluminum arm post with 1/8" wall thickness won't hold up. I first noticed a bend in my 12", then upon checking I found that the 8" was even more bent and was beginning to crack at the bend, and after a couple more years I found that even the 6" arm post I was using had some stress cracks in the anodizing where the post met the shaft collar. I eventually switched to making my own arm posts out of 7075 solid stock, turning them to the correct size (several arm posts I purchased varied wildly in size - not good!), but I eventually decided to move to 304 stainless steel for my own arm posts. The thing I like about steel is that it doesn't tend to crack and fail spectacularly like Aluminum does, but it bends. I have put a 60+ pound sled on an 18" stainless arm post (304 with 1/8" walls) and while you can see the post bend, I am not worried that it will spontaneously crack if it is bent like an aluminum post does. For my stainless arm posts, I had a local aerospace grinding shop do a run of stainless tubing centerless ground to .621" diameter, +/- .0005" (they laughed and said that to them that was a mile wide tolerance!). I found that to be the sweet spot amongst all of my arm posts I had purchased over the years - measuring and averaging them seemed to come to that number. Some were as small as .615", some were as large as .623". Honestly, the stainless was probably overkill, but for me, it was an insurance policy against catastrophic failure, and that for me was worth it. You probably could offer solid arm posts that would do the same, or 7075 aluminum, but I know I liked the feeling of security I got from the stainless.
-
I have heard of good results from some of the Scotch Weld adhesives, and I have also used some adhesives from West Systems that have held up well in a post I repaired. I have also heard in some communities like high-end RC aircraft building that people have had success using J-B Weld as an adhesive for bonding aluminum ends to carbon fiber. I can’t attest to any specific adhesives though, as I don’t have any on hand that I can reference. The biggest thing is surface prep - you must get all of the old adhesive and any residues off of both the aluminum end and the inside of the carbon post, without damaging the structure of the carbon fiber tube. Also the mix and curing of the adhesive is crucial - the MK-V post I saw that had failed appeared to have not cured properly. Then addition of the safety pins is huge as well - they provide a physical “key” to ensure that the post end stays in place, and they do require some care and careful tooling choice so as not to split the post when drilling them out. I’m not sure if there’s someone who does maintenance of this sort in the Vancouver area - if you were in the east coast USA I’d offer to take a look at my shop.
-
The epoxy has failed on the joint, and sadly, there were no safety pins in some of these older MK-V posts. This will need to be sent to someone qualified - either MK-V or someone who has experience with carbon fiber bonding techniques. When it’s re-glued, you should ask them to add in safety pins so if the glue should ever fail in the future, the base of the rig won’t drop off. Where are you located?
-
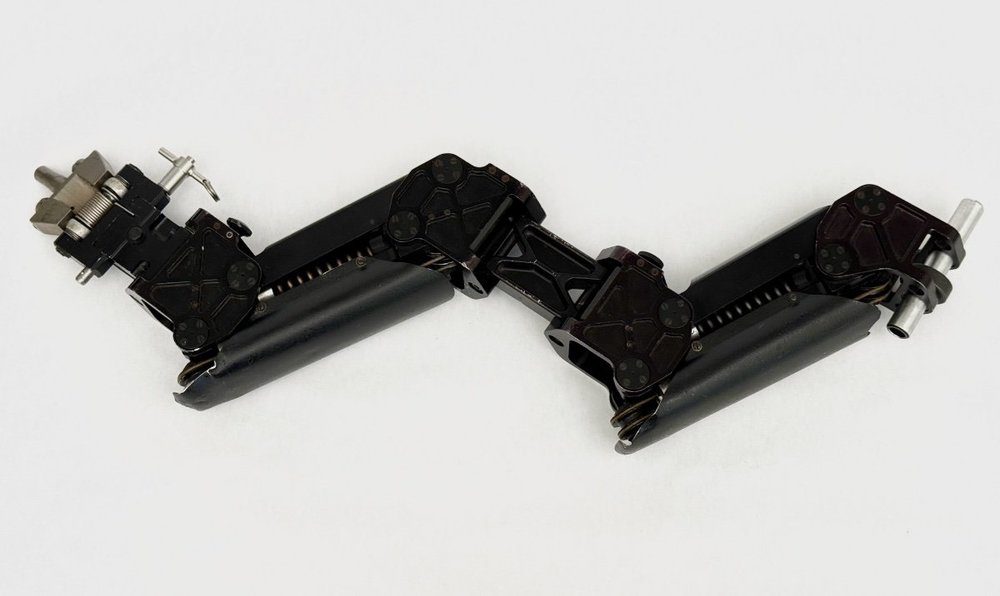
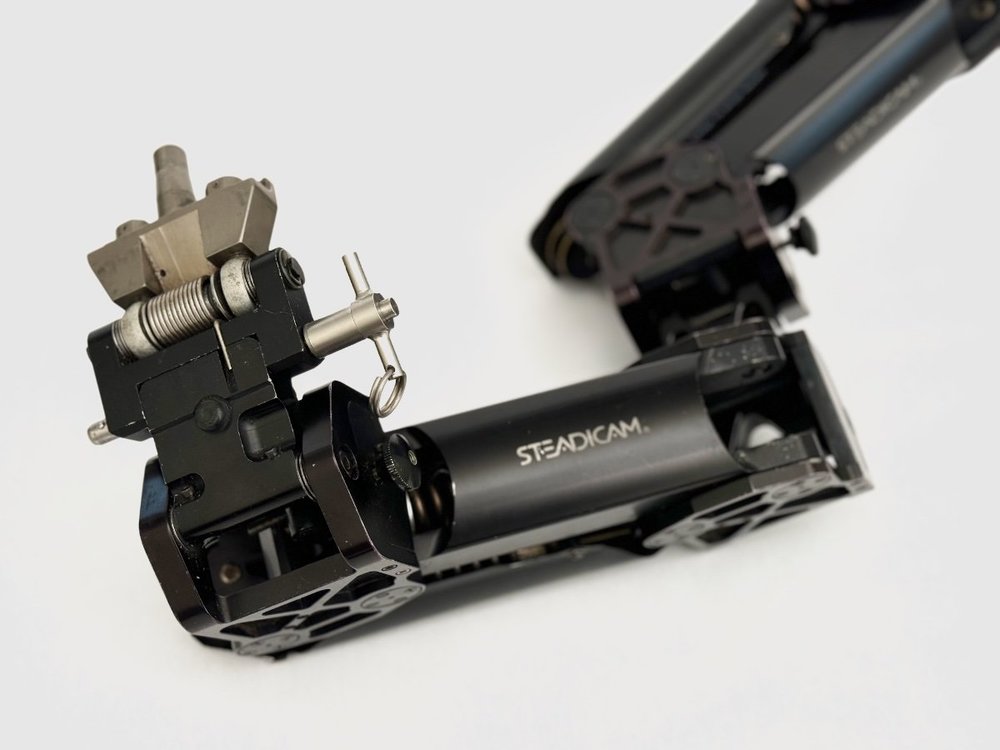
This arm formerly belonged to Larry McConkey. It is a Master series arm, and it has been slightly modified from stock with some Seitz modifications - mostly upgraded trunions in the arm. It carries about 65 pounds of weight at the top end of its range, and about 37 pounds at the bottom. This arm will allow you to carry pretty much any camera build you could be asked to fly, and it does it with ease. The arm is very smooth, and quite iso-elastic. I have flown it with a relatively heavy sled and it performs as well as I’ve ever felt a Master/Ultra arm to fly. Includes a 5” .740” (Tiffen) arm post, and can be easily adapted with other arm posts to fit other sleds, including PRO/XCS/Artemis standard 5/8”. Highly prefer local buyers in the NYC/NJ/PA area, as this arm does have a bit of a learning curve for setting it up properly, and getting the most out of it. Asking $4500 plus shipping if applicable. Contact me at willsvideo@gmail.com if you're interested.
-
- 2
-