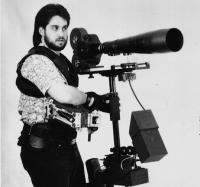
Peter Abraham
-
Posts
895 -
Joined
-
Last visited
-
Days Won
52
Everything posted by Peter Abraham
-
Hi, To follow up to Joel's excellent observations. #4- I use a Zephyr frequently with a client who owns a rig. The lower tube assembly is similar. I tend to put the battery WAY in and the monitor WAY out, but that's personal preference. Love the use of that tube design here. It's quite easily adjusted. #6- I've used those clamps before. I seem to remember that while upon first turn it may seem that you are hitting the post, you can do a combination of loosening/ snugging up the allen key bolt along with turning the handle and/ or pulling and relocating the handle one "click" until you are able to go from very snug to totally loose without hitting the post. Again, I've not tried this rig yet but on other applications I was able to fine-tune the rotation of that kind of short metal handled clamp so that I could go from 0 to 100 %. Now I'm psyched to TRY IT !!
-

The Longplate- option for all rigs.
Peter Abraham replied to Peter Abraham's topic in Camera Stage/Donkey Box
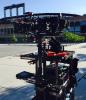
Here's some Longplate shots from a job Patrick Drury did at Citifield in Queens, NYC where the NY Mets play. Shows the flexibility of build that comes with being able to spread things out a bit instead of piling things UP on top of the camera.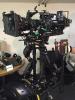
-
I'll dive in here and offer a few thoughts. My relationship with the lighter Steadicam systems goes back to 2002 when I first saw Garrett's prototype of what became the first Flyer. I handled literally hundreds of Flyers, Pilots, Scouts and Zephyrs during my time with Tiffen. I've yet to fly the Aero, and so will limit my reply here to one issue raised above. The placement of the 1/4-20 threaded holes in the bottom corners of the stage. This is a clever placement of the holes/ weights. If you've a camera mass that is much lighter than you wish it was- because it forces your gimbal placement to an area on the centerpost that's less than ideal for the build and/ or shot you are after- you have little choice but to make the camera "weigh" more. Adding the steel weights in these new locations makes the top of the rig heavier without getting in the way of the camera build itself. I see the placement as useful. Now to the issue of expanding the c.g. on top. Fair to say that the placement of additional weights in the corners of the stage does spread the c.g. out a bit from dead center, but doesn't make a huge difference. There's a hidden gift in the plate itself, however. There's the 1/4-20 threaded hole at one end. If I had a lighter camera and wanted to spread things out, I'd start by moving the camera to the very back of the plate and then adding a few of those steel round weights into that 1/4-20 hole provided at one end of the plate. With a bit of experimentation, one could add a few UNDER the plate. I can see being able to find a way to add a few of those weights without sacrificing a lot of fore/ aft movement on the plate itself. Adding weights that many inches from the camera body itself would alter the c.g. a fair bit. Just a thought- can an Aero owner try this out and let us know? Best to all, Peter Abraham, S.O.C.
-
Preston FIZ II and MDR2 Repairs-Yes, they repair them!
Peter Abraham replied to John atkinson's topic in Follow Focus
Hi John- Great to hear this. I am interested in full contact info for PLC- can you please post it in here when you have a moment? Best, Peter Abraham, S.O.C. -
Complete Preston II System for sale.
Peter Abraham replied to Peter Abraham's topic in Steadicam Marketplace - For Sale
Price reduced to $ 9,000.00 USD + Shipping worldwide. -
removing the top plate on an old Flyer?
Peter Abraham replied to Neil Hodgkinson's topic in General Discussion
Sight unseen, I'd say you should re-assemble completely if you can. Buy HDSDI cable from Alan Rencher at Media Blackout. He is easy to find here- he advertises to the right of what you are reading right now !! Get the thin cable from him. It's superb for this kind of arrangement. My entire sled is wired with this stuff. Run 2 lengths, and buy high quality HDSDI rated BNC jacks top and bottom. Viola !! :) Peter Abraham, S.O.C. -
removing the top plate on an old Flyer?
Peter Abraham replied to Neil Hodgkinson's topic in General Discussion
Neil- happy to try to help you out here, but I see no photographs..... I've a ton of experience with the Flyer line. Best, Peter Abraham, S.O.C. -
Complete Preston II System for sale.
Peter Abraham replied to Peter Abraham's topic in Steadicam Marketplace - For Sale
** Price Reduced to $ 10,000.00 USD Complete !! ** -
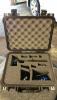
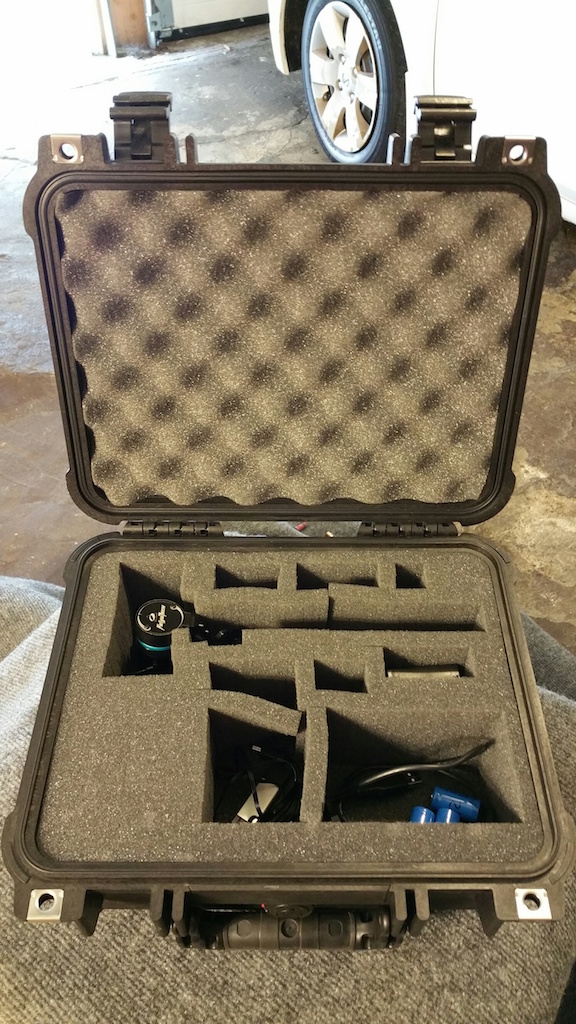
Complete Preston II system for sale. Below find a few pix. The link to the full set of pix is also below. The password for the album is: Preston . Highlights: HU II MDR II ( able to be upgraded to III Chip, Blue Dot MDR Case ) 3 Digital motors MicroForce Zoom 5 newly celled Preston batteries with 2 fast chargers MDR power cables to PRO, Steadicam and 4 pin XLR Cables include motor cables, zoom cables long and short and two 30' hardwire signal cables Comes complete in Pelican 1510 case. System for sale COMPLETE only. Will not be parsed out. Bank wire transfer payment only. email me with serious inquiries to: peter@steadicamproductionservices.com Complete Photo set: http://s21.photobucket.com/user/Cartooniverse/library/PRESTON%20II%20SYSTEM?sort=3&page=1 Password on Photo Album: Preston
-
The Longplate- option for all rigs.
Peter Abraham replied to Peter Abraham's topic in Camera Stage/Donkey Box
Do y Sent from my SM-N910V using Tapatalk -
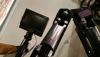
View of arm in place.

- 1 reply
-
- 1
-

-
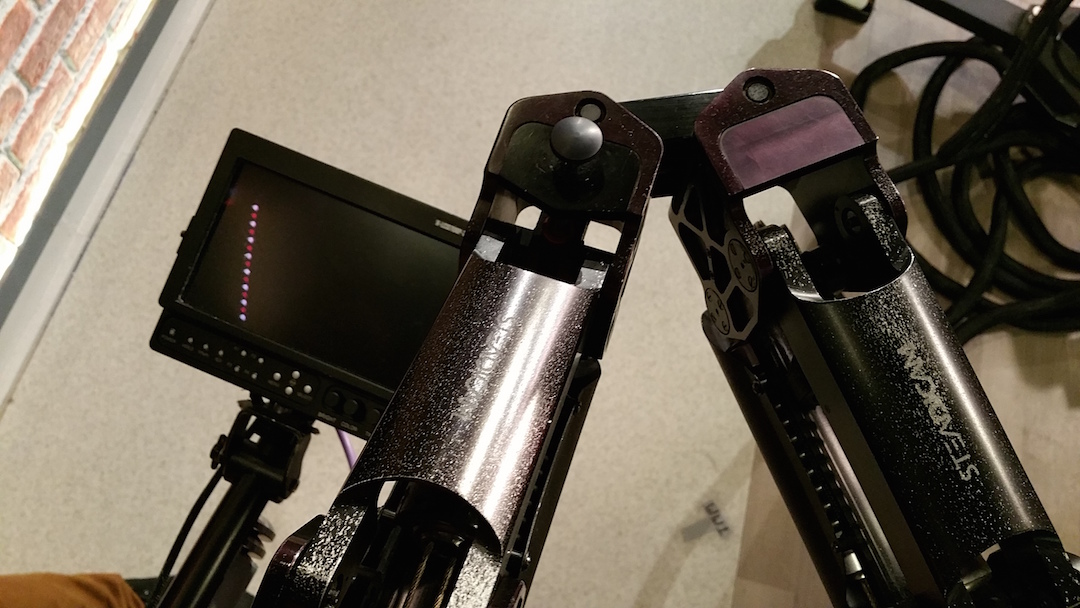
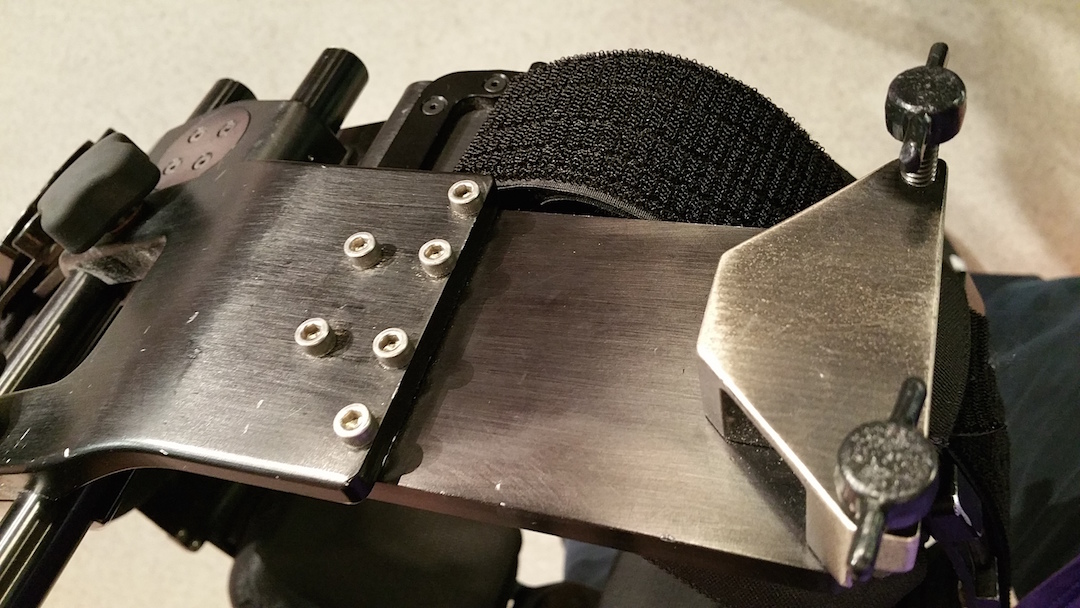
Good evening ! As is the case with every Zalex accessory I have come up with, this latest bit was borne out of a desire to solve two problems that have come up repeatedly for all of my 30 years as a Steadicam Operator. I finally got tired of facing these situations and so designed and had machined by Steadicam Operator and creative machinist Tom Wills the new Zalex Arm Repo Mount, or A.R.M. Depending on the rig and the build and where I placed my monitor, I sometimes encountered these issues: 1. Difficulty in seeing 100% of the monitor. Sometimes the arm as it left the handle departed at an angle that made the arm segment block my view partially. 2. The possibility of the arm bumping the edge of the monitor. Also depending on the shot and monitor height on my rig. The partial view issue is typically handled by operators in one of two ways. We either push the arm handle away from our bodies so that our hand is holding the handle at an awkward angle. This creates a nice “hole” through which we can clearly see the image. The other method is to lean over, craning our neck to clear the blocked view afforded by the edge of our metal arm. The arm bumping the monitor is addressed by developing a stance that minimizes the possibility of a bump. This has mostly perturbed me when running or when shooting on stairs or when wishing to pan to the right a bit during a shot. If the arm is very close, as they frequently are, then we have to turn our bodies slightly as we move to avoid the arm and monitor edge touching. An important aside- these two situations are agnostic. They can occur with any branded rig and any camera. They are simply an issue that many of us deal with at some point. It’s a truth that some Operators have a monitor placement and arm post/ arm combination that allow them to not have to deal with either a blocked view or the potential for bumping the arm against the monitor. For those of you who have faced either or both of these issues, the new Zalex A.R.M. offers a simple solution. The A.R.M. shifts the socket block farther away 3.5” on center of the socket block. The plate is a bit over 4.5” wide. The hole pattern is the classic socket block hole pattern, regardless of branding. If you own a vest with any standard size socket block, you can use the A.R.M. The photos show the arm placement shift clearly. The A.R.M. is placed behind your existing arm bridge. The A.R.M. comes with stainless steel helicoils inserted on the required end and is made of 6061 aircraft grade aluminum. It also comes with 8 mounting screws. ( Because at some point, we all lose a screw! ) The Zalex A.R.M. is now shipping. The price is $ 200.00 USD and includes free USPS shipping to the Lower 48 United States. Overseas shipping costs extra. To place an order please email me at: peter@steadicamproductionservices.com

- 1 reply
-
- 1
-
-
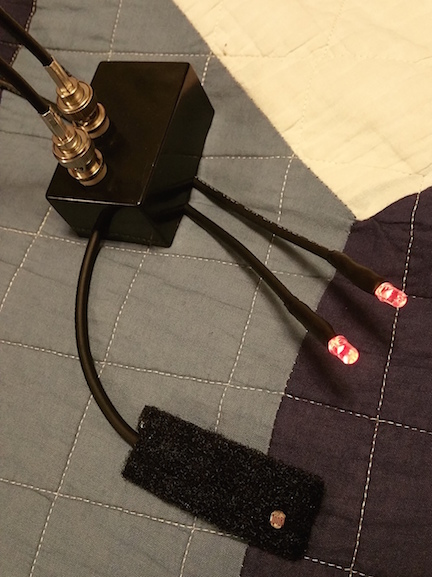
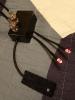
The new production run of 50 Zalex Tally Light systems for all live broadcast work are shipping. 7 are already sold so there are 43 remaining in this run. This is the popular tally light that I've made and sold for 20 years. Used worldwide, for the reasons seen below. This system will work with every single brand of stabilizer on the planet. It works with one of two signal paths. It is 100% self-powered. The power system lasts more than 2 years on a rig that is used 2 hours a day for live work, 5 days a week. ( This, from my colleague Adam Keith at Good Morning America. He ran his Zalex Tally for more than 2 years before changing out the battery. ) Key Features: º Self-Powered º 2 Tally System. One light for the Operator to see against their monitor, aimed up at their face. The other light aimed at Talent so they know when they are on air. º Ultra-Bright Red L.E.D. º Does not require any plug-in to camera for power or tally relay at all. º Can run down the centerpost and out the bottom of the sled OR if there is no spare coax line to be used in the centerpost, is easily run down below the lens and to the monitor as an external line. Never the preferred method, but for shows where all of your coax lines are in use, this system will still work. º Reasonably priced at $ 175.00 USD. Shipping to the lower 48 United States is free. International shipping and Alaska/ Hawai’i is additional. º PayPal only accepted for payment. To place an order for the Zalex Tally Light system, email me at: peter@steadicamproductionservices.com

-
An added tip to Chris' excellent idea of warming the adhesive ( normal hair dryer- a heat gun will melt the Velcro !! ) is this: Take fairly rough sandpaper and mark out where you want to apply the Velcro. Put tape all around that area to protect it. Then abrade the whole area that you are going to use gently. The warmed and softened adhesive ( technically called V-40 by the Velcro company ) will grab better. Best to all, Peter Abraham, S.O.C.
-
The Longplate- option for all rigs.
Peter Abraham replied to Peter Abraham's topic in Camera Stage/Donkey Box
Hi all, I actually have inserted a note suggesting AGAINST low mode with this kit. Better to be very cautious than woefully sorry. Ned- the Longplate will work with the Pilot plate. You have to screw the two together. Not a problem. The Longplate weighs 20 ounces. PM me to place an order ! Sent from my SM-N910V using Tapatalk -
Steadicam WHM -BG
Peter Abraham replied to Libor Cevelik's topic in Steadicam Marketplace - For Sale
I'll take it. Email me !!! Best Peter -
Steadicam Antlers.
Peter Abraham replied to James Baldanza SOC's topic in Steadicam Marketplace - For Sale
I'll take em right now. PM'ing you James. But what about the power supply? :lol: -
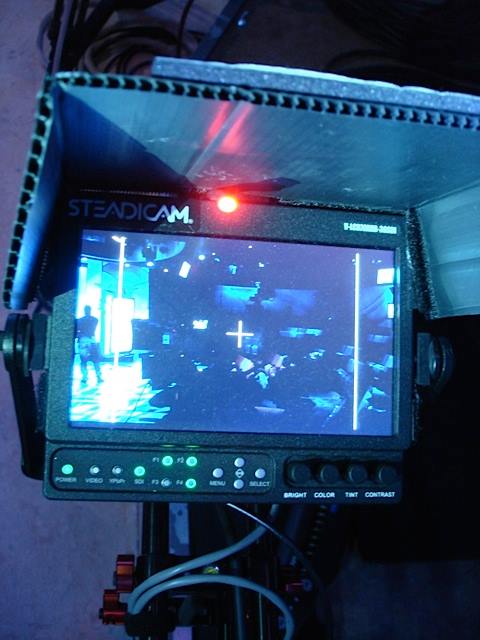
Heh- indeed, I screw it into the underside of my Longplate. The metal mounting fins make it easy to grab with zip ties, etc if you've got to put it up higher. Like most of these smaller adaptors, it comes with the small ac/dc converter and a long cable. It had the usual 2.5mm cylindrical jack on the end. Meter the output to make double sure of polarity and then I cut it off and soldered a P-Tap jack onto it. I use a 1-4 P-Tap adapter on top of my sled. Wired into one of my 3 pin Lemo cables, it affords me places to power plenty of little bits that don't draw tons of amps. The issue of signal loss or infiltration of voltage into video signals or potential distortion of our primary HD signal has been a deep thorn in our collective sides for years now. You cannot use a T-splitter on HDSDI ( opposed to Composite, which you can split pretty easily with a usable signal ). This solution works for me and I will never again be running the outbound signal down my post, around through various bits and back UP my post to the Xmitter.
-
That's fucking brilliant. There are such high-intensity 5" HD monitors out these days. Added weight is meaningless. I love this. Gonna chase this idea.
-
Good stuff so far ! Harness yourself in. Harness the SLED in as well using vinyl-coated steel wire from Home Depot. You know the aisle where the locks and chain is? It's in there. Make a long loop that you can anchor to the cart, pass up through the opening in the end of the arm just behind the arm post and back down. Make it adjustable so you can have the driver swerve or hit a bad bump and NOT HAVE the sled rocket out of your hand. Helmet, all good stuff. Rehearse EACH SHOT at half speed. Make sure the path is secured and controlled. Drives move on instinct. A kid on a bike, a car, a dog- that golf cart driver will jerk the wheel. You won't go flying if you are truly secured.
-
If the issue is signal degradation, buy a 12vdc powered Video D/A from B&H Photo. I use one on almost every job. It is THE CHEAPEST insurance protection against one item fucking up your HD video signal path. Before I thought of using this, I used to run my HDSDI ( if the camera only had one output ) out of the camera, down the post, through the Hyperdeck Shuttle, through my monitor, back UP the post to a Transmitter. Lots of chances for problems. And I had them. The BlackMagic Hyperdeck Shuttles have an issue where voltage runs into the video lines and voila- you have friend your monitor. Or transmitter. Or both. Well, enough of that crap. Now I use this tiny lightweight thing. 1 jack in, 4 outputs- each one HDSDI 1 volt peak to peak. Get one, use it on the outbound signal from your DSLR. Then you are using individual HD lines for each destination. This is the unit I own and use. Best, Peter Abraham, S.O.C.
-
Were you ever in a situation where you said "No" ?
Peter Abraham replied to Beau Cuizon's topic in General Discussion
Ah ! This is quite dangerous but reminds me of a deeply amusing ( and embarassing ) story. In the summer of 2006 I shot a tour through Ontario of Blues Festivals. I was traveling with The Detroit Women. Amazing group of singers with a killer band behind them. We were in a small town called Porquis Junction, Iroquois Falls, Ontario. TINY town. They hosted this Blues Festival in the ice skating rink every summer. It's just insanely hot and humid. No rope line for a barrier, but before the show started I walked along, getting people to step back to where I'd need them to be. Many were already drunk, none were jerk offs and I figured I'd be just fine. We get set, our band goes on and because the stage was quite tight there, I was limited to being the "human dolly", tracking back and forth during the entire set. We've all done those. Before we even get started, I'm quite sweaty. By the end of the second song I'm just drenched. And yet....and yet... as I do a move from one edge of the stage line on the floor moving to center, with the lead singer in my frame, I come to a stop. And two hands very firmly grab my butt cheeks. I hold my shot and turn and look and see two very inebriated young women laughing. I had no rope line- and had no need for one. It was a very weird moment. I moved away doing a shot. EVERY single time I stopped near center to concentrate on the lead singer, that gal's hands held onto my bum. Sometimes one, usually two. I knew I was drenched and was part irritated, part grossed out and part flattered. They just kept laughing. And doing it. Not once did they reach out for me as I was operating. When the band finished, I walked up to them. Just dripping with sweat. They were both laughing and grinning. I said, so.... what's the deal? One said, " It's her birthday- give her a kiss ! " I wished her a happy birthday, shook her hand and bailed. I hadn't thought of that in years till I read the post quoted above. :D -
Steadicam EFP in storage for ~18 years. What to check?
Peter Abraham replied to Eric Swanson's topic in General Discussion
All depends on how deep you want to go. In no particular order. 1. Examine all BNC and Hirose connectors for corrosion. Fax all lines of course. 2. Clean and lubricate arm trunions one at a time. Can't write out the whole procedure here, if you want to do this PM me, I'll find the document. 3. Clean and lubricate the gimbal bearings. The EFP gimbals weren't killer anyway, and the new owner will very likely be buying this system to gut the sled and make it fully HDSDI and new power wiring. In which case, find out of they're buying a hot new gimbal and save the cleaning/ lube effort. 4. Check to see if the arm cables are straight or twisted and if they are fraying at all. 5. Is the Anton/Bauer mount snug? 6. No offense if this is obvious, but build the rig and put it on and fly it for a few minutes. Is the vest okay? Any plastics cracked? How does the arm feel and sound, etc. Good luck with the sale. Were I looking for a lighter weight rig for not a lotta $, I'd jump at an EFP. In fact, that was my first sled when returning to Operating. Robert Luna can upgrade the springs, but check with him to make sure that the dog bones are in fact the same spec and thickness as IIIA arm dog bones. I cannot remember if the EFP arms ran "thinner". No idea who in Chicago, or anywhere else, does this kind of tune up and repairs. As I mentioned above Robert Luna is the gold standard for those kinds of arms. He actually BUILT and calibrated that arm for Cinema Products. He is The Man. Best, Peter Abraham, S.O.C. -
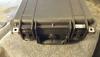
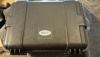
I bought my Preston in this case. Have outgrown it. It's a nifty case. Steel latches instead of plastic like the Storm/ Pelican cases. There is no identifying model # on this case, oddly. Near as I can tell from the measurements ( 16x11x5.5 including lid depth ) it's the Boyt H15 hand gun case. They're for sale on Amazon for around $ 53.00. I'll sell this for $ 35.00 + shipping. Please email me if interested. PayPal or cash if we meet in NYC only. Best, Peter Abraham, S.O.C. peter@steadicamproductionservices.com

-
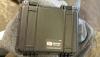
Here are all the specs on a Pelican 1400 case. " The 1400 Pro-Pack camera case offers an interior storage area of 11.81" x 8.87" x 5.18". Unlike the images on the link, this case comes with a lid insert and the pluck foam as seen. ( items IN the pluck foam do not come with the case !! ) New it's $ 139.61. This case in very good shape with both hasps intact is $ 100.00. PayPal payment only. Buyer pays shipping. Please email me if interested. Best to all, Peter Abraham, S.O.C. peter@steadicamproductionservices.com