Tom Wills
-
Posts
456 -
Joined
-
Last visited
-
Days Won
42
Everything posted by Tom Wills
-
 Send me an email - I still have several. Willsvideo@gmail.com
 -
The dovetail for the SK is the same as used on the Flyer, if I remember correctly. It is the smaller “medium dovetail” size, and it has a gear rack on the bottom of the dovetail. The Flyer was made recently enough that Tiffen may still carry dovetails in that size. As for the battery for dynamic balance, it likely is expecting something like an Anton Bauer ProPac. They weighed around 5 pounds.
-
Sold! Thanks for all the interest!
-
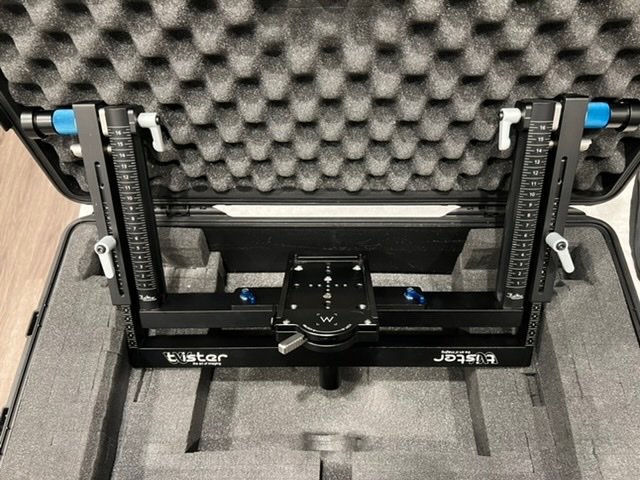
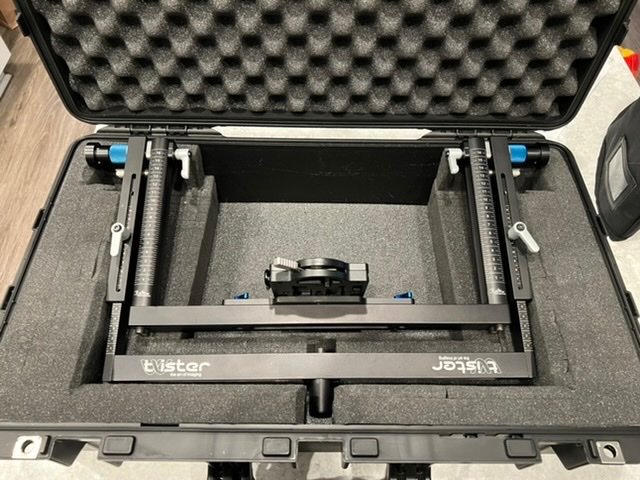
This is a Betz-Tools Twister rig. I picked it up used about a year ago for a project that I didn’t ever end up finishing. I’m selling it now to clear some space in my shop. This allows you to mount the Betz Wave on a Steadicam arm for horizon-stabilized handheld operating. The Twister is slightly modified (partially by the previous owner, and partially by me) to accept different hole spacings on the bottom. Currently there is a Wooden Camera 120mm quick release plate mounted for easy on and off of the Wave, if you attach a quick release plate to your Wave. It could also accept an SOS plate for easy mounting that way. What you see in the pictures is what is included. Comes in a Pelican Air case. Shipping on the buyer’s expense, or pickup available in New York. Asking $1000 plus shipping. Thanks! Email for more info: willsvideo@gmail.com

-
Apparently I never marked this as sold. Apologies, it’s been sold since 2019. Thanks!
-
2 things here (and I apologize if this is brief, I’m on set at the moment). The answer to your actual question is that you dynamically balance without those cables. Get the rig into DB with all those cables disconnected, then add them. Now rebalance the sled using only the Topstage and gimbal (do not move anything on the base of the rig). The rig will still be in dynamic balance. However, in most circumstances with most rigs dynamic balance only affects the tilt axis of the rig, and only while panning. Unless parts of the base of your rig are offset to one side, and your horizon only goes off while panning, your horizon issue is more than likely completely unrelated to dynamic balance.
-
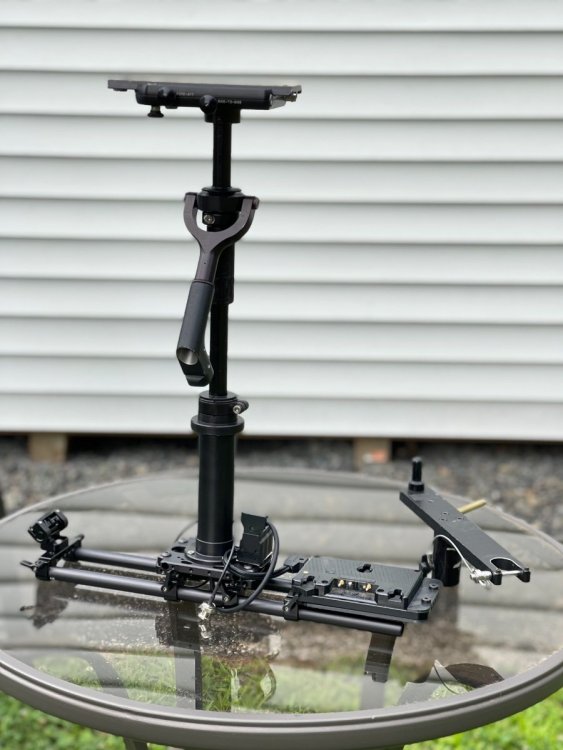
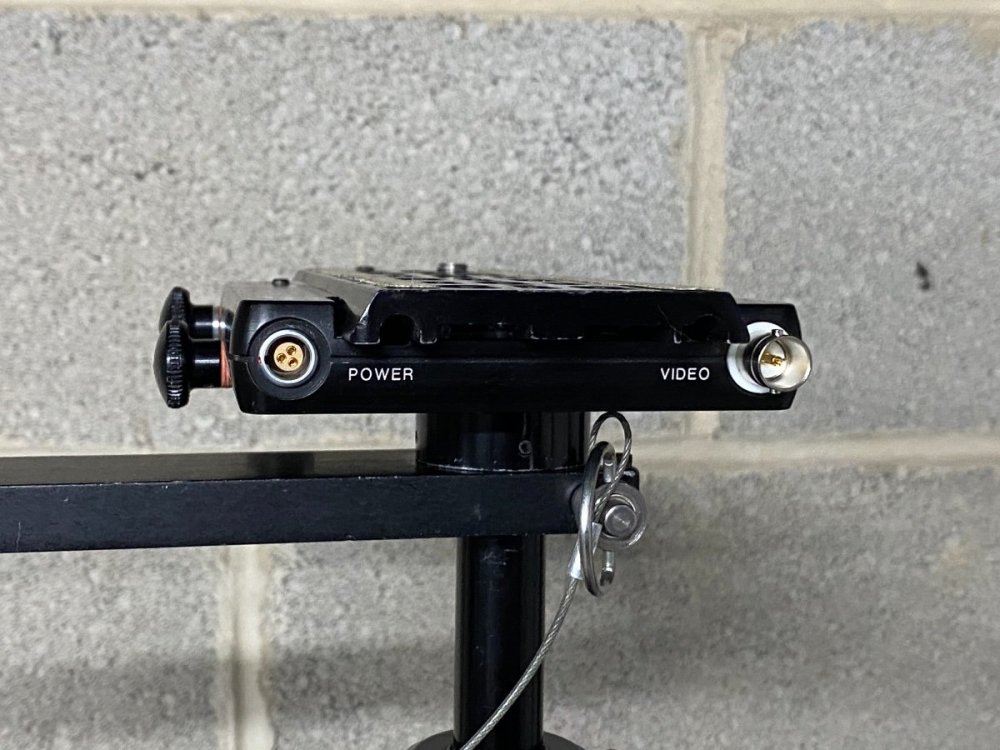
This is a 1st Gen Steadicam Flyer package that I picked up last summer and modified as a project. Now for sale! The Flyer was the first of Tiffen’s really serious lightweight rigs that could be used for professional jobs. It supports cameras in the 15 pound range, which while limiting for big jobs, would allow you to fly a lot of the smaller cinema cameras that are now out. This rig has been re-wired for an HD-SDI line down the post, as well as a more modern Tiffen-standard 3 pin power plug. The rig has a baseplate with standard 15mm rods on it, allowing for monitor and battery mounting, and a lot of flexibility in terms of which monitor you can use. Includes arm and vest, both in working order, though all of the pieces show signs of use. Asking $2000 for this rig (arm, vest, and sled together) plus shipping, or pickup in the New York/NJ area. Contact me at willsvideo@gmail.com or 215-796-8938 if you’re interested (please be patient, as I’m working!)
-
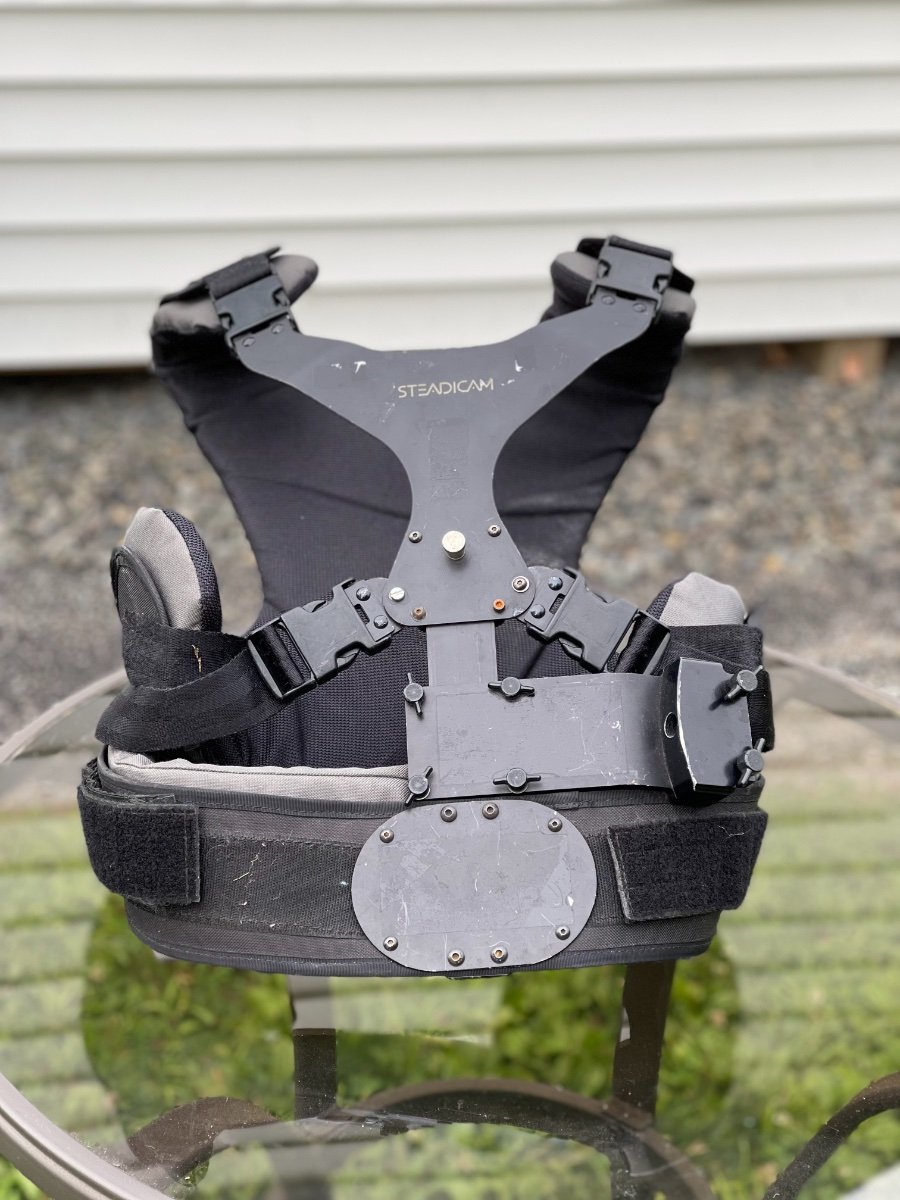
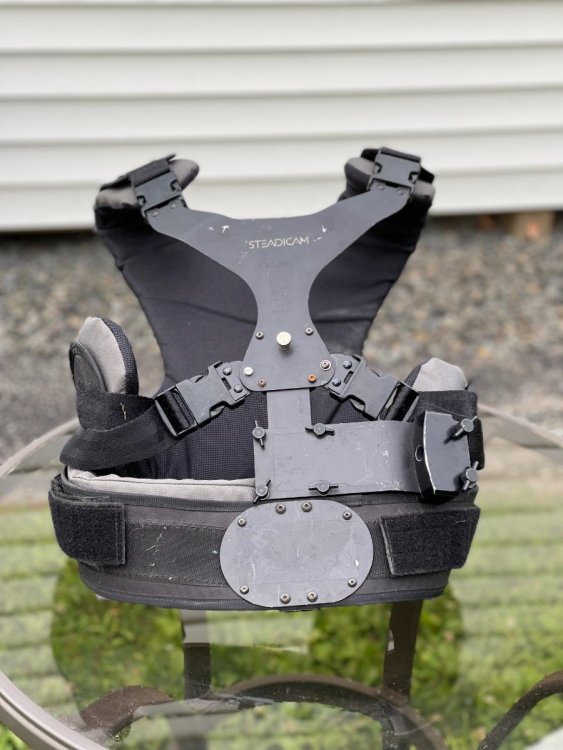
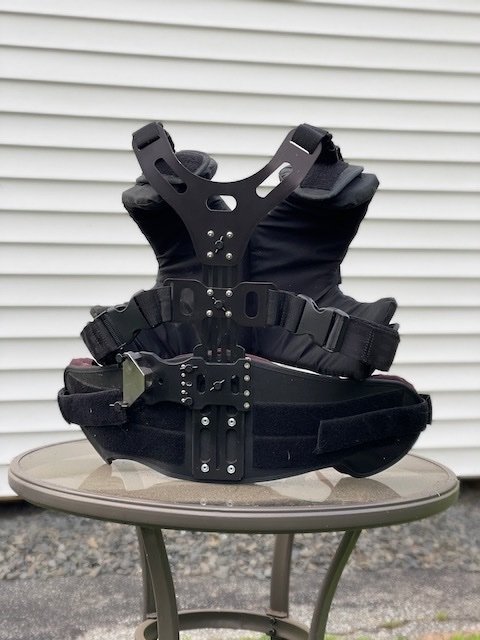
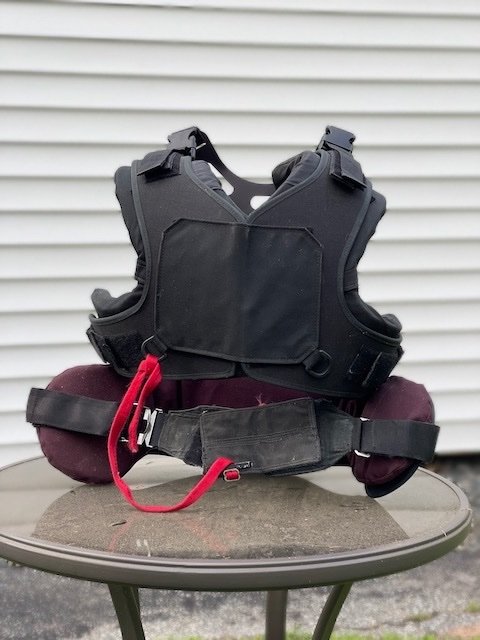
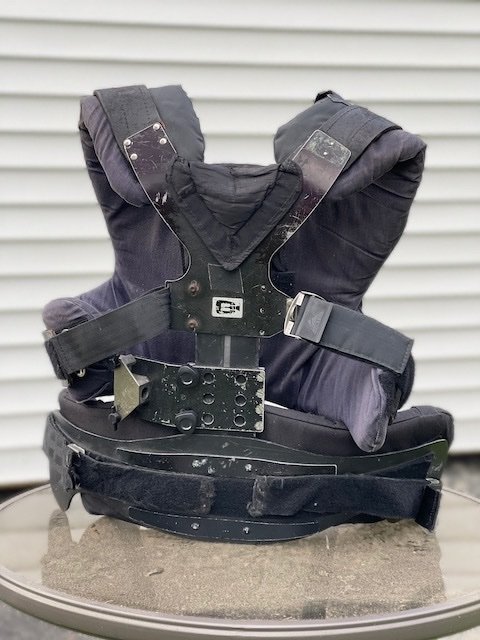
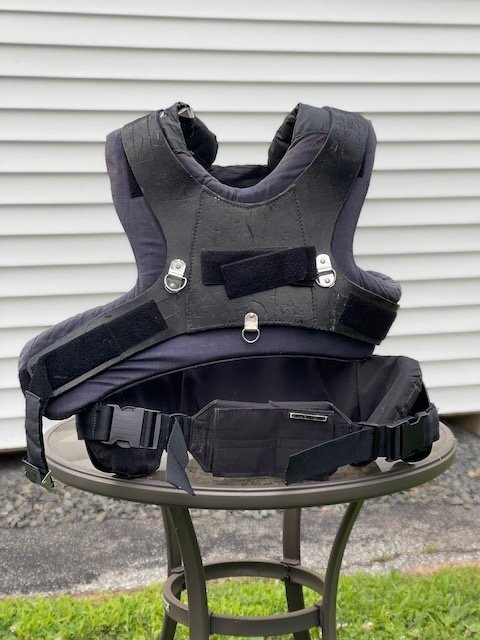
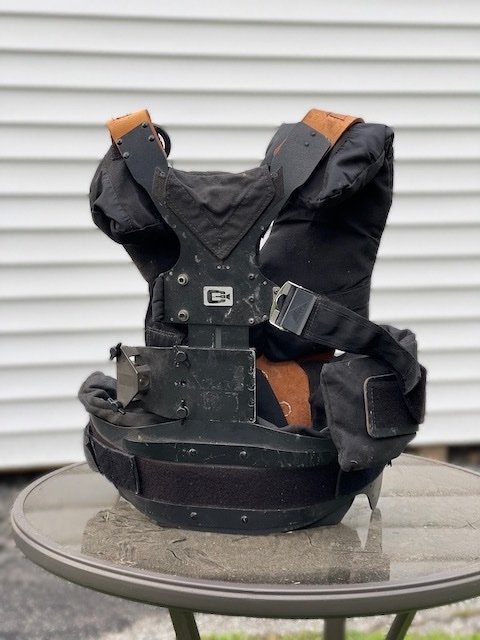
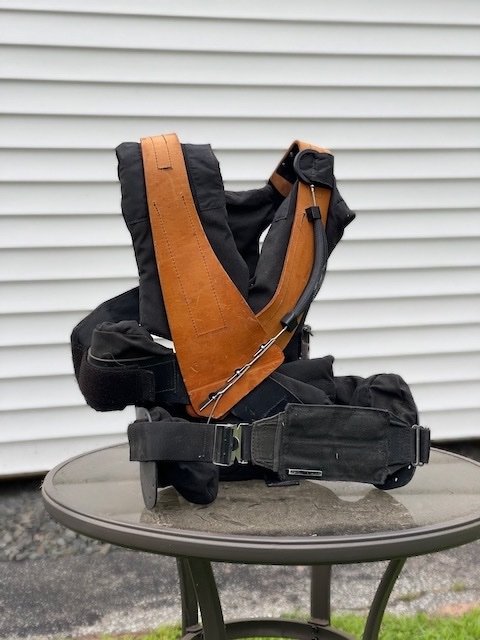
I have 3 front-mounted vests for sale. These were purchased as part of a lot of equipment last year, and I don’t need this many backup vests! All vests are sold as-is, are available for test in NY or NJ, and can ship at the buyer’s expense. Contact me at willsvideo@gmail.com or 215-796-8938 if you’re interested. (Please be patient, as I’m working!) Custom front mount vest of unknown make This vest looks to be in good shape, though it does appear to have been used. It is quite adjustable, with a lot of Velcro strapping and sliding shoulder and chest buckles. Asking $1500 for this vest 3A Vest with new back leather This vest is well-worn, and could probably use some rebuilding eventually, but seems functional. It has a new piece of solid back leather, rather than the multiple pieces of the original vest. Asking $1000 for this vest 3A Vest in need of service The metal parts of this vest are intact, and it includes all of the leather and straps (though they're mismatched from several different donor vests), but the pads are in sad shape, and the foam has disintegrated. This vest could use to be rebuilt by someone like Janice Arthur, but could probably save you some money as it is mostly mechanically intact. Asking $750 for this vest
-
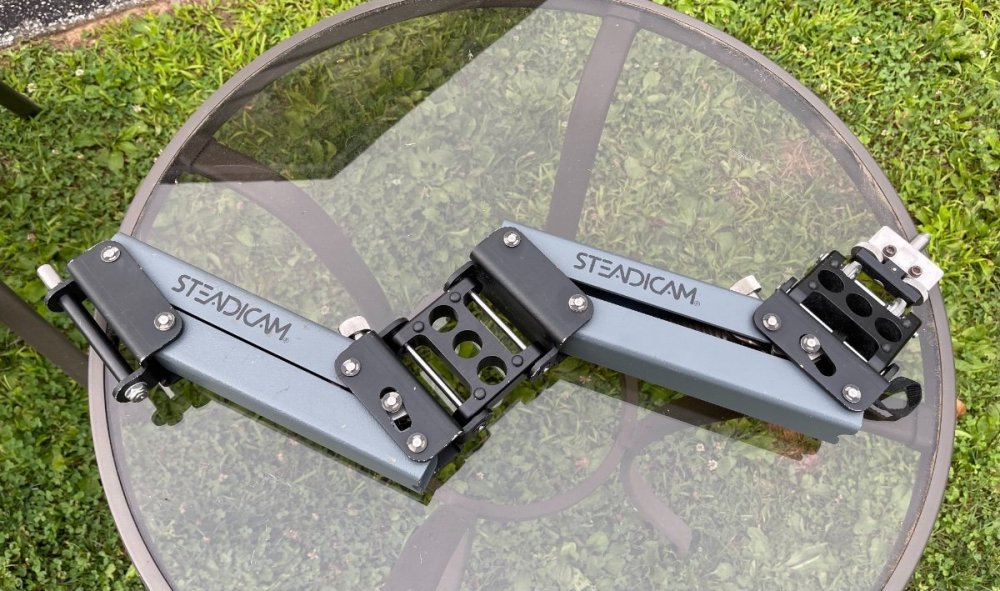
This is a Cinema Products Steadicam 3A arm for sale. I believe it has Gold Springs, and seems to be in good working order. This was acquired in a lot of equipment that I purchased last year, and I have no need for another arm at this point, so I’d like it to find a good new home. Includes one 6” arm post. Asking $3500 for this arm. Available for test in NY or NJ, and can ship at the buyer’s expense. Contact me at willsvideo@gmail.com or 215-796-8938 if you’re interested. (Please be patient, as I’m working!)

-
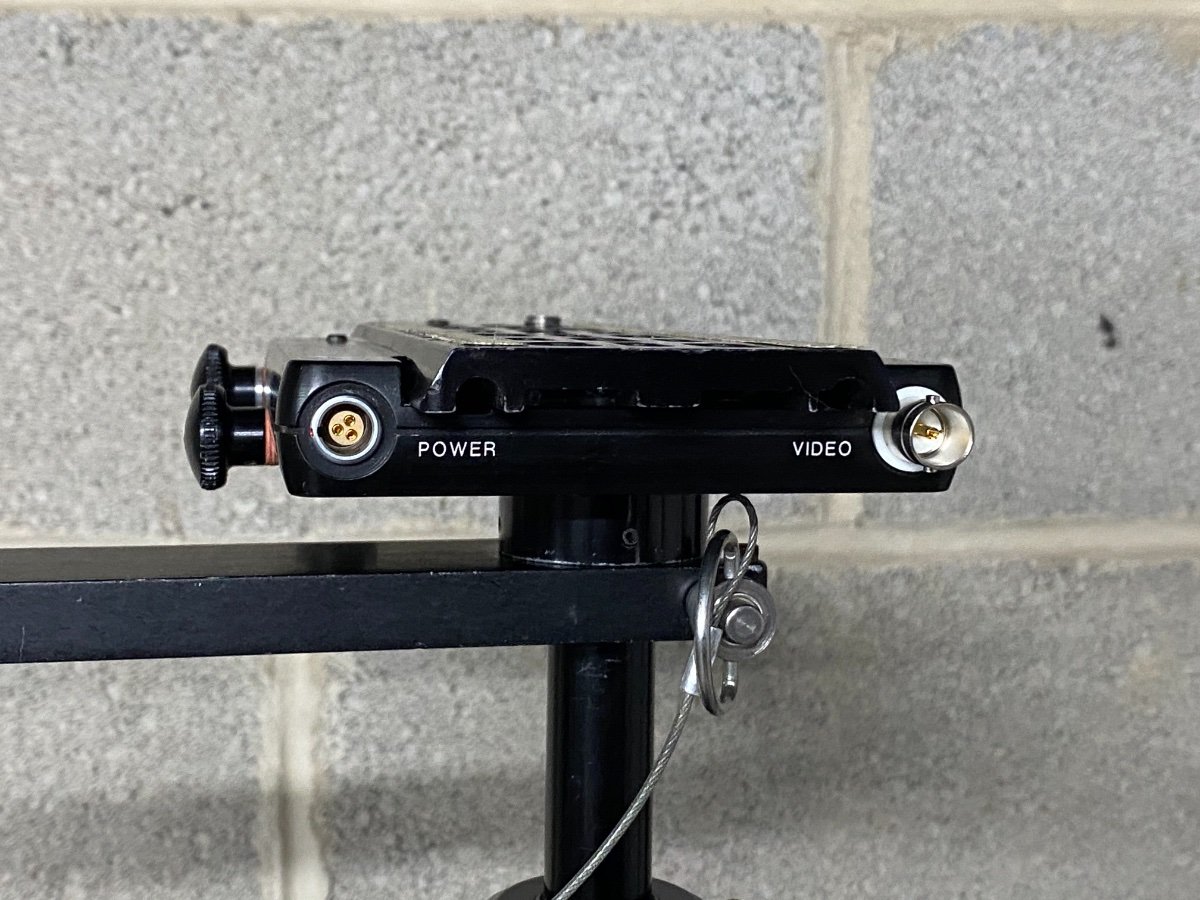
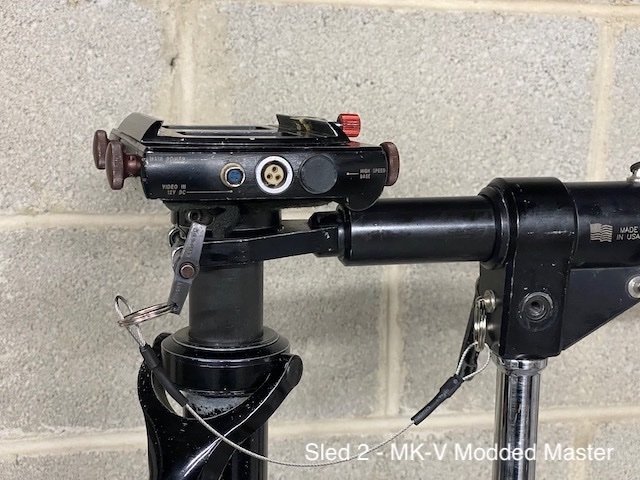
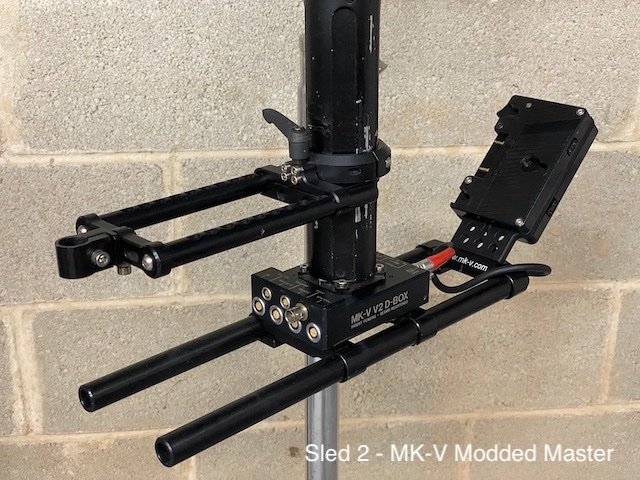
I have 4 sleds for sale. Three of them were acquired in a lot of other equipment, and I don’t need them, so I am passing them along. One of them was a project build for me last summer, and I rebuilt from the ground up. All rigs are sold as-is, although I have taken apart most of these rigs and can potentially help you down the line if you run into any issues with them. All rigs are available for testing in person in NJ or the NY area, and can be shipped at the buyer's expense. Contact me at willsvideo@gmail.com or 215-796-8938 if you're interested in any of them. (Please be patient, as I am working!) Steadicam Master Series with custom base and electronics This rig was a project for me last year, and I spent several weeks rebuilding this rig to be something I was happy with. The rig started as a stock Master series sled, but I added on some modified MK-V components and several custom-machined pieces, along with an entirely new electronics housing on the base. It has 2 AB plates, wired for series or parallel 12 or 24v, an HD-SDI line down the post, and standard Tiffen-style power connectors top and bottom. The rig currently has on it an old beat up Marshall HD monitor, which I’ll include for free, but it could use to be upgraded to something better for real operating. Includes docking bracket, monitor, monitor power cable, and one dovetail. Asking $9000 or best offer for this sled Steadicam Master Series with MK-V Modified Base This sled is one of the sleds that MK-V offered an “upgrade” for, which replaced the entire base of the rig, swapping it for a new MK-V designed base, which in this case has 19mm rods for the battery, an MK-V monitor mount, which is very flexible in its position on the rig, and MK-V V2 SD electronics in the base. Everything appears to work, although the sled does have quite a bit of wear on it. It includes a double AB battery mount, docking bracket, dovetail, and a MK-V Hummingbird SD daylight-viewable monitor (or could be sold without, if you’d like to add your own HD monitor). It may be possible in the future to HD upgrade this rig if you’d like, or it is very usable as a “starter rig” until you’re ready to upgrade. Asking $6000 or best offer for this sled. MK-V Sled with 1.5” Post, 3A gimbal, V2 SD electronics This sled is comprised of a 1.5” 2-stage post, MK-V V2 SD electronics top and bottom, an MK-V 3A-style topstage (easily swappable for a PRO or Betz stage later) and 19mm MK-V rod brackets for the monitor and battery mounts. The gimbal is a 3A gimbal modified with an MK-V upgrade to a tool-less adjustable grip. The rig is in working order, and some parts appear to be brand new (like the battery and monitor rods) This rig offers many upgrade paths due to its modularity, including new top stages, new gimbals (PRO or XCS) and new electronics from MK-V. It includes an MK-V docking bracket, and dovetail. Asking $7500 or best offer for this sled. Custom “Running Rig” MK-V sled build (bare bones) This rig looks like it was a project by the previous owner. It is an MK-V 1.5” CF post, an MK-V gimbal (silver, perhaps a prototype?), 3A-Style topstage, and a custom base section based off of MK-V’s 19mm rods. Quite importantly, this rig has no electronics on the rig. The previous owner ran 2 HD-SDI cables down the post, but there isn’t currently any power wiring down the rig. This would be a great place to start for an enterprising operator who wants to start with the parts to build a really impressive rig, but wants to save money at the moment. There are 2 battery plates included, along with a docking bracket, and some docking collars. I can also throw in some extra 19mm rods. Asking $6000 or best offer for this sled.


-
Hi Donald, You’re right to assume that the answer is quite variable, but there are some rough guidelines that may help. One of the things that I particularly like to do at a workshop is to have a student take their post hand off of the gimbal completely. (Obviously leaving the other hand on the gimbal grip - no need to go totally hands free!) Many new operators get frustrated by what they see as “the rig wobbling”, and yet the moment I ask them to take their hand off, the rig floats magically through space without a wobble. However, as they then see, the camera is now aimlessly drifting, and the frame usually sucks. But hey, it’s stable! What this immediately shows, however, is that every “wobble” is coming from your hand. So the trick is to apply the input you need to frame the shot, but only that much input. There are times where you will need to apply more input - like stops and starts of a move, and there will be times where you need to apply less input, like a very slow consistent speed move. But the challenge of Steadicam is always applying just enough input to the sled. So, as to how that relates to pressure on the gimbal. The general rule of thumb I’ve found is that it’s almost always on the light side. Times when you need to apply more pressure would be when doing a tilt with a heavier drop time, or when counteracting violent stops and starts with a bottom heavy rig, or when changing directions mid-move. Apart from that, applying as little pressure as possible is the name of the game, as the tighter you are holding onto the gimbal, the more likely you are to make the rig wobble, or throw off the horizon, or cause pan wiggles. As for keeping the horizon level, that comes with practice, but there are a few additional tricks there. First of all, if you can, there are many new tools that can provide assistance for horizon as you’re operating (such as the Wave and Volt). While I think it’s important to learn how to operate without those tools, they have given a lot of operators the freedom to remove chasing the horizon from their attention loop while operating, and that’s incredibly freeing. It also takes away what was always one of the curses of Steadicam - it’s the only tool we regularly use on set which goes off level easily - so it makes it much easier for Steadicam work to blend in and be less obvious, something I know I appreciate. As for tricks without those fancy horizon aids, think about the blocking of your shots to avoid having to change direction unexpectedly. Every time you change direction or speed in the side to side axis, you introduce a tendency for the rig to go off level, and you will have to fight that. By blocking shots that limit these speed and direction changes, you limit the amount of times that you’ll need to be absolutely perfect. In addition, I run with a set of grid lines on my monitor, and regularly check them to the vertical and horizontal lines of the set. I also run a “CineLevel”, which is an acceleration compensated digital level that mounts on my rig, and seems rather effective at giving me a horizon readout, and it is relatively inexpensive, which is a pleasant surprise! Finally, and I’m sure others will echo this - if you haven’t, please find time to take a workshop or some private training from a reputable operator (and of those two options, I really recommend the workshop if you’re starting out, for a variety of reasons). While there is much you can learn on your own, and from videos and books, having experienced operators around you, critiquing you, and building your form is invaluable. In addition, there is a ton of nuance to how each individual operator crafts their shots, and handles their rig, and being around a group of extremely talented people gives you tons of people to “borrow” ideas and techniques from, and will vastly broaden your skill set in a very short period of time. If you can logistically and financially make it make sense, the SOA provides some of the best workshop experiences I’ve ever seen, and I’ve been lucky to be able to instruct there a few times.
-
Hi Nick, It sounds like you’re not balancing the camera inside the Wave properly. The camera must be balanced inside of the Wave, both side to side and top to bottom, so that the CG of the camera sits at the exact center of rotation of the Wave. If the camera is either bottom heavy or top heavy inside the Wave, whenever the sled goes off level it will do as you say - falling further and further off level. This balancing can be done via either adding riser plates to the camera, moving accessories around, using a counterweight on a Noga arm (something I still do in combination with riser plates), or by using the Wave Rider adjustable riser, though I personally think it’s too heavy and clunky. Once the Wave is perfectly balanced, it should have zero influence on your operating, and you sled should behave exactly as it does without the Wave on top. You shouldn’t have to change your drop time if you’re balancing the Wave properly. I actually wrote up instructions for someone who was purchasing some of my “blue plate” riser plates (which are made for raising the CG of a camera inside of the Wave, amongst other uses - link here: https://willsvideo.com/blue-plate-camera-riser-plates/ ), and they may be helpful for you as well: When you’re balancing, the test for whether the CG needs to be raised is simple. Here are the steps: Prep the build. Remove any large dovetail bases, try to get the build to be as symmetrical as possible. No need to make the camera super short, so keeping something like a rod baseplate on the base of the camera is okay, as long as it’s not a large “ARRI Dovetail” type of rod bracket - those are generally too tall! Assess the build - is there a lot of gack on the top handle, like an MDR and a light ranger? Is the camera pretty low and sleek? If a lot of accessories are on the top, I’d start with one or no Blue Plates. If it’s a more streamlined camera build, I’d start with one or two. As you use the plates more, you’ll develop a sense for how many you may need. Mount the Blue Plate(s) (if needed) between the dovetail and the camera base with the appropriate screws. Pop the camera/dovetail/blue plate assembly into the Wave. Remove the power cable from the Wave (or keep your sled turned off), and unlock the Wave. The camera should sit relatively level. If it falls to either side, it is side-heavy, and you should correct any significant side heaviness before proceeding. This can be done by moving accessories around, or by using a counterweight on a Noga arm, for small differences. Once it sits relatively level, now rotate the camera slightly to one side. It will either fall further off level, return to level, or stay there. If it returns to level, the camera is bottom-heavy. You need to move weight upwards, either by moving accessories, moving a counterweight, or adding (or doubling up on) a Blue Plate. If it falls further off level, it is top heavy, and you’ve overshot. Either move accessories, move a counterweight, or remove a Blue Plate. If it stays where you put it, it is balanced. Repeat this check across the range. The Wave’s drive has some friction to it, so sometimes it performs differently at different points in its rotational travel. If it’s balanced perfectly, it’ll stay exactly where it’s put at any angle. The Wave will perform well even if slightly out of balance, but the more bottom heavy a build is, the more “squirrely” it will behave, and the more side heavy the build is the more the motor will work, which isn’t good for it. So, no need to obsess and get it perfect if you’re in a rush, but it’s good to get as close as you can.
-
Best place to buy camera mounting screws
Tom Wills replied to Joseph Hartzler's topic in General Discussion
Jim Candreva makes the best camera screws around, and they’re very reasonably priced. https://www.jccamerasystems.com/screws -
WTB HDMI to SDI converter
Tom Wills replied to Sabrina Marki's topic in Steadicam Marketplace - Wanted
The Blackmagic HDMI to SDI micro converter is fantastic, super stable, and $50 USD. Easily purchasable at any major camera retailer - B&H, Adorama, even Amazon. It’s powered off of a micro USB, which is easy to get an adapter from a P-Tap/D-Tap for, and power it off of your sled. I think it’s a little notch above a lot of the cheaper converters you can get off of Amazon and eBay, as I’ve had mixed results with those. -
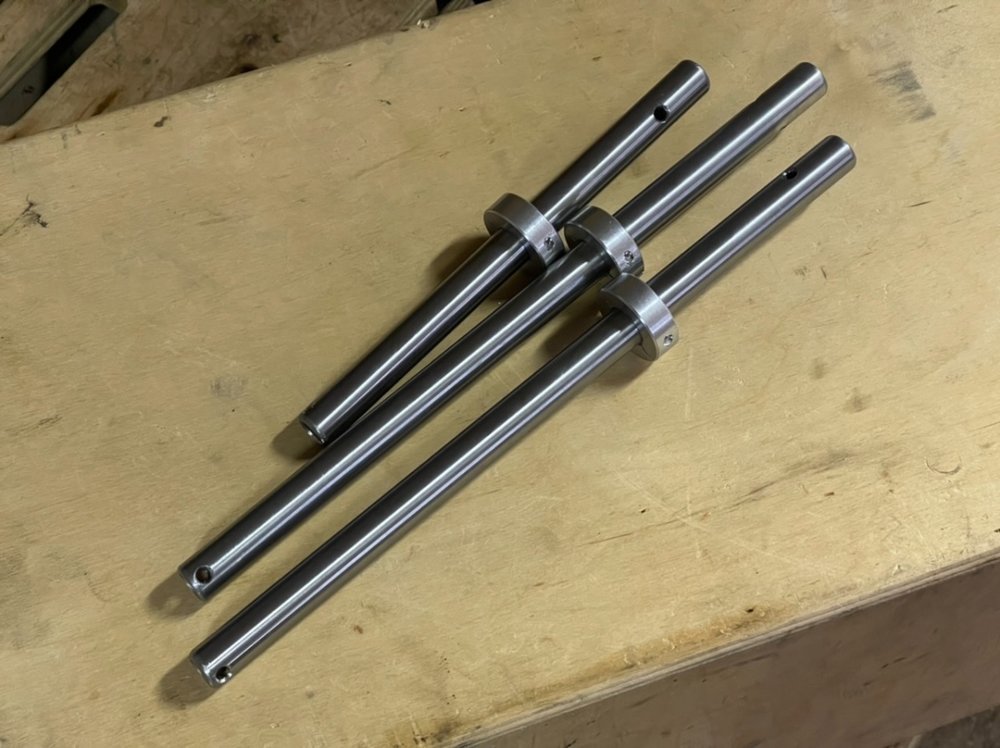
I’ve had many problems over the years I’ve had my PRO arm with aluminum arm posts. After bending several of them, and one beginning to crack, I decided to start making Stainless Steel arm posts. I’ve had a local medical parts manufacturer create precision-ground stainless tubes that are exactly (to within +/- .0005” in diameter) .621”, the same as the arm posts that came with my arm. I can cut these down to any length you’d like, and can add holes for low mode brackets, or not, if you’d like. I’ve been running similar (turned instead of ground, so the finish wasn’t as nice as these) stainless posts for several years now, and they are a huge improvement in strength - no more permanent deformation when using them with heavy loads! (Even 60+ pound packages on an 18” arm post - not that I’d recommend that!) Pricing is as follows: With holes for pins: 6” (or shorter) - $80 8” - $80 10” - $100 12” - $120 Without holes for pins: 6” - $60 8” - $60 10” - $80 12” - $100 I also can supply plain aluminum shaft collars for $10 each, or I can direct you to how to pick them up yourself for cheaper. These require a bit of time and work to cut down, machine the ends, and add the holes, so they do cost a bit more than aluminum ones, but I think they’re worth it! Contact me ( willsvideo@gmail.com ) for delivery times, as they can vary depending on how busy I am with operating.
-
Custom 6” Inovativ Steadicam Stand Wheels
Tom Wills replied to Tom Wills's topic in Steadicam Marketplace - For Sale
Sold already. That was fast! -
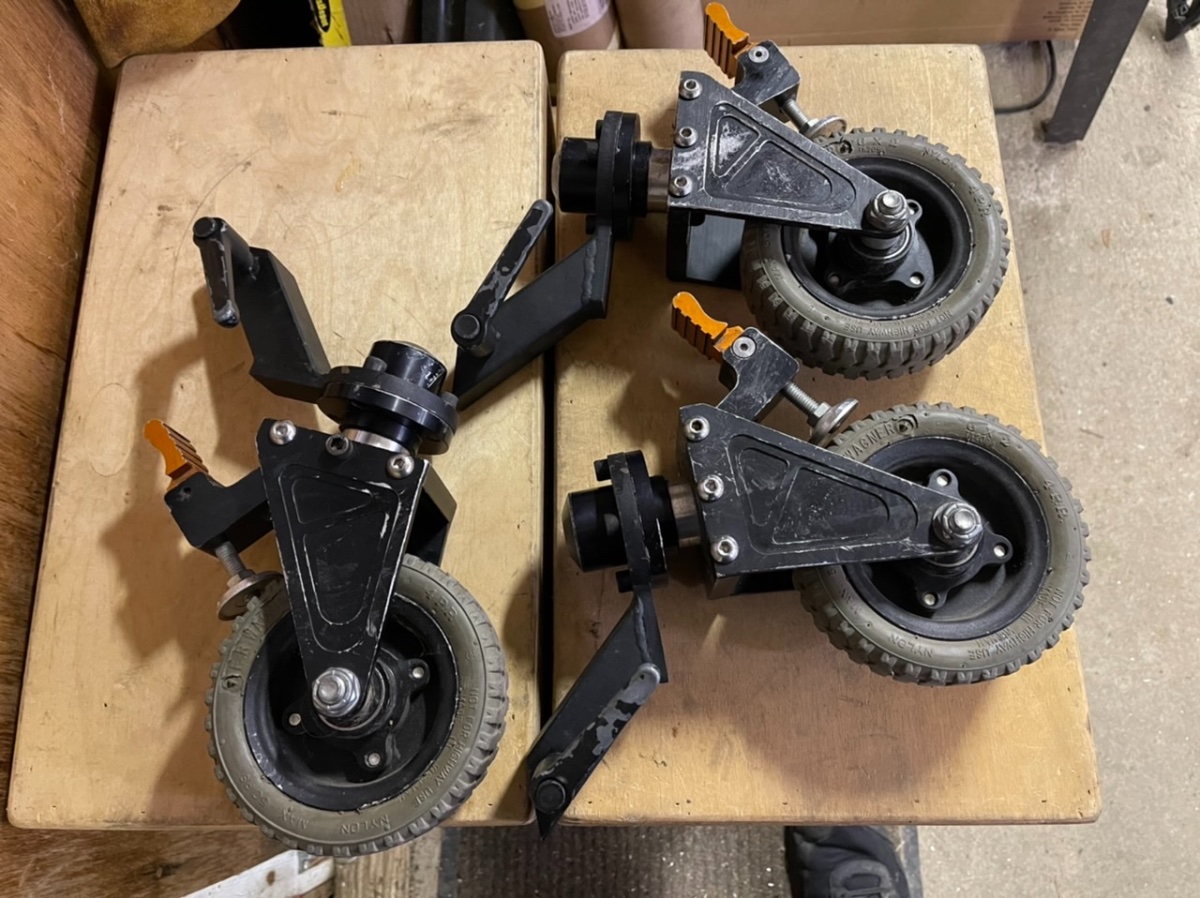
These were a (very expensive - around $1000 new) custom ordered set of wheels that I had Inovativ make for me. These wheels fit an American Steadicam Stand, and are the 6” wheels from the Scout 31”. The wheels roll beautifully, and were great for blocks and blocks of New York streets (as you can see from the wear on the anodizing). The locks are the most solid I’ve ever seen on any wheels - if you have an Inovativ cart, these are the same. They really felt like the Goldilocks wheel - big enough to roll over cables and sidewalks, but not so big as to make the stand impossible to use in small locations. Several people have tried to buy these from Inovativ, but it seems I’m the only person to sneak in a custom order before they decided not to do it anymore! As to why I’m selling, because I believe in being up front with potential buyers - my complaint with these wheels is that they don’t change direction very well. If the wheels are all oriented in one direction, and you need to push it in the opposite direction, it takes a lot of force, and it was difficult for some of my smaller assistants to do. So I’ve moved to a different wheel system that works better for my assistants, and I’m passing this one on. Please do note that these are in “as-used” condition. There’s some surface rust inside the tubes, there’s dust, dents, and dings, and there’s plenty of discoloration on the light grey tires. They’ve been used hard for 2 and a half years, but they still work as well as they did on day 1. Email me for more info. Willsvideo@gmail.com.

-
Hi Laney, I think arm posts are pretty crucial - I have a set of them from 6” all the way through 18” (though that long isn’t the safest thing, so I use it rarely!), and I switch them out shot to shot all the time, even though I’m 6’ 4”. It’s still useful to be able to get the camera super high (I’ve done shots at over 9 feet with a super post and the 18” arm post), and I also do a ton of work in low mode over tables, benches, and beds, which requires a long arm post armed out over obstacles. I’ve come to making my own arm posts, because I found that the arm posts I purchased from several different manufacturers didn’t hold up to my expectations. The big question is which arm you are using. Some arms, like the PRO arms, the G70, the Master and Ultra series, and even the 3A allow easy exchange of different lengths of arm posts. Other arms, like the G50, and some of the new arms on the market have less standard, less simple arm post designs, and may be limited in what they can have added on. Let me know, and I can help you pick out what may be the best option for you.
-
Steadicam Pilot and Steadicam Mini
Tom Wills replied to Sham Ramsoebhag's topic in General Discussion
Hello Sham! The Mini is a strange rig, and you are right that it has a much less advanced design arm than the Pilot, and other subsequent rigs. The Mini’s arm is much more like a desk lamp arm than a more modern Steadicam arm, so I would absolutely prefer the Pilot’s arm to the Mini’s arm. The vest also doesn’t have an adjustable socket block, so you may have to lean to balance the rig (ouch!), and the whole rig is pretty outdated by modern standards. However, the Pilot’s arm and vest will not work with the Mini sled. The Mini’s gimbal actually only has 2 axes in it, and the 3rd axis of the gimbal is mounted on the end of the arm. So it requires serious modification to be used with any arm other than the Mini’s arm. I wouldn’t bother with that anyways, as you’re still going to be limited in payload by the Pilot’s arm, which tops out at a total weight of around 15 pounds for sled and camera. I’d be surprised if you’re maxing out the sled’s payload without also topping out the arm, so moving to the Mini sled wouldn’t fix that! If you can find one, a used Flyer would have a higher payload, and sometimes I’ve seen them go for sale very cheap. They are rated for 15 pounds (give or take) of camera, so a significant increase above what the Pilot can take, although with an arguably less flexible sled. You could also look into an Aero 30 or Zephyr, which are more modern, higher payload rigs, but at higher prices. -
Steadicam Rickshaw For Sale
Tom Wills replied to Tom Wills's topic in Steadicam Marketplace - For Sale
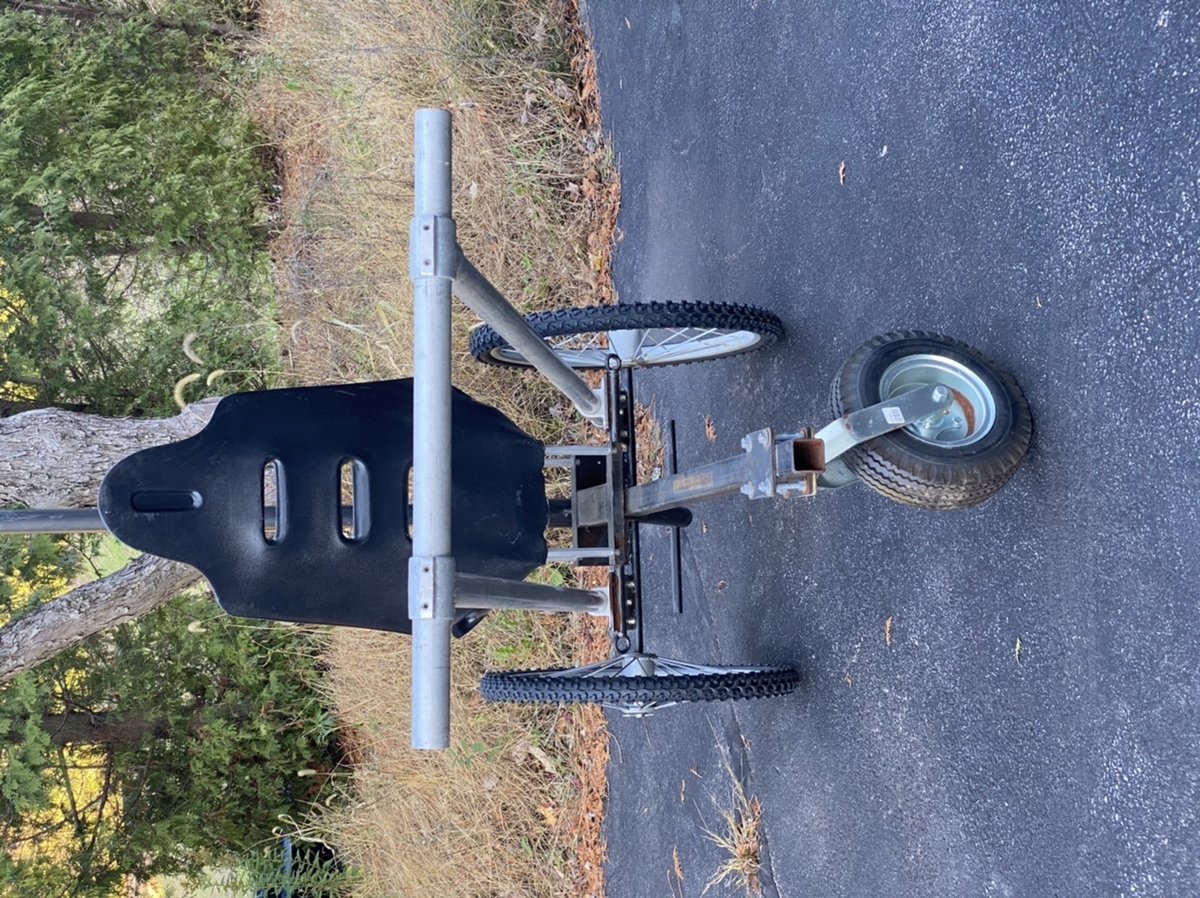
Bump and a price drop - $1000 now, with free delivery in the mid-Atlantic and northeast US. Want this to go to a new home and be useful, not just taking up room in my storage! -
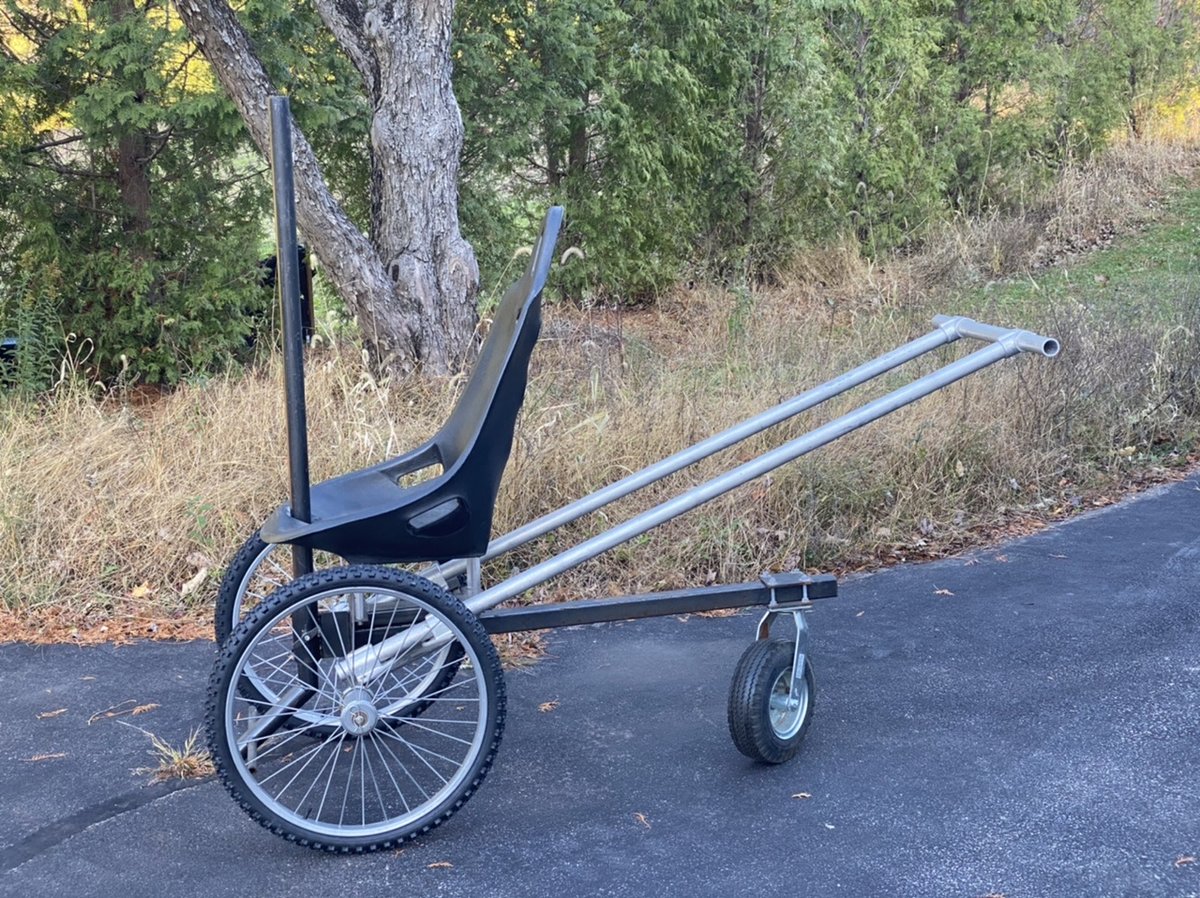
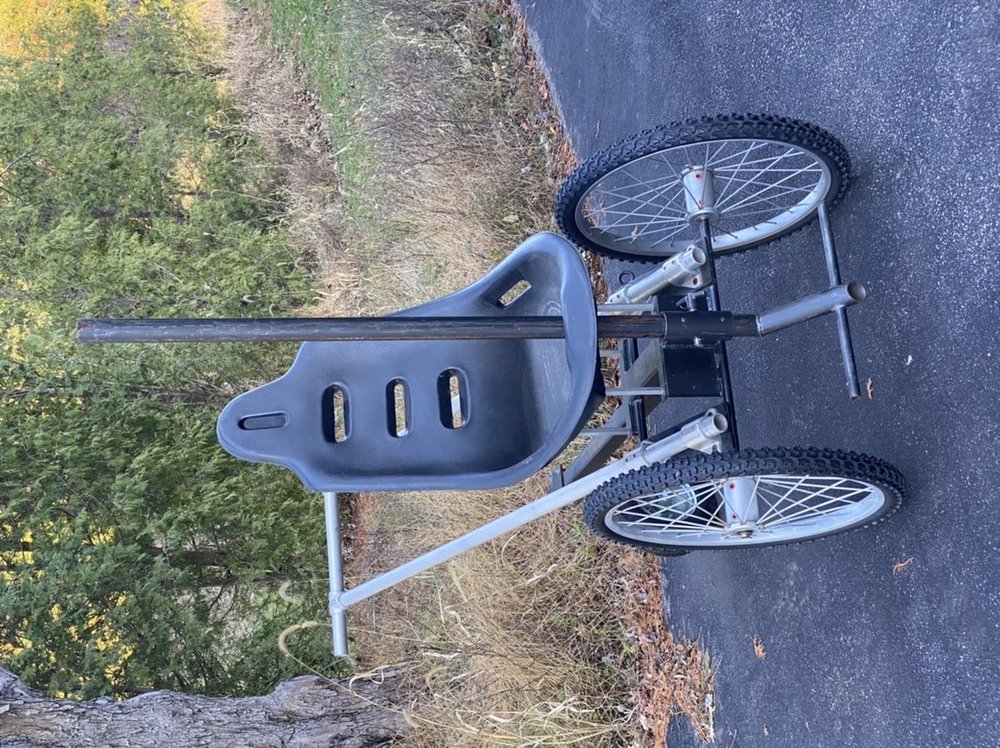
This is an older, but very workable rickshaw, which I just tuned up, and it’s ready for you to go start making money with it! This rickshaw is built off of a steel frame, 2 “bike-style” wheels, and a very beefy pivoting caster in the rear. It’s original owner told me that it was built by a key grip in New York years ago. It’s sat for some time in the previous owner’s garage, and then my shed, and so there is some rust on the steel frame, and on some screws. However, everything seems to be functional, and it rolls beautifully with the brand new tires I just had put on by a local bike shop. I think owning a rickshaw is a pretty important piece for the operator who wants to be prepared for anything. It’s saved me from doing quite a bit of running, and I’ve used my current rickshaw for doing a lot of handheld running and even mounting of remote heads and gimbals (both of which this Rickshaw would work well for, with its beefy 2” mounting post). Asking $1500, which you can easily make back in 5 days of rental (the going rate in NYC is $350/day for Rickshaw rentals, and I’ve gotten that without issue). Only selling to the NY/NJ/PA/CT/MD area due to size and weight, and either you’ll have to bring a van to get it from me in NJ, or I can deliver in most of that area in my van. Important note is the size of this rickshaw, and that it doesn’t fold down too much. The seat, post, and wheels remove, but the frame itself is heavy steel, and the handles are based off of 6’ lengths of Speedrail. So please make sure that you have the room to store this, and a way to transport it to set with you!


-
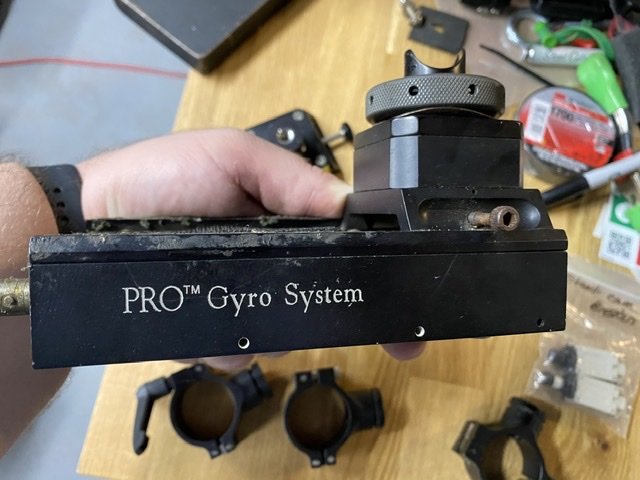
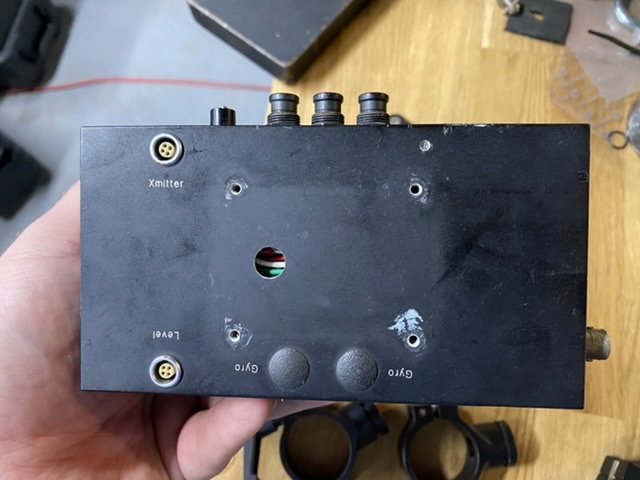
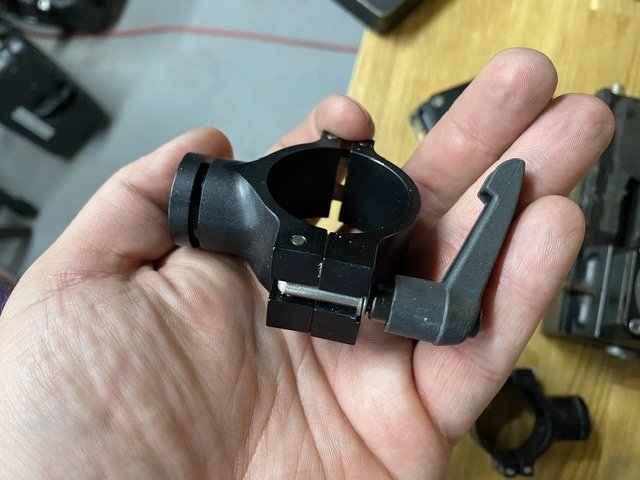
This is a bunch of retired parts from an old Gyro system, everything appears to be functional, but it all has seen years of use. Available are: 4x PRO 1.5” Gyro clamps - $150 each 1x PRO “Gyro System” base, which is very similar to a PRO 1 base, except with a large LEMO input on the front for the battery inputs, instead of the battery cage down below. This would be a great starting point for a custom lower sled, as it has the modern PRO threaded post connector, and a lot of room inside for new wiring. Also includes new circuit breakers, and a gyro mount that slides into the dovetail on top. Asking $400 or best offer. Email me at willsvideo@gmail.com if you’re interested.


-
Castle Nut Wrench for MKV Post to DBox Threaded Collar
Tom Wills replied to peter keeling's topic in Center Post
I would probably use a strap wrench. While I’m sure you could use a castle wrench, a strap wrench will be a bit more universal. Also, if you’re finding that you’re getting play between the D Box and the post, that may be from the edges of the flats on the post connector being rounded over, and I know in the past I helped someone by shimming that with some thin layers of tape to make it more solid. -
Larry asked me to help him get the word out about these Volt button extensions he’s been working on for months, and finally has a batch of to sell. They’re a slick little machined Delrin and black anodized Aluminum part, and fit easily into the Volt with no modifications. You can find more information, as well as purchase them here, and more information will be posted soon on installation. https://larrymcconkey.com/product/volt-button-extension/

-
Hey Kevin, I texted this to you, but I figured it may be good information for others, so I would share it here as well. As for the Wave drifting off of level, there are a couple of things that could be at play here. The first thing I would ask is how quickly it drifts off level, and whether it’s a gradual, slow drift, like it is just slowly “settling in”, or if it seems to more quickly go off level. If it is a slow “settling in” feeling, I have found that over time my Wave developed a similar issue, but that there is an easy workaround. The first few minutes after boot-up, the Wave’s sensors seem to be warming up, and while it’s a small difference, I have found the Wave to be most stable if I let it warm up, powered up, for at least 10 minutes before I check the level and tweak it in finally. Usually, if I trim it in perfectly right as it powers up, it’ll drift subtly as it warms up, and then I have to trim it back in. Over the course of the day I don’t notice it drifting much, but it’s worth checking and periodically re-trimming in, just because there will be some drift in almost any stabilization system when we’re working down at the sub-degree levels that we are working at. To be frank with you, after all the learning I’ve done about sensors and stabilization, it’s much more of an art than a science getting drift-free, precise stabilization on the scale we’re talking. Getting a sensor package to come up with zero drift is incredibly difficult, until you get into things that are much heavier and bigger than we would be willing to fly on a Steadicam, like a Laser Ring Gyroscope. Almost evert sensor package has some drift in it, because of electronic noise, or the rotation of the earth, or tolerances in manufacturing, etc..., and the secret is all in the algorithms of how that drift is noticed and calibrated out by the sensor, and from all I’ve seen, not even the best remote heads, the best gimbals, or the best Steadicam augmentation has it exactly perfect, though it’s getting closer with ever iteration, and many people will have different tolerances for what they consider “perfect”. If the drift appears to be a quicker drift, or seems inconsistent, or is drifting far enough that you are running out of “trim” on the adjustment knob, I would be more concerned, and it might warrant a trip back to Germany, which I will say has been surprisingly fast and simple to do the few times I’ve had to send something back. As for docking, I leave the wave unlocked, unless there is going to be a lens change, a flip to low mode, or my rig will be powered off. I see no reason to be sending an off-level picture, and when the Wave is locked a lot (like by an overzealous assistant), I’ve occasionally found myself flying, trying to Dutch the rig to avoid an obstacle, and suddenly watching the horizon go horribly off, only to have to apologize to those at video village. Not fun! As for outside influences, no issues. The worst you can do is strain the motor, but when using it in studio mode, on a dolly, I’ve often flown it severely out of balance, and seen no ill side effects. I do find that lens changes are worth locking the Wave for, mostly because if your assistant is particularly brutish, or the lens mount is particularly sticky, the Wave may “give up” when rotated very hard, and it can be quite unsettling for an assistant to suddenly have the camera wiggle around in their hands.
- 1 reply
-
- 2
-