Tom Wills
-
Posts
456 -
Joined
-
Last visited
-
Days Won
42
Everything posted by Tom Wills
-
 Most of the package has been sold - remaining items will be relisted. Thanks!
 -
One of the main things that’s kept me using SmallHDs as my primary monitors (though I will soon be picking up a couple of the off-brand new super bright monitors as backups) has been the ability to zoom and scale the picture, along with the addition of custom, easily changeable guides. I have found that in the past couple years, there has been a proliferation of DPs wanting to use old anamorphic lenses, sometimes producing odd aspect ratios, and then cropping down the sensor to fit the proscribed aspect ratio. On one particular show last year, we were using a 2x anamorphic lens on an Alexa Mini, cropping for 16x9, but not in the center - from the side of the frame! It was truly bizarre (horizons always were oddly bent, no straight lines existed on one side of the frame, and you had to be cognizant of where you put the actor’s face to make it not get too bendy... but that’s another story), but the biggest thing for me was that after you go to anamorphic, then crop down, you end up with a tiny box of picture in the middle of a giant black area. SmallHD’s cropping and scaling tools meant that I easily had available a crop which I could toggle on and off that gave me the picture area we were using, with only a little look around on the edges. No text, no giant black bars, just my frame blown up to full screen. I don’t see how I could commit to using a primary monitor at this point that didn’t give me at least that flexible of an option, and so far, the SmallHD has seemed to be the most intuitive, easy to use version of that.
-
Fiber jumper and a few other things have sold - please check the website linked for an accurate list of what is left and pricing! Thanks!
-
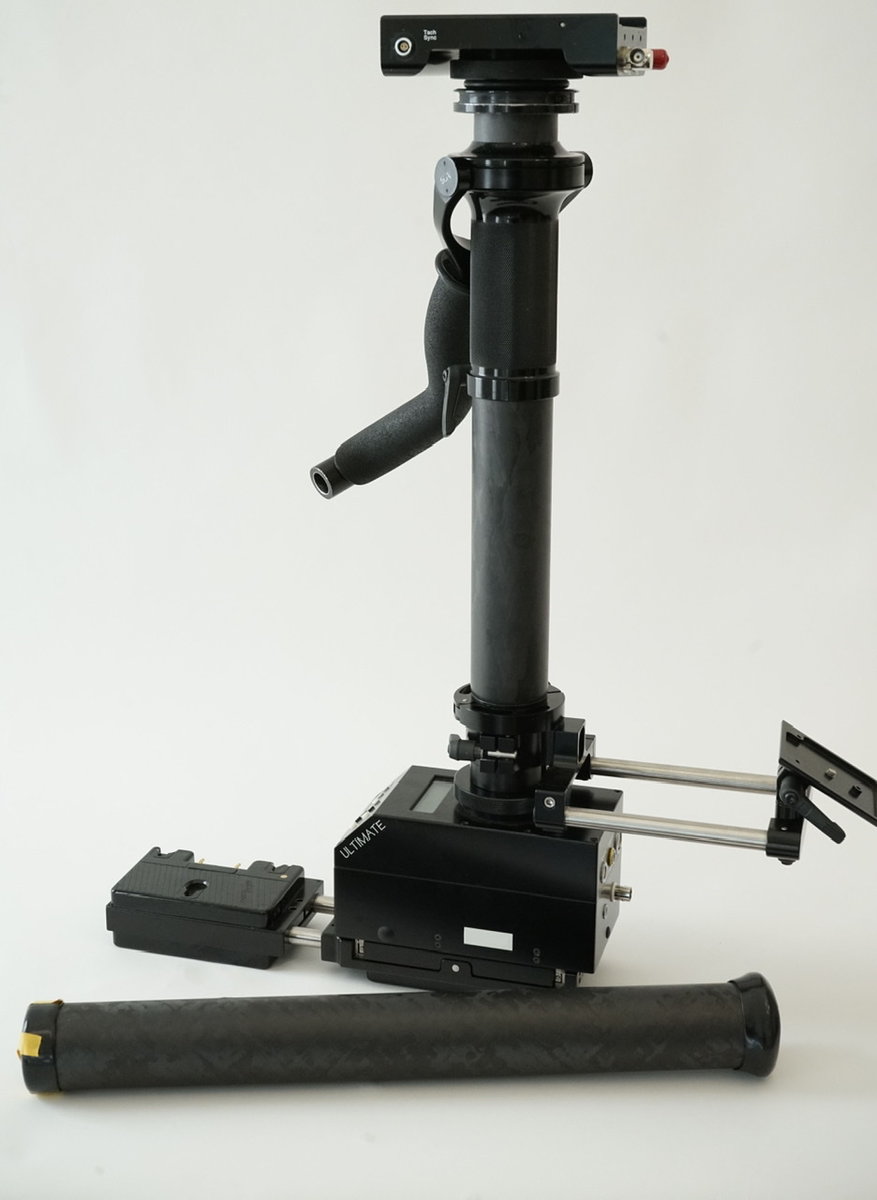
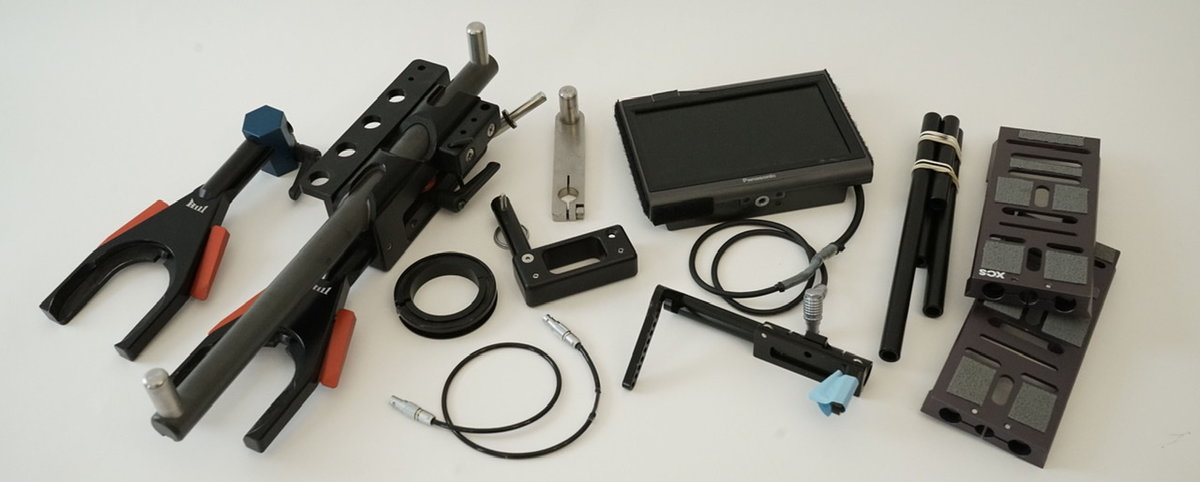
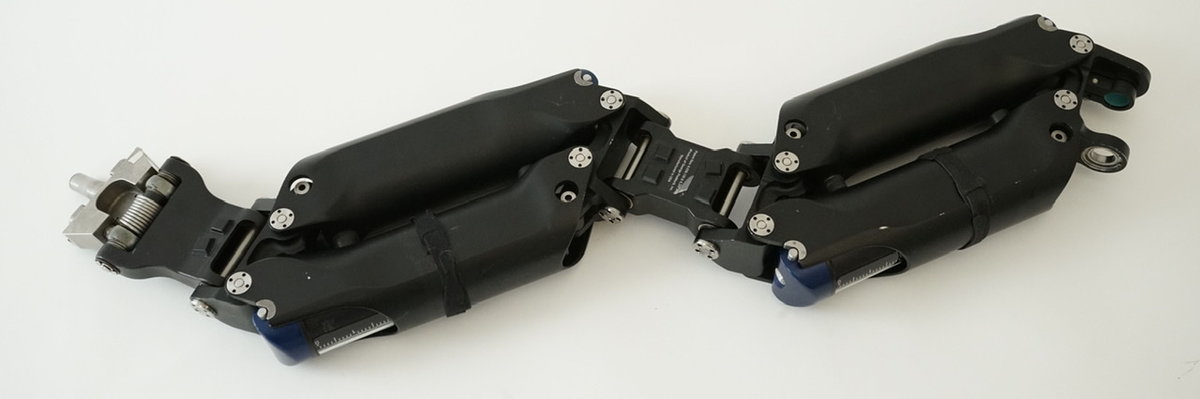
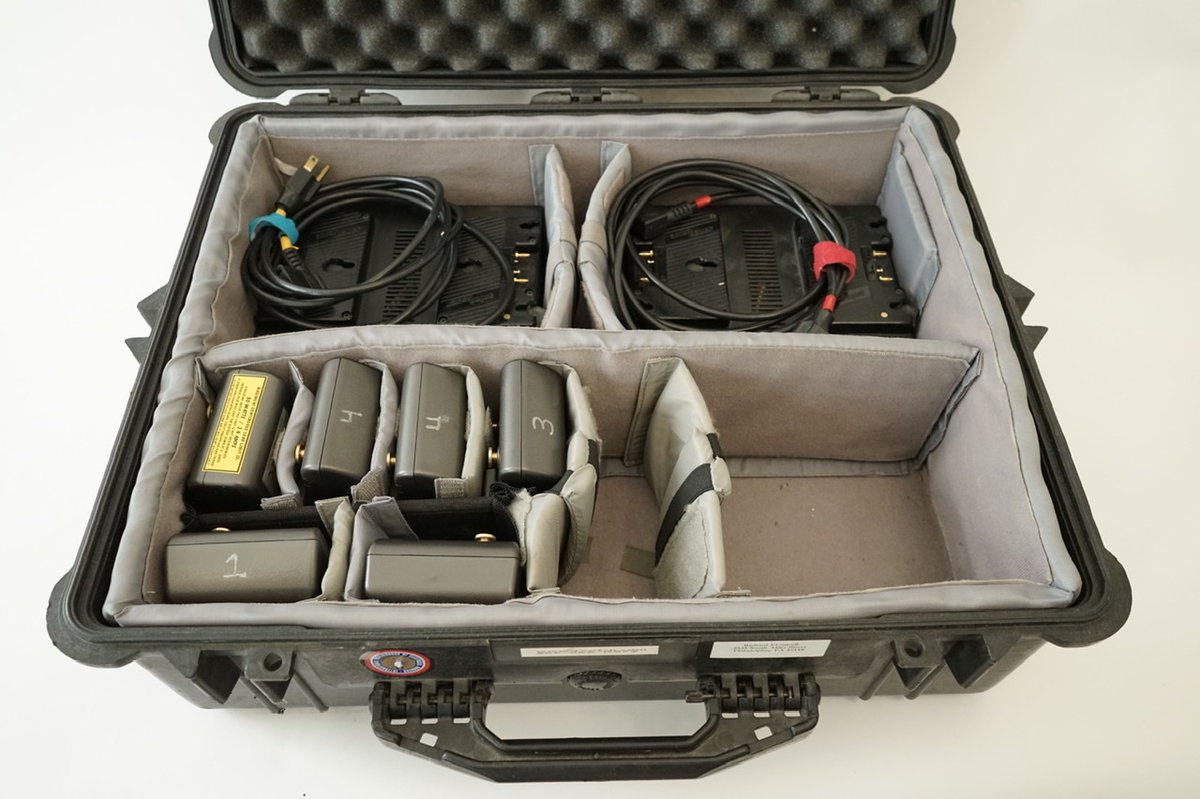
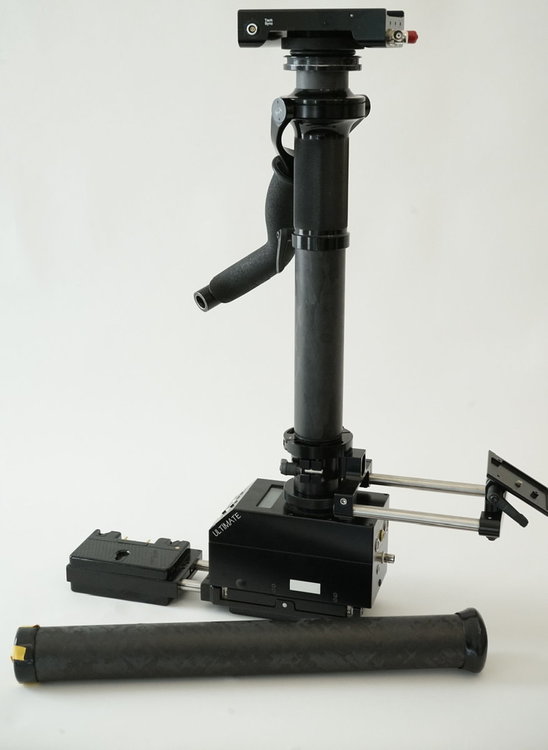
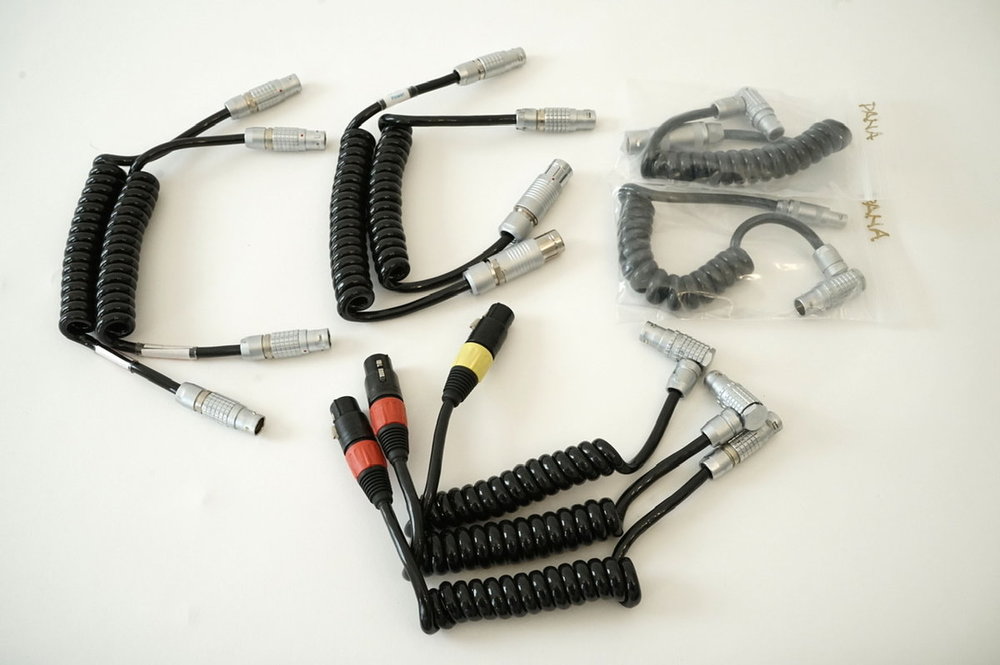
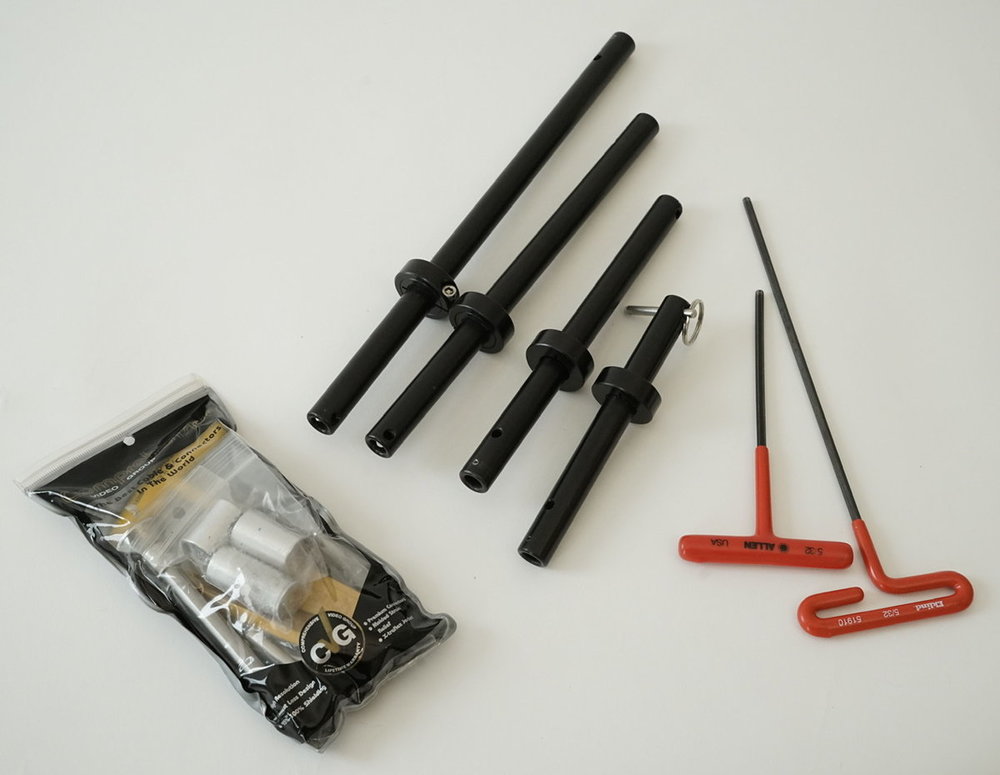
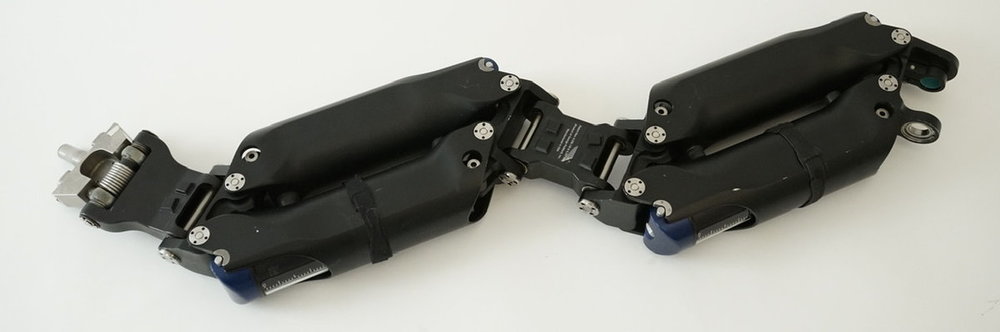
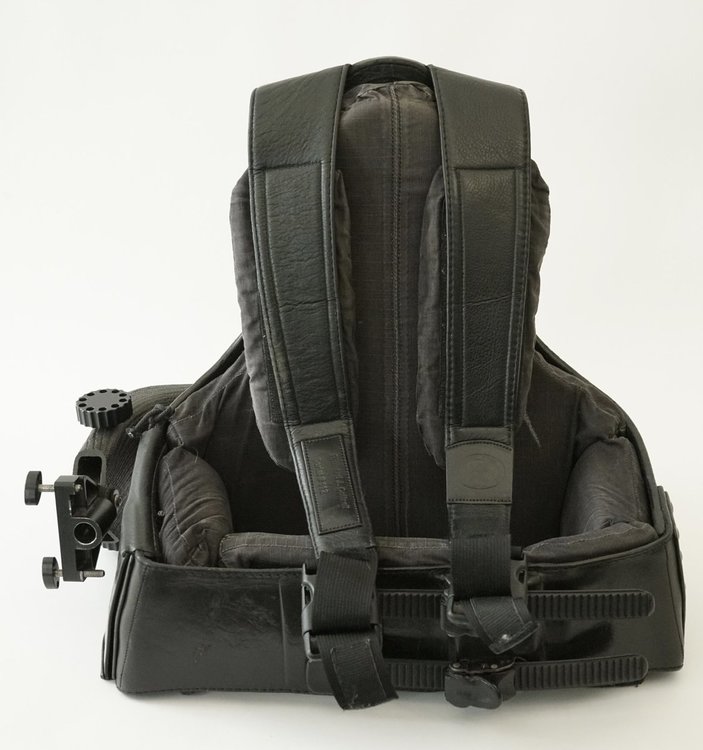
I’m helping a friend who is retiring from Steadicam operating clear out his gear package. He meticulously cared for this equipment, and it’s all in fantastic shape, ready to get out on set. Ideally we would love to sell the whole gear package to someone who’d be able to use it to start up or upgrade, but I’m willing to entertain offers on individual pieces as well. All prices are asking prices plus shipping. Tons of pictures, prices, and contact information are available at the link below: https://willsvideo.com/used-equipment-for-sale/


-
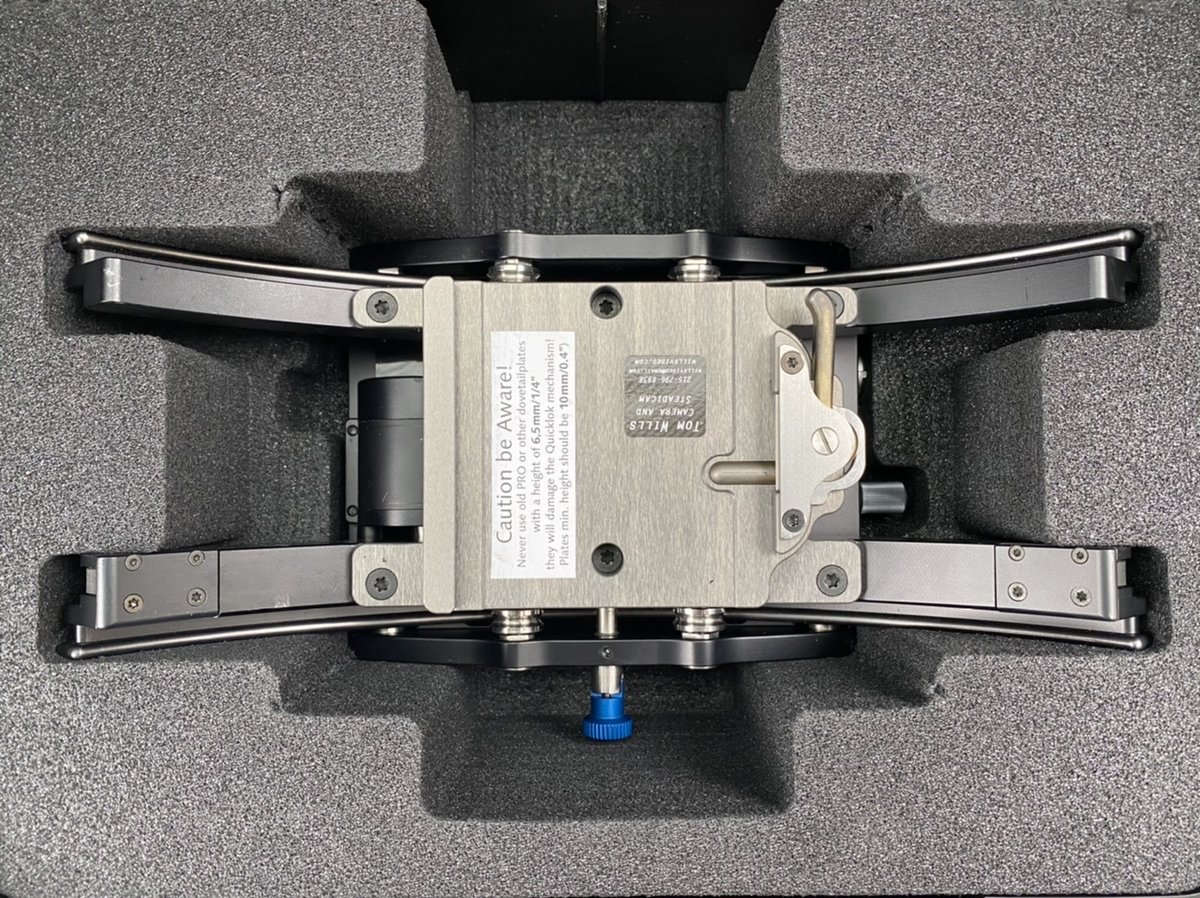
FYI to any interested parties - I will be taking over the sale of Rich’s gear for him, including this PRO arm. Please contact me if you’re interested: 215-796-8938 willsvideo@gmail.com
-
Just as a little signal boost for Rich, I’ve personally operated with this arm, and it’s in wonderful shape. Testing out this arm was actually the reason I ended up buying a Titan for myself!
-
I tend to run the inverter on the back of my Klassen harness. I’ve added a bunch of soft-side Velcro back there, which means I can just slap the inverter there, but still easily remove it when I dock (very important! Otherwise you end up stuck to the rig when you’re docked!). I power the inverter from either a block battery (I carry a shoulder strap so that my dolly grip/spotter/spare 2nd AC can carry the block behind me), or from an AB Plate with a belt clip on the back of my harness as well. I also like this as it works the same for vehicle mount and Rickshaw work, which is one of the cases where I often positively need gyros. Since the inverter is already separate from the sled, it’s no big deal to put the inverter somewhere on the vehicle (I often put it on the hard mount itself, so it’s easy to switch on and off as needed), and then run an XLR cable back to the block battery, either strapped into the vehicle or tied down to my Rickshaw. I do carry short cables with the gyro so if I absolutely need to mount it on the sled, I could, but so far, I’ve never had to.
-
Hello Wei, From what I recall, the A-30 and Zephyr arms are identical - just different names for the same arm. The difference in weight capacities you’re noting is from the difference in what they’re saying - the A-30 arm holds 30 pounds of total payload, which includes the camera, accessories, and whole sled, while the Zephyr’s rated 23 pound payload only includes the camera and accessories. The 7 pounds remaining on there is a combination of the weight of the sled, and possibly some safety overhead, to prevent parts from being damaged. I will also note that pushing this level of rig to its absolute maximum is probably not advisable. I’ve heard many stories of people breaking gimbals and dropping cameras when they’ve overloaded their sleds. So be mindful - these are not full size rigs, and they’re not designed for incredibly heavy payloads! And also important to note - I have heard that some arms may have a slightly higher weight capacity than specced, due to variations in tolerances in the spring. Just because the arm supports the load, doesn’t mean it’s not making out a part somewhere else, like the pin that holds the tilt axis in the gimbal.
-
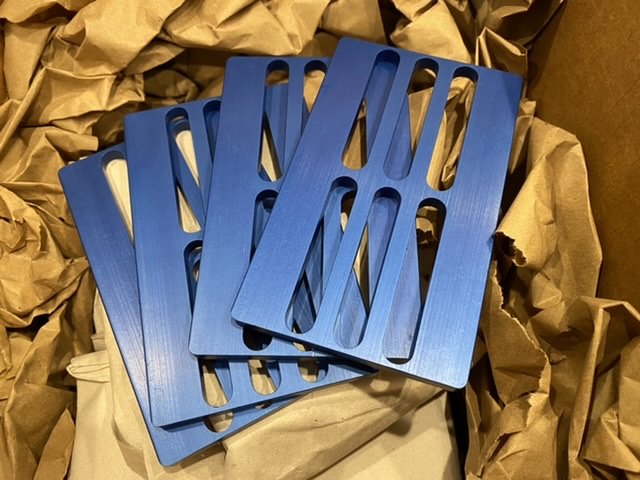
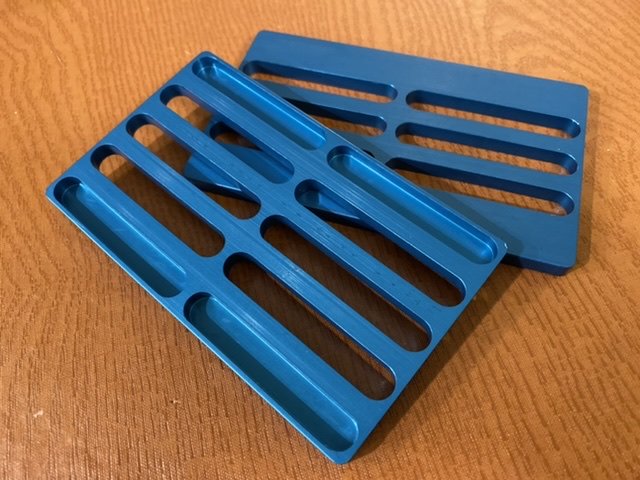
“Blue Plate” Camera Riser Plates
Tom Wills replied to Tom Wills's topic in Steadicam Marketplace - For Sale
I totally forgot to include the price on this post - $250 USD shipped for the pair of 2 plates. Thanks for those who let me know! -
Just got in a new batch of these plates, and I’m keeping the price down at the previous sale price, so hopefully these can end up in more people’s kits. These can be used for balancing a camera in the vertical axis on the Wave, or for adding a little riser to clear lens supports or anything else you might need. 1/4” rise with one plate, or stack 2 for 1/2”. Demo video here: https://youtu.be/9S0q3N0mG1A Includes: - 2 “Blue Plate” riser plates - 10 extra-long 3/8” camera screws (5 for 1 plate, 5 for 2 plates stacked) - Free USPS flat rate shipping in the US willsvideo@gmail.com 215-796-8938
-
In the spirit of the times, in which many of us are picking up new skills, like the new 3D printers in many people's homes, I've decided to take some of my projects and parts I've done and put them out in the world, for printing, machining, or making as you see fit. Hopefully more to come soon, so watch this space. https://willsvideo.com/parts/ Good luck!
-
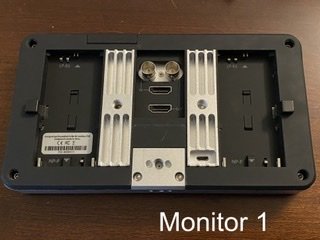
Parts & Monitors & Docks & Plates!
Tom Wills replied to Tom Wills's topic in Steadicam Marketplace - For Sale
Monitor 1 is sold! -
Parts & Monitors & Docks & Plates!
Tom Wills replied to Tom Wills's topic in Steadicam Marketplace - For Sale
Steadi-to-sticks plates sold. The rest remains! -
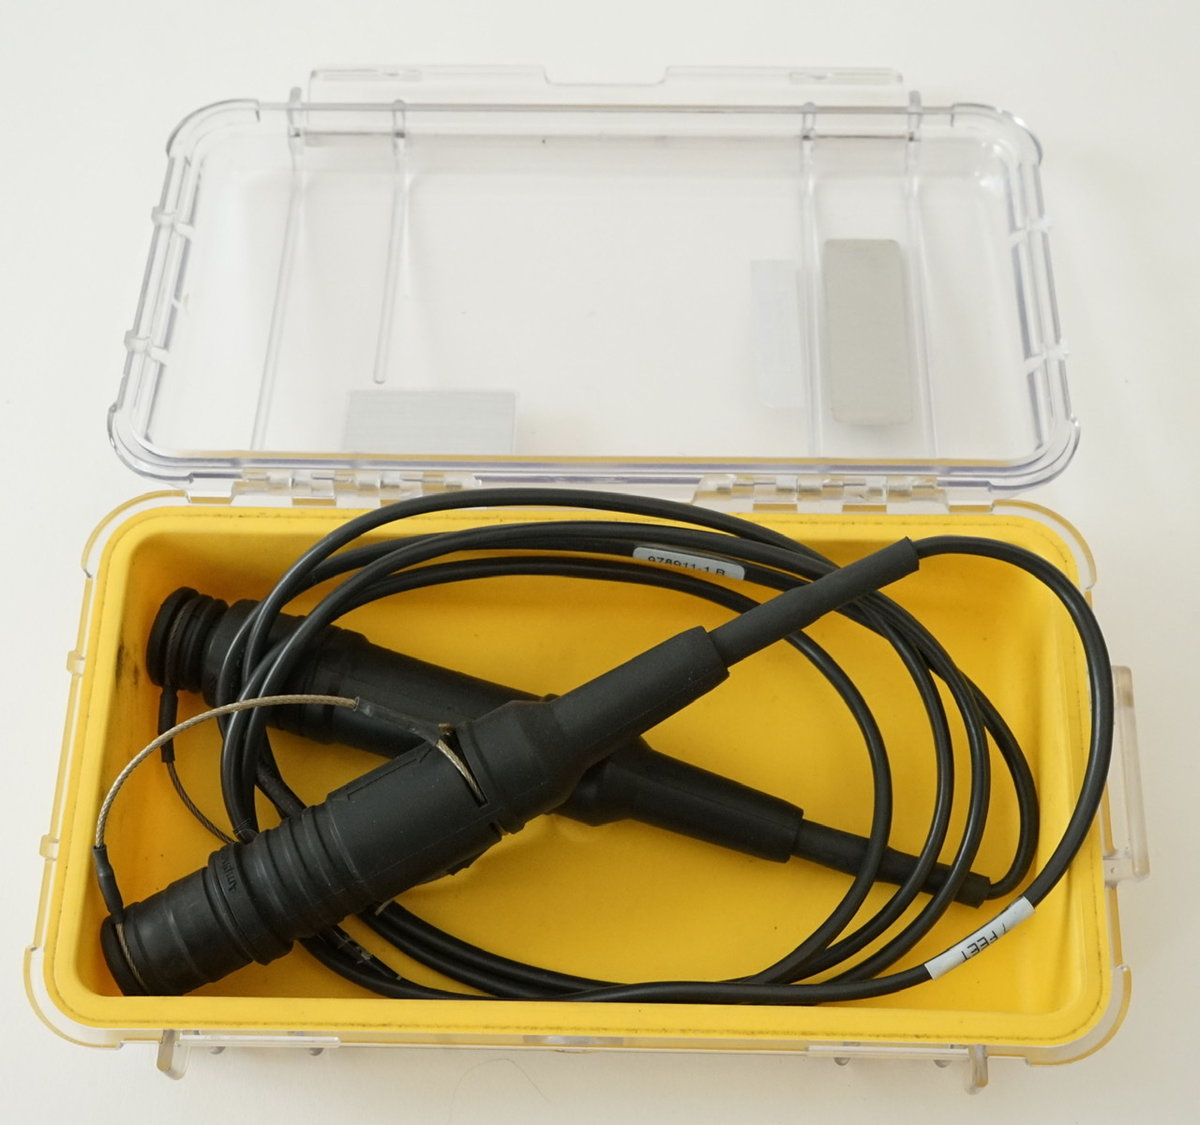
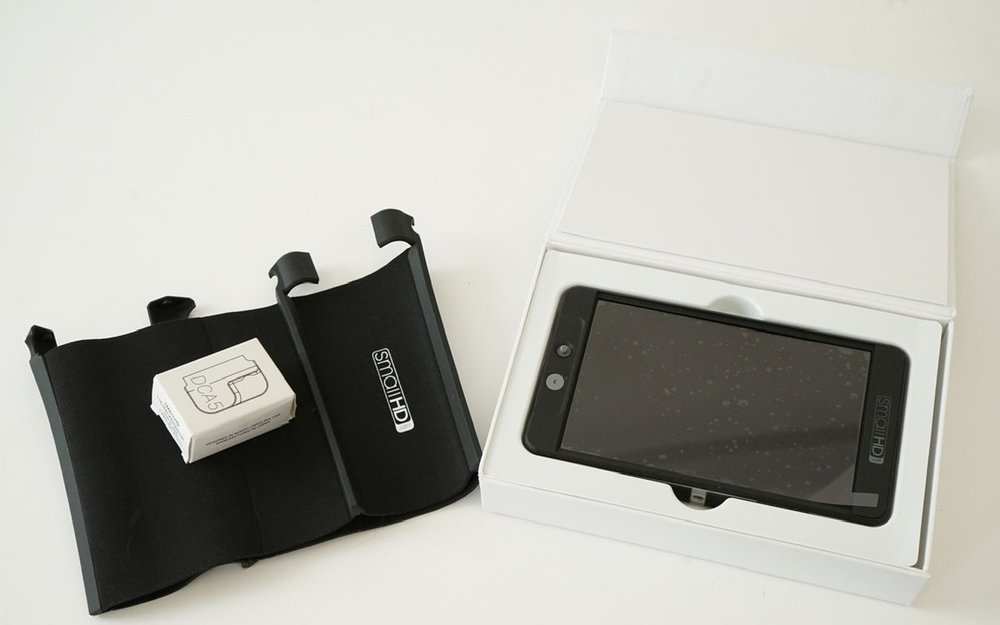
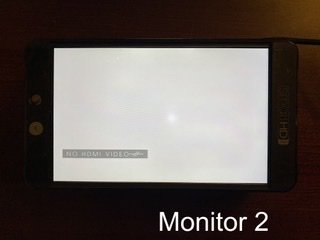
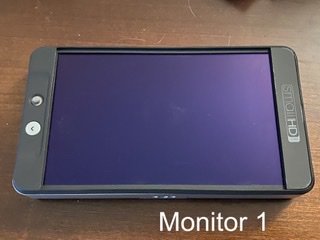
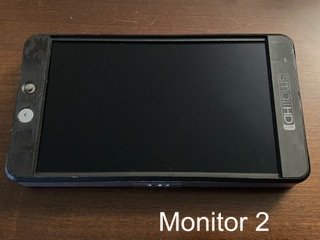
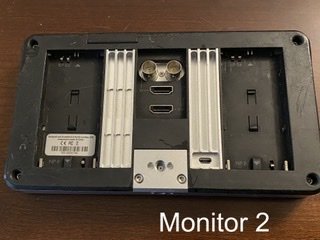
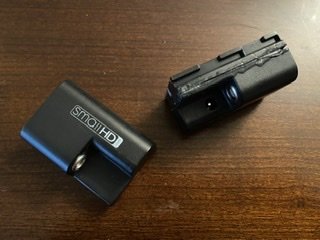
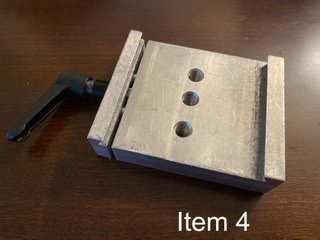
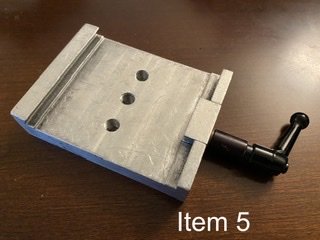
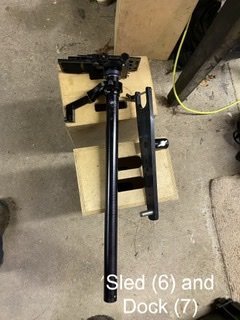
Since I have some forced downtime, just like everyone else, I’ve gone through some gear that I could use to get rid of. Everything is priced accordingly with global circumstances at the moment. Item 1: SmallHD 702 Bright Monitor (1) This monitor was bought as backup-of-a-backup, and while it has been used, it hasn’t been abused. The back looks almost brand new. It does have a couple of little marks on the screen, but they aren’t visible once powered on. Includes a SmallHD LEMO to LP-E6 dummy battery (which has been disassembled and glued back together to fix a design issue, see pictures). $500 Item 2: SmallHD 702 Bright Monitor (2) This monitor was my primary Steadicam monitor for a few years before I upgraded to the 703, and it shows the use. The outer casing is worn, and some of the “soft rubber” on the plastic parts is worn off completely. There are no marks on the screen (always had a screen protector on it), but it has developed a bit of a bright spot in the middle of it (see picture) Also includes LEMO to LP-E6 dummy battery, also with some marks from the surgery performed on it. $400 Item 3 & 4: Steadicam Dovetail to Tripod Plates These are 2 prototype Steadicam-to-sticks adapters that I made up a couple of years ago. They accept any full-sized Steadicam dovetail, and have 3/8” holes on the base for mounting a tripod quick release plate to. Extremely handy, and because these are my design, I ensured that they lock down extremely tight. No slipping, unlike some of the commercially-produced other ones! They are a little rough (I wasn’t interested in finish, just function), and not without their quirks, but they’ve worked really well. Only selling because I’ve replaced them with newer versions, and figured these could help someone who didn’t have any, rather than having 6 for myself! $100 each Item 5: Steadicam 3/3A parts Here’s something I put together as the start of a project, but don’t have the time to finish. It’s a Model 3 stage and plate, a side-to-side addition (maybe DeRose?), a Model 3 extension post, and a Model 3 gimbal, which I recently gutted, cleaned, and re-lubricated with the same oil I use for my M-1 gimbal. Would be a great start to a sled project, or a running rig! $800 Item 6: Custom 1.5” - 5/8” Dock This came with the rig above (and I’d prefer to sell it with), and is beautifully machined. Some history behind who made this, I’d be happy to share with the buyer. Includes aircraft pin and all the works. Discount available if you want to buy this and the sled parts! $250 Contact me at willsvideo@gmail.com if you’re interested!
-
Hi Josh, I remember being in your shoes clearly - it was the late summer of 2012, I was on my first feature film, having operated “semi-professionally” for about a year, and on two occasions I had to either put the 85mm up, or do a shot on the 50mm in low mode, and I remember both being seemingly impossible. So, you’re not alone in the difficulty of doing long lens work on Steadicam when starting out! I’d say about 1/4 of my work is tighter than a 50mm. Generally I don’t see many lenses above 135mm (though I have from time to time), although especially when doing anamorphic, 135mm is a pretty typical lens, and I regularly fly 100mm spherical lenses. A 65mm or 75mm is a sweet lens for Steadicam, and if you can get well in-sync with your actors, you can produce some truly beautiful tracking shots. I’d say to get to the point where I was completely unafraid of long lenses took me about 3 years of operating, and probably about 5 years to actually be able to back up my big talk with the skills to really pull it off. I will say that with long lenses, not only is it a technique issue, but it is also a physical feat with your body, and there is a significant component that the quality of your rig plays. When I upgraded my rig after that first feature, one of the biggest things I noticed in going to a new gimbal was that there had been some friction and play in my previous gimbal that just destroyed any chance of precision in long lens operating. Even the slightest friction in your gimbal will translate your body’s movements into the lens, and those errors will become much more pronounced on longer lenses. The same goes for your arm, although to a lesser degree (as the issues will be translational rather than angular). Additionally, having your rig trimmed for the tilt you will be holding is crucial, as is keeping your speed consistent. If you’re holding pressure with your hand to hold tilt, any little twitches and tremors in your hand will get into the frame, and if you’re speeding up and slowing down, any pendular swing of the sled will also get in, unless you’re good enough to keep 100% of it out (which very few are, although I think we all hope to get close!). And biggest of all, relax! I even get called out on this by DPs I’ve worked with for a long time. If I’m tense, that tends to telegraph into the shot, and sometimes I just need to take a deep breath and shake out my hands and try again. I hope that helps and gives you a few things to think about! Best of luck on your adventures!
-
Sold. Thanks all!
-
I’m clearing out some rarely used gear to make room for some new acquisitions, so my backup Wave needs a new home! I picked this up last year, and it’s only been used a handful of times, and only gently, as it is my backup unit. It comes with the case, but with no other accessories, although if you need a dovetail or something to fit it, I could probably dig out one of my spares to sweeten the deal. Asking $5000 USD. Looking for a quick sale, ideally on the east coast! Email me for more info - willsvideo@gmail.com
-
I’ve been making these “Blue Plate” Camera Riser Plates since the beginning of this year, and they’ve been incredibly helpful to me and to many other operators who’ve added them to their kit. They help raise the camera, either for clearance purposes, or for balancing the camera top-to-bottom in the Wave. I recently ordered a new batch of them from a new machine shop, and while they work just the same, the surface finish isn’t quite as beautiful as the ones I have sold previously (see the detailed photo below), so I’m going to let this batch go at a “scratch and dent” discount. I’m offering a set of 2 of these riser plates for $100 off the original asking price. That’s $250 for 2 of these plates, and 10 screws (5 short, 5 long) for stacking either one or two of these plates in between your camera and dovetail. I can accept Credit Cards via Quickbooks invoice, or PayPal or Venmo. Email me at willsvideo@gmail.com if you’re interested, and enjoy the discount while it lasts!

-
These are not fuse holders, these are circuit breakers. They are specifically Klixon brand circuit breakers (or at least that looks identical from the outside, and considering that PRO uses Klixon, it’s likely that Jerry Hill used the same). Those should be the Klixon 7277-2-10.
-
I've been holding off on saying much, as I know many who've gone the Volt route who I don't want to discourage, but I've had a very different experience than many with the Volt and the Wave. My experience with the Volt was that while it did offer some immediate advantages over the Wave (like its size and weight, and also the added bonus of having a rig that is neutrally balanced and thus can be moved around without any pendulum effects), it significantly changed my operating, and not for the better. I do a lot of tilting in my operating (something I wasn't aware of until I switched to the Volt), and the M1V electronics altered the way tilt felt, which required a lot of retraining, and additionally, I always saw a little pan wobble at the beginning and ends of tilts, no matter how much I turned the tilt strength down. There was also the issue (that I'm hoping eventually gets fixed) of the M1V tilting on a diagonal, and not in a straight vertical line, amongst a few other things that I found over my year and a half with the device. The work I did with the Volt was simply not as clean or good as the work I could do with the Wave, so I have since moved back to the Wave and sold my Volt. I urge each operator who is moving towards any augmented stabilization technology to try using both (and make sure they are both set up correctly, as many do not balance the Wave correctly), and see what they prefer, and most importantly, to analyze the footage critically.
-
I designed these plates out of a frustrating need that kept popping up at camera preps - cameras often needed just a little extra height, either to balance properly on the Wave 1, or, as with the Alexa Mini and some Panavision builds, needed a little extra height so that some part of the camera or lens support would clear my dovetail. I’ve resorted to using washers in between the camera and the dovetail occasionally, but no more! These spacer plates are 3”x5” and 1/4” thick, and weigh 0.15 pounds (.06 kilo). They’re still quite strong, however, because of their design. And the slots are long enough to fit almost any camera hole pattern. If you use the Wave, you’ll be even more pleased with how these work. Balancing the camera vertically can sometimes be a chore - moving motors, adding tons of weight to a Noga arm, etc... Now, if you’re faced with a very bottom heavy camera, use one (or even two!) of these between the camera and the dovetail, and you can use a lot less weight on the Noga, and have a stiffer, simpler build. I made these to be a simple Swiss-Army-Knife type gadget, and small enough to fit in your usual AKS case to be there when you need them! Includes 3/8” socket head extra-long screws, for easy and secure tie down of cameras on the riser. $175 each. Email me to purchase - willsvideo@gmail.com

-
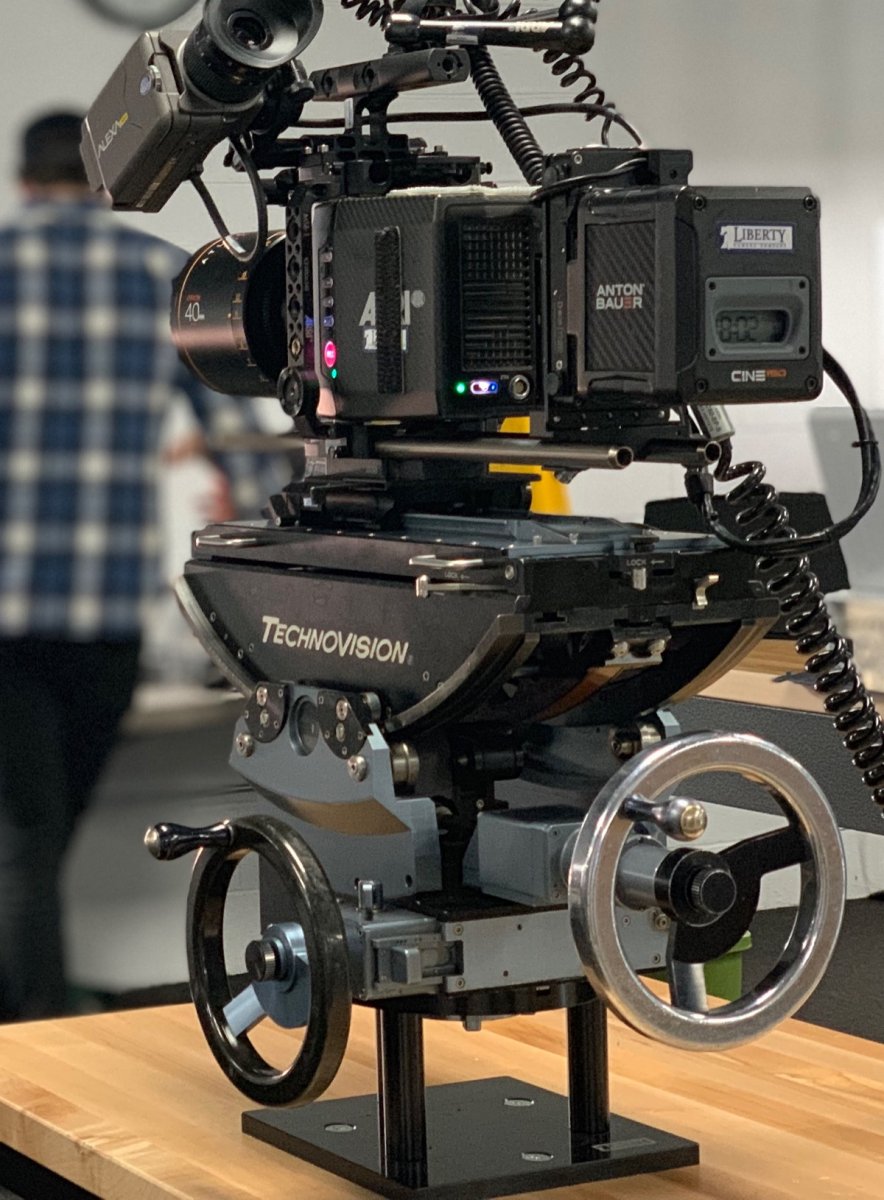
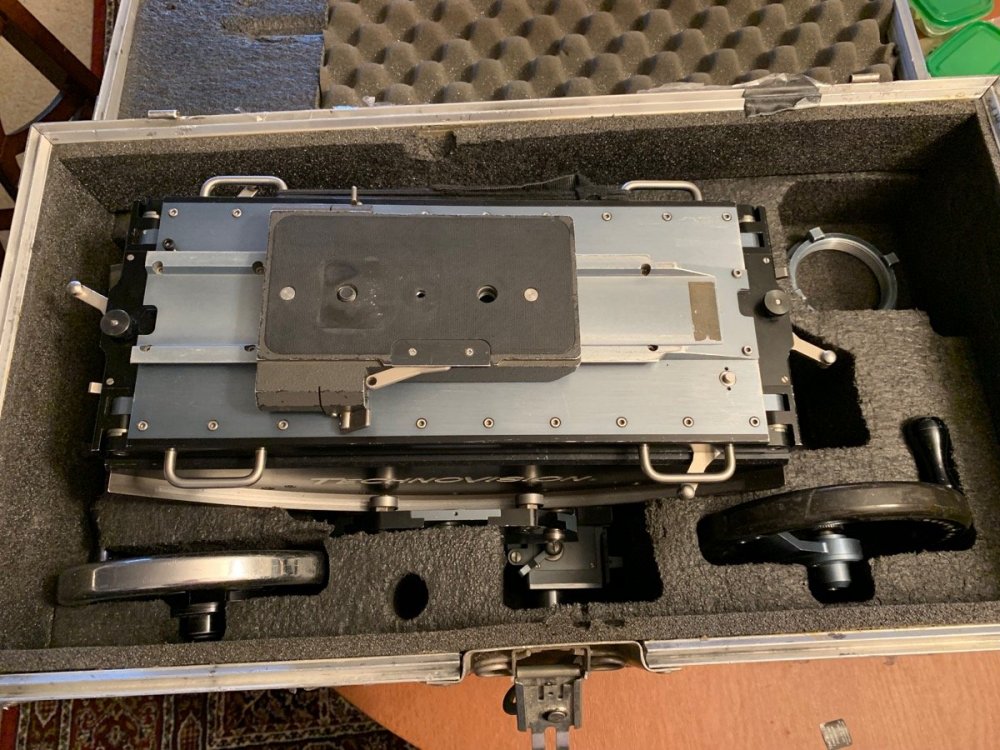
I’m selling a used, but decent condition Technovision Geared Head. In the time I’ve owned it, about 6 months, it has never been on a job, only been used for my own personal training. Sadly space in my storage unit has gotten tight, and as this is something that I haven’t used on set, I have to let it go. The head is in reasonably good shape for its age. The previous owner I believe had it rebuilt, but if you were going to use this on set as a “daily driver” head, I’d probably have it tuned up again. Both handwheels have a tiny bit of backlash in them, but it is quite minor. I replaced both of the bubble levels in the head as well, so they look fresh and work well. Included in the kit is: - Technovision Head - 2 Handwheels - Low Speed Reducer Gearboxes (add an extra-slow gear for really long lens moves) - Mitchell Nut - Bonus - old ARRI Bridgeplate for mounting cameras on the integral ARRI dovetails of the head I also can include a Mitchell Hi-Hat to sweeten the deal for a local buyer. The case has seen better days, and is quite heavy (around 80 pounds), so I’d like to sell it locally rather than ship it cross-country again. Ideally looking for someone within a few hours of the NYC area who could use a practice head to teach themselves wheels. Having this head was quite useful for me in honing my skills on the wheels, and I can imagine it’d be quite helpful for you as well! Asking $5000. Paid $6000 in August of last year. Email me for more info. willsvideo@gmail.com

- 1 reply
-
- 2
-

-
Hi Mark, The big question is - are you balancing the camera's vertical CG in the Wave? As in, can you unlock the Wave (when powered down), roll the camera to either side, and have it stay there without issue? It should be balanced so that the camera is totally neutral inside the roll cage of the Wave. If it is "bottom heavy" (aka seeks the center) in the Wave, it becomes almost impossible to operate as any deviation from absolute level will cause the rig to want to fall further and further off level. The method Larry McConkey figured out early on, and that I also use (and many other ops) is using a set of small counterweights on a Noga arm to raise the CG and be able to adjust it precisely to where it needs to be. I am also working on the design of riser plates that will allow you to raise a camera's CG with a very light, small plate, rather than the heavy and often too-tall Wave Rider, to limit how much weight is needed.
-
The simple answer is to swap out the post in the low mode bracket and add in one with the hole in the correct location for the Tiffen handle. The Tiffen handle's hole placement is fine by me, and I've had no issues with my low mode brackets actually having both holes (one for the Tiffen hole placement, one for the PRO). Seems far easier to me (and easier to swap out if something should fail) than drilling on the rather expensive Tiffen gimbal handle.
-
Bartech Dual Channel (Focus/Iris) System
Tom Wills replied to Tom Wills's topic in Steadicam Marketplace - For Sale
Dual Bartech setup is sold. Thanks!