Frederic Sturm
-
Posts
105 -
Joined
-
Last visited
-
Days Won
3
Everything posted by Frederic Sturm
-
One-man steadicam operation for doco?
Frederic Sturm replied to Craig Anderson's topic in General Discussion
Hey Craig, what Lars said, the book and then a Workshop is the perfect starting place. Depending on your camera there are many, many possibilities for pulling your own focus from the gimbal handle, and of course, it has been done before, a lot. And with the redrock micro, too (done it myself). Depending on your budget, for smaller cameras look for a lanc remote control, for "real lenses" have a look at devices like the stanton, or a combinazion of a good follow focus motor and the Betz "Schnitte" and their nice "Stick" Gimbal Controller (betz-tools.de). You can come up with countless solutions, spending anywhere from $300 to 30.000 just for this. However I strongly recommend rather than investing in gear to pull your own focus, investing in a good wireless follow focus like the bartech (or even a hocus-focus may serve you well if budget matters) and an assistant to do it for you. If you're just starting out, you'll have enough work framing and operating the steadicam, believe me and those who've said it before. I've been doing this for just about 3-4 years now, and though I feel I could maybe manage some additional focus workload sometimes, I always prefer an assistant. Why risk compromising your main job which is great framing. If you absolutely must go on your own, you might also try attaching an AF-on remote to your gimbal handle (on your own often means lower budgets and chances are you might use a DSLR or similar where this works), focus for the right plane, then work through the shot somthat you dont need to change focus. Cheap, quick and dirty, and a real option when things happen fast as they do sometimes on documentaries. Happy Flying =) -
Hi Brian, I dont share my rig, but I find that with different weights on the Zephyr, the arms slack varies calling for adjustment, so it floats nicely in the sweetspot I want it to. Maybe I'm trying to be overly precise, but I prefer a finely tuned rig, just makes things easier. Of course this is an adjustment required just once per setup, but if you fly different setups almost daily, its a daily thing. And sometimes in the kind of productions I currently work on, when people are waiting, things need to go as quick as possible and this ist just wasting time. Also, those screws are as loose when unloaded as they are tight when loaded, so they loose adjustment during transport. This however I sometimes counter by marking them.
-
Ummmm.... I want that, too?! Please?! The tool-free socket block of the Zephyr is the #1 pain in the b*** about the whole rig! It's just a totally failed design - it is impossible to turn the side-to-side adjustment screws by hand while the sled is on the arm, way too stiff (which is obvious while loaded) constant docking and undocking is necessary for proper adjustment. Holding the rig up doesn't help, the arm alone is weight enoug to stop the screws from being loose enough to turn. Fingers get sore before it will move. Result - either a lot of wasted time or accepting a less-than-perfect balance. It is one of the major reasons I want to upgrade sooner rather than later, and yes I get that that may be Tiffen's exact reason for not giving the big one to the Zephyr even as an option (since you say it exists...). But the Zephyr is such an awesome rig, it'd really deserve a good socket block. I'd pay for having that immediately, probably more than would be reasonable...
-
Cool Video! Yes Victor, as Jerry said, I just use a Zephyr/Flyer sized socket block on the Exovest. Actually I do the same with my Jerry Hill Hardmount, the hole pattern is the same, they're interchangeable in minutes. Is the black overcenter lever a new one and part of the upgrade? Mine is blue, and together with the lower dovetail the only true issue I have with my Exo, because the dovetail is really hard to close, and if one does manage to close it to the point where the overcenter lever can be fully closed it works its way up against the lever which then becomes stuck and requires violent pushing to unlock. Chris said there's gonna be an update, just wondering if the black lever shown here is part of it.
-
After today I'd like to add something about the pelvis tilt hinge. Up to now I felt mostly indifferent about the tilting parts. Well, I worked the whole day on a a ship today, and had to climb one flight of stairs after another. Had the Zephyr pretty well maxed out on weight range, and configured for max inertia. Nothing compared to a fully loaded big rig, but nice n heavy - absolutely. Im sitting in the car travelling back right now and already most sore feeling is gone. The tilt was a very very welcome feature, and with today I know what its really for - stairs. I dont feel it much on slow moves etc, but it just makes stairs, and especially tight and cornering ones so much easier to do. Thanks Chris!
-
Anybody has experience with the WHM-BG Artificial Horizon Modules
Frederic Sturm replied to axel ebermann's topic in Monitors
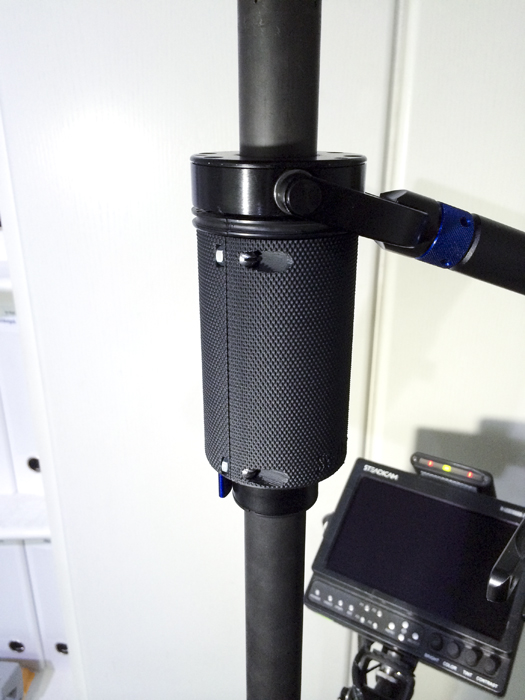
Hi Mark, Hi Victor, Yes they are my design, yes they are out of my 3d printer, and yes, after some tiny refining I'll make them available for you to buy =) Stay tuned, I'll post something soon. Wanted to make sure the design works and stands up to real-world operating first. It does and does more than you see on the picture (low-mode switching is a breeze). Also with getting this you'll free up the original mounting base and thus gain a free accessory mount like mentioned above, so two birds one stone if youre looking for that. Enough hijacking =) give me a few days, and I'll post more. -
Anybody has experience with the WHM-BG Artificial Horizon Modules
Frederic Sturm replied to axel ebermann's topic in Monitors
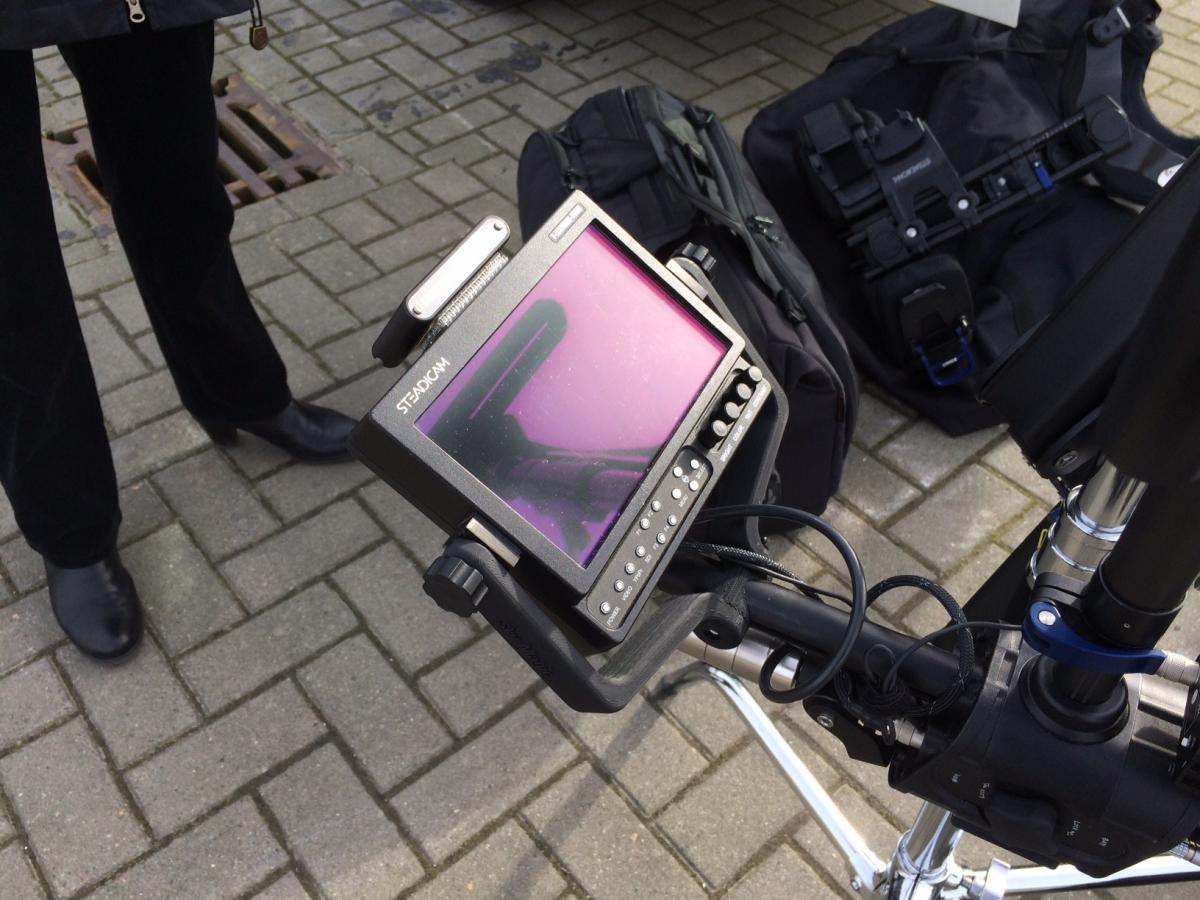
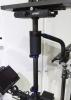
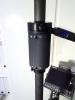
As promised, 2 photos of how the wagner main unit is mounted on a spare original Zephyr monitor mount, and how the display just mounts to the top of the monitor with dual lock. Both rock solid, and the sensors are close to the post, which may not be as necessary as with others but couldn't hurt.. Powered from P-Tap on the V-Lock plate (which I converted to have two P-Tap outs). Those monitor mounts are really useful, as you see I have another one for accessories, and yet another one for quick low-mode monitor switchover to the lower rod (though that one just got rendered unnecessary with the new monitor yoke).

-
Anybody has experience with the WHM-BG Artificial Horizon Modules
Frederic Sturm replied to axel ebermann's topic in Monitors
Just saw this, thanks for mentioning my idea Chris =) I'll post some pictures when I get a chance on set later. Hey Marc, I got mine from Betz, but not sure if they stock them. That said you're always welcome to stop by my place (Munich, Nymphenburg) and check it out. As for real world experience, I love it. But: you can't rely on it for vehicle mount work on steep corners. At least mine, goes off on corners, and does so slow enough to make it kinda believable, then slooooooooowly returns to level. If you believe it youll bank turns like crazy. I found out on a test and believe my feeling for framing and horizontals in the monitor then. Actually mine hasn't got the latest firmware updade yet, so that might improve it (does it, steve?) (that's another thing I dont like - no usb port for updates, might be considered unnecessary if there arent any updates, yet there was one already a week after I got mine, and now I needto send it in =( ...) For the cable, I made one (or had it soldered at Betz I think) with a P-Tap and a 90* plug on the Wagner side so the cable doesn't stick out like the straight ones. But overall its a great little unit I'd immediately recommend at its price point. -
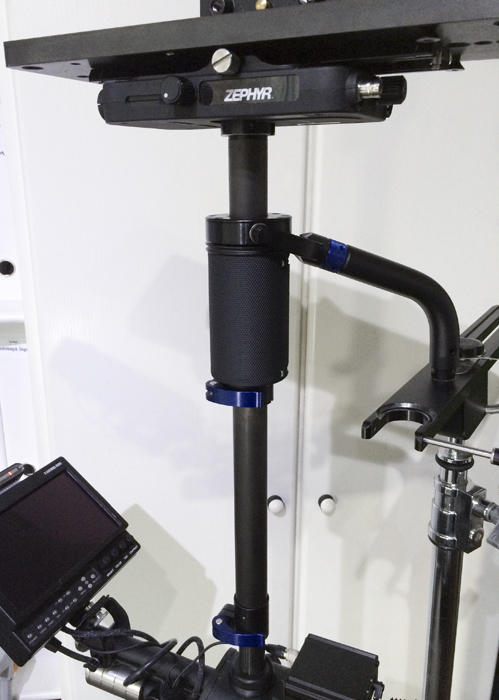
After a lot of testing, and great feedback the first ones have finally shipped and should be with you guys soon :) For now just a final update: Testing and some research resulted in the final outer diameter being 2.2", as it seems the most comfortable option between 2.1" and 2.4" with the Zephyr among most people who have tried it.
-
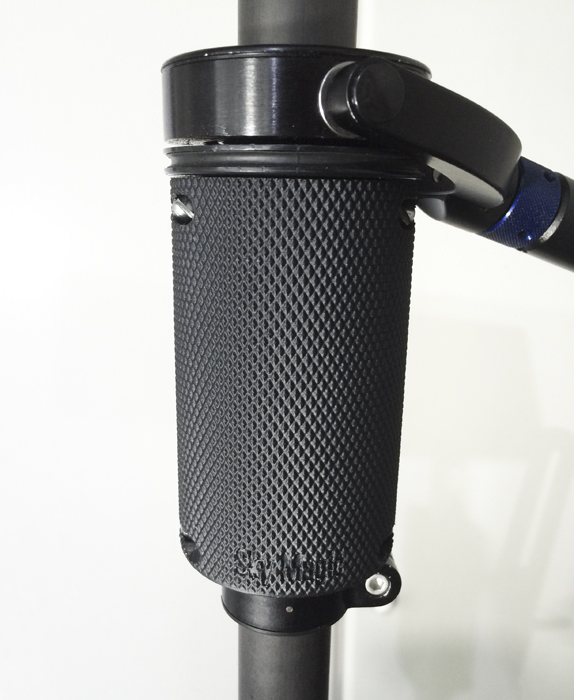
Thanks for all the additional feedback and orders in the PMs and email :) The final prototype is done and the first ordered ones should be produced soon. In the attached picture you can see how your name would be embossed if you choose you want it. The side with the hex nuts is designed to be facing your palm (so to the left for regular, right for goofy), and thus to be totally free of touch distraction. The nuts are inserted through a tiny cutout and held in place. Thus, the name will be placed on the side with the screws, which would be facing your thumb. It will be, just like the screw cutouts, out of any normal thumb reach, so that it cannot disturb your touch feeling. It is almost imperceptible to the touch anyway, yet I think this is the best place to put it. It's your choice of course to have it on the other or even both sides (or whereever you want it, really ^_^ ) It is very discrete of course (not something flashy as some were worried ;) ), still it will give your sled a very personal touch! With the knurl surface around its a little hard to take a good photo, still you should easily see the "Sky Magic" name on this one.
-
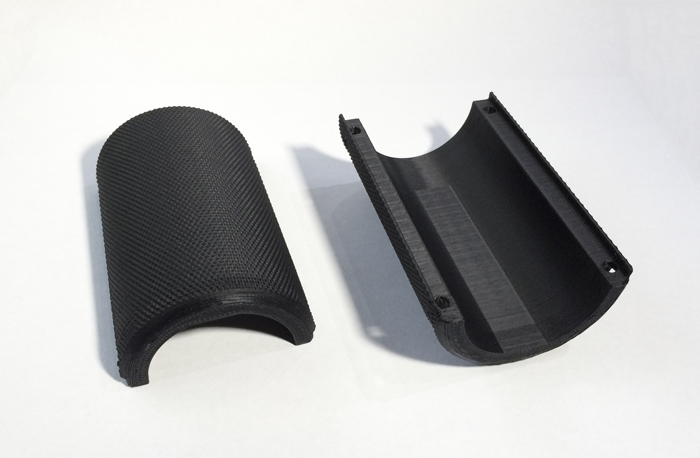
Thanks for all your nice Feedback so far =) Ok, here we go on pricing: Features: - new diameter of 2.4 inches gives much more control and a more precise feeling - screws and nuts are well hidden inside the grip - easy installation - very rugged yet lightweight - your name can be printed on it Please consider: - these parts are made from extremely stable ABS plastic (not any of the less stable but easier to handle filaments). - it takes quite a while to design them to the tight fit with virtually no gap between the 2 halves. - they take about 8 hours to print on an extremely expensive, professional 3D printer, so the quality of the parts is really nice (you can't compare it to parts from any of the cheap consumer printers) I'm happy to announce you can have one of these for USD 120 / EUR 90 plus shipping (plus VAT if you're in Germany). USD 15 / EUR 10 gets your name printed on it (preview pics soon). DHL traceable shipping to US: USD 25,- Europe: EUR 15,- Germany: EUR 5,- Payment by Paypal or bank transfer. I've tested the grips for a while now and they perform well, but of course, should any problems come up with your grip I'll be the last one to leave you alone with them! The first ones should be ready to ship by the end of next week. Looking forward to more feedback, questions, ideas... =)
-
Hi Libor, with the measured exact dimensions of the original Grip and desired outer diameter, no problem at all! You could send me a few photos with dimensions by PM or mail and I'll make a prototype. Then I guess I'll pay a visit to Betz around the corner then and look at the real grip to make it fit =)
-
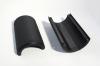
Thanks =) Yes it does lock with the flat sides and tightens perfectly snug. (Its fully round inside above the flat sides though, to allow proper clearance for the metal rings above the plastic grip). Yes Victor, I did consider making some to sell, actually I've already been asked and agreed. I'll need a few days to make some final adjustments and then I'll be ready to make some =) I've sent you a pm
-
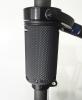
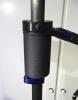
Just thought I'd share this with fellow Zephyr Ops: I really love my Zephyr, one of its shortcomings however -I think- is the gimbal grip. It's small diameter has always bugged me a bit, because when I use bigger rigs it always fees like the larger grips allow better control and more precision. Since we got a really good 3D printer to develop and manufacture special parts and brackets a while ago, I thought I'd give it a try and make a wrap grip specially for the Zephyr. It came out quite nice the first time, but it took some experimenting to make it really accurate (down to 0.1mm), get the surface nice to the touch, and so on... Now it fits really snug, the screws & nuts are completely hidden inside the diameter so don't get in the way. The added feeling of precision with the larger grip is very noticeable :)
-
Just came across this and have to say I'm very impressed by your manufacturing of the gyro mount :) Nice way to make ABS parts really strong! I've been intrigued by 3d printers for long, but it was always to much of a science of how to build the printer itself to be really interesting for me. And then the possible print quality in the beginning was a bit imprecise for my taste. For a relatively short time reliable 3d printers with awesome print quality have become (in a way) affordable, and some time ago I finally went and got one. Certainly one of the coolest toys I ever played with! A gimbal wrap grip actually was one of my first ideas, too, since the Zephyr grip diameter is really small, and I'm not a huge fan of the flattened sides. It's fun to see even people with a nice big grip like to one on the Ultra like to go bigger. But that's the really cool thing: Imagine a solution to a problem, create it, hit print and watch it materialize on your desk. I have been dreaming about this for long, as have many I guess. :) :)
-
Have been working with mine for a while now, and it still feels more like "hardmount" to me, in that it gives my operating precision I never was able to achieve using any frontmount vest I've tried. Also, I find it extremely comfortable, especially on longer takes and days.
-
Tiffen Steadicam Zephyr Compact Vest
Frederic Sturm replied to Frederic Sturm's topic in Steadicam Marketplace - For Sale
Thanks for everybodys interest, this has been SOLD :) -
Betz Tools is a superb crew, I can only second that. Isabell, Christian and Alex are infinitely friendly and helpflul from tiny details to big decisions. Having come across Betz on the 2013 Munich Workshop they organized, it was easy enough to realize that these are the right warm welcoming people to deal with when you need a rig or your rig deserves some special attention. While sure, their services are not cheap, they are well worth it, and I have always been approached in a very fair way when it comes to the finacial part. While I myself am still on a used medium sized rig (Zephyr, too) and waiting for the right time to upgrade, I purchased an Exovest from Betz and got several other things, like cables, made and will happily come back next time I need something. Another thing worth mentioning, after I had the chance of some rather interesting insight: If it weren't for their experience and expertise in handling the sometimes ouright weird ways manufacturers handle purchases and spare parts deliveries, the part wouldn't be at your doorstep the next day as it is, but rather take weeks. I am very grateful for living and working in Munich, having the Betz(st) friends you can have as Steadicam dealers / service right at my doorstep =)
-
Hi Kevin, Generally you'll want to fix the cable to your vest, whereever its most out of the way and the other end to the steadicam. The steadicam operators Handbook then suggests a method of slinging the cable around your operating arm twice and letting it leave your hand directly below the gimbal. I tried that with success, yet have been shown a much more comfortable and reliable method by Larry McConkey. Just fix the cable directly next to the gimbal (by means of a small clamp and some sort of arm), where it has the smallest possible lever arm. Then just let it fall straight down freely and loop back up to the attachment point on your vest. That way it will create almost no tug mounted right next to the gimbal, have the largest possible loop to give stiffer cables the least chance of exerting force, and won't interfere with your arms. Larry did this with a whole bunch of not really flexible cables from the Alexa 3D rig on hugo, with great success. Those were so many cables that he even had a flexible belt attached to the cables that he just ran around his vest so he didn't need to reattach them all everytime. Personally, I'd still try to get a flexible HD-SDI jumper, since the very long SDI cables are usually quite stiff. Hope that helps =)
-
Tiffen Steadicam Zephyr Compact Vest
Frederic Sturm replied to Frederic Sturm's topic in Steadicam Marketplace - For Sale
Final Price Drop: EUR 1700,- or USD 2350,- and it's yours. Or it will go with the Zephyr as a complete system sometime 2014 or 2015 ;) -
Tiffen Steadicam Zephyr Compact Vest
Frederic Sturm replied to Frederic Sturm's topic in Steadicam Marketplace - For Sale
Price Drop: EUR 2000,- / USD 2650 -
Hi Herman, the pilot vest is really comforatble because it's ridiculously light, but it's not the most stable one. I've first practiced on a pilot before taking a workshop and it's a great little rig to start on, you'll develop a really sensitive touch. Yes, by all means, try to tighten the waist strap as much as you can. Snug up the chest straps really well, too. Still with a camera load that's a little on the heavy side, the vest might shift - a little - towards the sled. Also, Tiffen has a buckle upgrade for the pilot vest for $50 which is really worth getting: http://www.tiffen.com/displayproduct.html?tablename=steadicam&itemnum=801-7816 Mine had that already and I can't imagine opening and closing velcro everytime! Have fun with your pilot!
-
Tiffen Steadicam Zephyr Compact Vest
Frederic Sturm replied to Frederic Sturm's topic in Steadicam Marketplace - For Sale
BTTT -
Tiffen Steadicam Zephyr Compact Vest
Frederic Sturm replied to Frederic Sturm's topic in Steadicam Marketplace - For Sale
Bump -
I think there was a (slight mis)interpretation of my maybe poorly chosen words. Please let me clarify. "If you consider at an Exo, Chris Fawcett will be able to provide tons of researched anatomical reasons for the new design, and thus explain health benefits. After all it has been designed with nothing else in mind than supporting a Steadicam in the best way to suit human anatomy." Please substitute "possible health benefits" or better yet scratch that part of the senctence entirely. If you meet Chris and hear him talk about the Exo, and show his presentation on anatomy, you quickly now this guy has done a lot of research, has a wealth of anatomy knowledge, and designed a vest from a purely anatomical standpoint, to try and support the weight with the least negative impact on the body. That's it. I did not claim that the vest actually achieves this goal (After all I'm not a doctor either...), or that there was any track record. All I said is it's designed with certain goals in mind - please correct me if this statement is wrong. The only claim I made, about comfort and endurance, came from a personal observation of myself, and was labeled as such. I only used the word "health benefits" because Danny had asked for health studies and other documentation, and I wanted to point him to Chris. I understand it might have been a misleading choice of words and apologize. Still, I think Chris' Documents will be interesting for Danny and thus please understand my point in the spirit in which it was intended, which I have hopefully described better now.