Calum Tsang
-
Posts
12 -
Joined
-
Last visited
-
Infrequent Flyer - Rebuild of a Steadicam Flyer
Calum Tsang replied to Calum Tsang's topic in Steadi-Newbies
Battery System 2023 Attempt I wanted to power the entire rig from one power source and I wanted this source to be cheap and plentiful if I needed to buy more batteries. After looking up replacement NP1 batteries, it was clear I needed to replace the original battery setup completely. In the years since NP1 chocolate bars were popular for Betacams and the like, I had assumed someone had made a cheap NP1 Lithium Ion replacement, but they are actually fairly expensive. One option was Sony F-type or Canon LP-E6 style batteries, while cheap and plentiful, were small in capacity. I had also considered going to V Mount or Anton Bauer, which had many cheap brackets/cables available in the aftermarket, but a quick back of the envelope calculation showed these cine/broadcast specific batteries were almost double the price. If you look at price per watt hour, there is nothing cheaper than using power tool batteries. I settled on using Ryobi 18V power tool batteries. One reason is I already had a 4Ah from a weedwhacker and these are easily found at any Home Depot, but another reason is that they have integral voltage cutout circuitry, which is critical for managing Lithium Ion cells. If you let them run too low, they can't be recovered. In DeWalt and other systems, that circuitry is in every tool, in Ryobi, it's in every battery. If you put a load on a DeWalt battery, it will eventually run below a safe voltage and the battery will never be able to be recharged. I'd also need to adapt the physical shape of the Ryobi battery to the lower "paddle" of the Flyer as well as convert the raw 18V DC output to some constant voltage around the rig. To adapt the physical shape of the Ryobi battery, I found an STL model on Thingiverse that someone had already modelled quite accurately: https://www.thingiverse.com/thing:4129039/files This is a two piece model which has the Ryobi "stalk", a leftover from the original sub-AA NiCAD cell design of early 18V batteries, and an interface plate which has indents for the spring loaded clips on the battery itself. To convert the voltage, I found a multitude of DC to DC converter boards on Amazon: https://www.amazon.ca/s?k=lm2596+dc-dc+buck+voltage+converters Many are based around the TI LM2596 integrated circuit, which is basically a single chip DC to DC converter with a bit of support circuitry around them. The input voltage range is 4.5 to 40V DC and you set the output voltage using a trimpot. The only problem with this setup is a current limit of 3A. This would be a problem later, but given their inexpensive price, I figured I'd go with this to start. https://www.ti.com/product/LM2596#params From there, I designed a shroud which would capture the metal "paddle" of the Flyer on one end, the Ryobi plate on the other, and have enough space for the voltage conversion inside. I did this in Autodesk Fusion360 and it was easy to mockup the Steadicam original parts, the Ryobi battery, the already designed Thingiverse plate, all together, then export for 3D printing. I had to print the first attempt in multiple pieces, using Lego Technic pins as alignment dowels, but amazingly, this initial draft worked perfectly. The batteries snapped in solidly and out came "clean" 8.4V DC power.
-
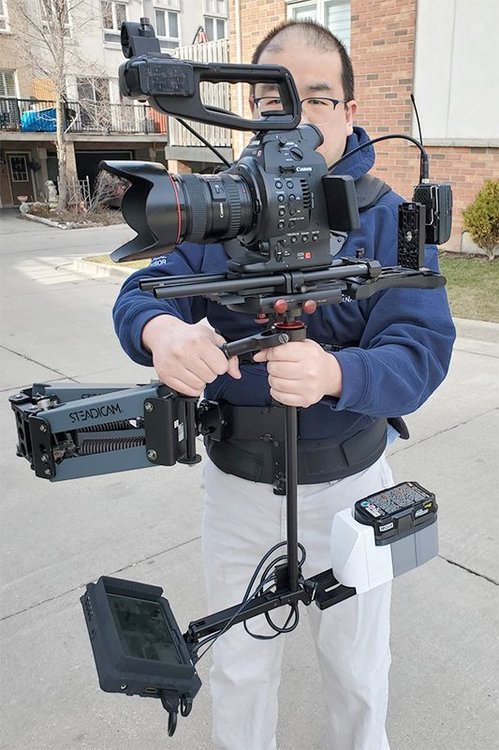
It's been almost two years since I started on a project to repair and learn how to operate a Steadicam, and I thought I'd write down some of the modifications and changes in case anyone is interested in such a thing, everything from washing the vest to prototyping new parts for it. I've been following the Steadicam for a while: In 1997, at SMPTE'97 in Sydney, I saw a Steadicam (ProVid) being demonstrated and I played around with it a bit--it was such an intriguing invention. Over the years I've kept track of prices of low end Steadicam Pilot kits but I have no professional need of such a thing: I just found them interesting. In June 2022, I noticed a local classified ad offering a "Steadicam Pilot" which had an arm significantly different than the Pilots I'd seen offered before. It was put up for sale for $400, which as far as I can tell, was about half the going rate for a Pilot here in Toronto. I visited the seller, who pulled out the giant nylon bag and showed me its contents. As I guessed, it was actually a Flyer. It turns out he'd had it for his business several years ago but never got much use out of it; subsequent potential buyers would come and look at it, and one even bought it and took it away, quickly returning when they realized the system was not a plug and play gimbal you could whip out quickly when you saw the mother of the bride hamming it up on the dance floor with Uncle Ed. The seller warned me, this was not a turnkey system. But I knew what I was buying into: I was purchasing a two year science project. I wanted to figure out how to restore it and operate it, purely for fun. The Original System So $400 later, I came home with the following: Flyer "grey arm" with two "bones". Flyer vest, complete minus one oval plate Flyer/Mini original post/sled, narrow diameter with red trim knobs and Sony NP1 NiCAD battery boxes Flyer/Mini dovetail plate Flyer docking plate A generic NTSC SD analog LCD monitor The giant black nylon bag The bag included a random assortment of objects like a text-adventure video game: One flat 10 pound dumb bell weight, a 14.4V NiMH Anton Bauer battery pack with the property tag of a local rental house, and a pair of brass door hinges, taped together with black electrical tape. It also included a photocopied excerpt of the Steadicam Operators Handbook and various printouts of Internet websites from a decade ago. What it did not include was the collapsible C stand apparently it came with from the factory. My goals would be to: Fly a Canon C100 with wireless transmission system for live events Replace the SD monitor with a cheap HD monitor of some sort Replace the battery system with some sort of unified power source for everything on the rig.= Washing the Vest and the Padded Case I thought the first task was to wash the vest, given these items are worn and probably sweated into extensively. There is very little information about how to wash a Steadicam vest, with most posts suggesting you spray the thing with disinfectant or leave it out in the sun. You can in fact wash it, but you do have to carefully disassemble everything. The hard items like the metal frame that comes across your chest and plastic buckles can be detached and wiped with a Lysol wipe or similar disinfectant spray. The soft vest pieces are made of foam padding blocks encased in a nylon cover. You can unwrap those padding pieces and wash them by hand in soap andwater, leaving them to dry. Any metal elements attached to the soft vest can be unscrewed and removed--in the case of the Flyer vest, the front brace has a set of bolts which go through the fabric--then the entire nylon assembly can be washed separately. To wash those nylon fabric parts, I used Lysol Laundry Additive, which kills bacteria and germs without damaging fabric colour, and soaked the nylon pieces for a few hours in a tub of warm water. Periodically, I would squeeze them to get more liquid through the nylon fabric. Then, I wrung them out in clean water and let the air dry after patting them down with towels. The nylon bag I got had been left in storage out in a shed. This bag also comes apart, with foam padding and durable plastic insert panels in each wall. If you look carefully inside the case once the foam blocks that hold the Steadicam are removed, you'll see internal zippers and folds where the padding and inserts can be accessed. Once they're out, the whole nylon case can be put into a washing machine. To rebuild the bag, it's easiest to roll the plastic inserts into a cylinder, then insert them into the inner folds of the bag and slowly unroll them into shape.

-
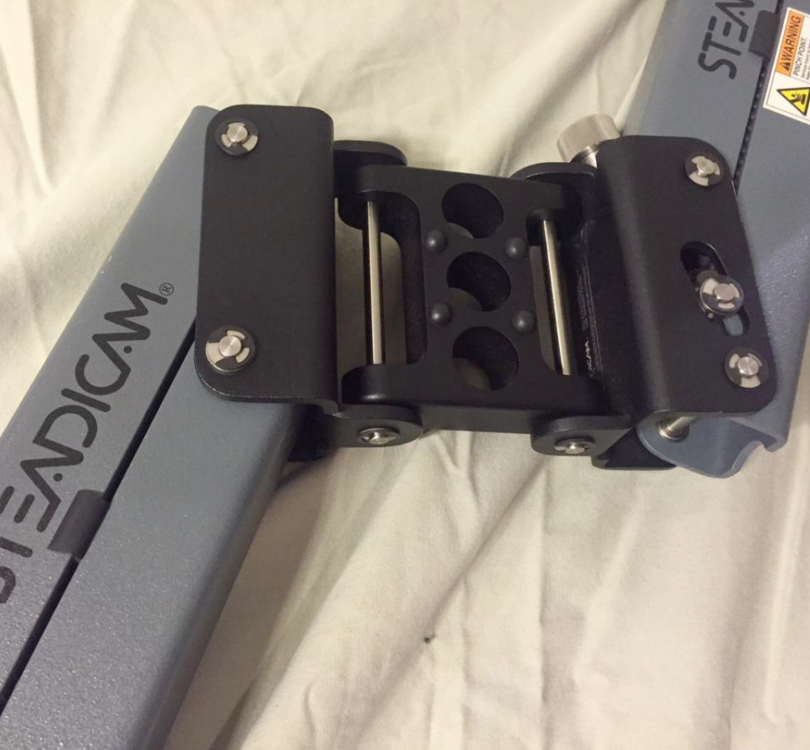
I am probably the least experienced person here, as someone just fooling around with a Steadicam, but the tuning of the arm's neutral position (flopping toward and away from your body) seems pretty key. When I have this dialed in incorrectly, I find the sled runs away from me and I'm leaning out, or the sled is swinging back at me. That tuning is done using the socket block adjustments as mentioned above. This video explains those socket block adjustments: The arm on this Varizoom setup looks fairly rudimentary--and doesn't have the socket block or its linkage screws. I could see why--the Steadicam ones seem like they're machined from billet stock and quite heavy. It also doesn't appear to have any weight adjustment knobs on the arm which set in the up down (booming) trim. The whole thing looks a lot like the Steadicam Mini or SK models which have a simplified arm and vest attachment. I've found watching this site and places like Kijiji here in Canada that low end Pilots and Flyers aren't that expensive, which seem the minimum Steadicam setup. A couple hundred dollars more and I think it'd be a lot more capable.
-
In theory, SDI and HDSDI should work over the same old analog 75 ohm cable, which is what most composite analog video used: https://en.wikipedia.org/wiki/Serial_digital_interface#Electrical_interface The theory was decks/switching gear/cameras etc could change but the studio cabling wouldn't needed to be ripped out. But I'd be concerned about what might be inside, like a distribution amp or different cable type, given some of the Steadicam unique needs.
-
I'm also similarly interested in a different sled. The very narrow post on the original Flyer sled I have really constrains what I can send up and down, especially when using wireless video transmitters.
-
Thanks! This is the whole sled as it stands now. I have to figure out how to replace the gimbal collar with a new socket head cap screw, the previous owner mangled the current one such that it doesn't tighten easily. I have to order from an industrial supplier locally, the big box hardware stores don't carry small diameters. One thing I've love to figure out is how to put more camera functions onto the gimbal yoke, like record start/stop and One Shot focus. And some sort of zoom demand with a follow focus motor.
-
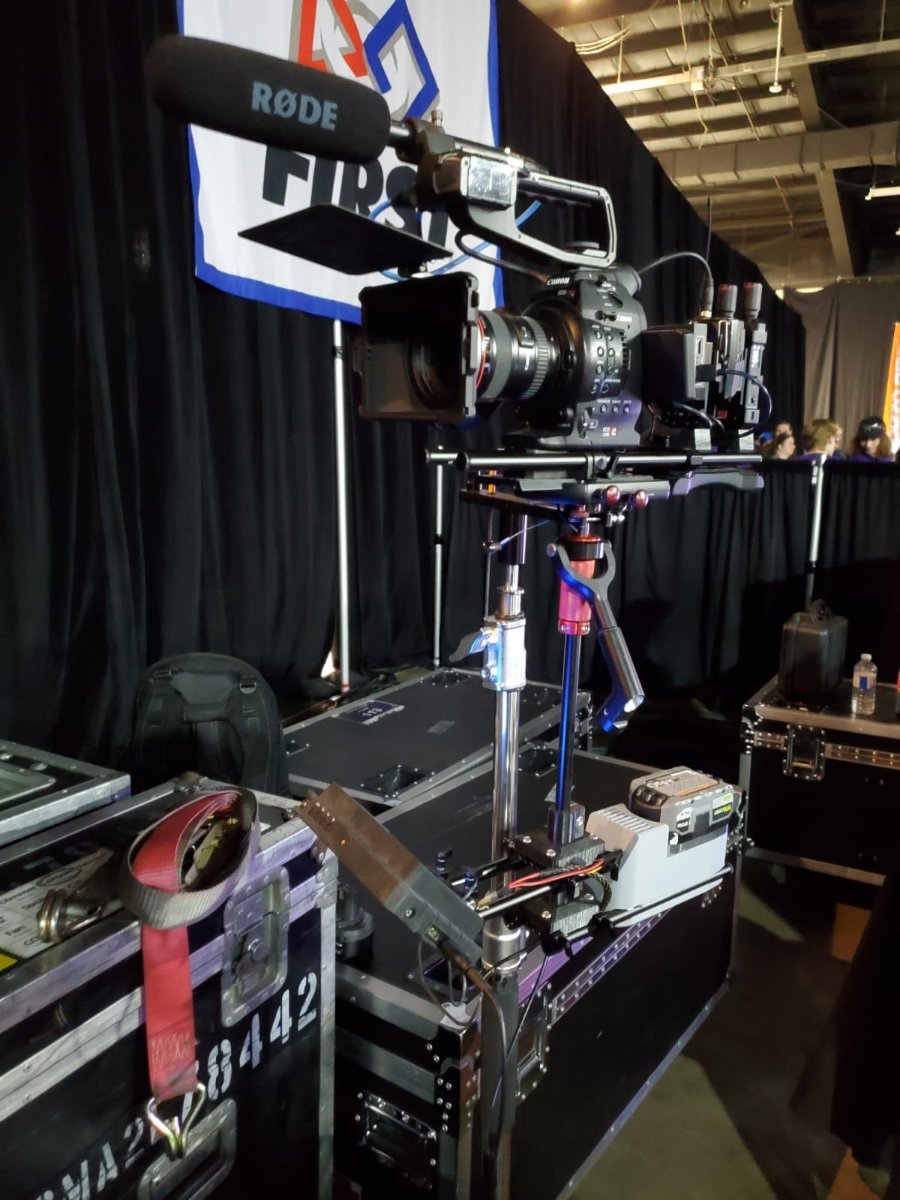
Thanks Bob! Here's some initial photos of the battery system. The battery was always going to be the most difficult component, as I didn't want to invest in batteries yet. I picked the Ryobi system because they have internal voltage protection, unlike DeWalt etc and also because I already had a 2Ah and 4Ah set from a lawn trimmer. (I know all serious operators choose hardware based on their lawn care equipment.) This is the rear battery holder which holds the Ryobi battery: I found a design on Thingiverse for the Ryobi mount (dark grey) and built a shape around it that captures the Flyer battery paddle (white and light grey). I had to print it several sections due to the limited build volume of my printer. I chose this shape to reduce snagging on cables and the like while moving. Once I get some experience with it, I will likely reprint it as one piece. I also designed a few cable clips to help route video and power around the rig. These have a 1/4" hole to thread under tripod mount and similar bolts: One of the next things I will order is some knockoff LEMOs from AliExpress. I spent two hours operating the rig this weekend, trying to dial in the arm tension, block and block threads. I got the sled balanced fairly well, but I could tell watching my footage my posture dying and the arm in/out/side to side changing. One thing I've realized is that my camera is at the very light end of the Flyer payload range, despite leaving just about every option attached (shotgun mount, top handle, handgrip), 15mm rails/shoulder pad. Over time that margin will help as I may need to add a lav receiver and a wireless video transmitter. I now also realized why the case included a random AB NiCad battery and a exercise weight--likely used to weigh down the rig for the previous owner who I think flew a 5D3 on it.

-
Well an update in case anyone is interested--I finally got my Flyer running! The pin is actually a curved piece of metal which forms a cylinder. It expands in the hole to pressure fit. To get it out, I ended up taking the end of a dollar store "jewellers" screwdriver, sawing off an inch of it, then carefully tapping it out with a hammer after spraying some WD40. After removing the pin, I managed to get a MicroHDMI connector through the narrow post, by shaving the connector plastic using a utility knife. I also ran some DC 24AWG through there for power, though I have not set up the camera on the LEMO. I soldered and trimmed the LM2596 DC to DC step down, and put it into a custom 3D printed fairing. So, after all these months, I have the world's only Ryobi drill battery powered Steadicam. Now to actually learn how to use it. I ran my first test today and realized the previous owner had set it up for goofy. But after that, I did manage to get the C100 to balance on its own!
-
Buy used Steadicam Flyer or new model?
Calum Tsang replied to Nolan Dennhardt's topic in Steadi-Newbies
I have no idea what I am doing, so take this with a grain of salt--the only thing I am qualified to talk about is the single old Flyer I bought earlier this year. For what it's worth, some of the first generation Flyers had a grey arm, though some of them are black. I can tell based on this middle hinge, which has three holes: Mine looks like this ad: This is a closeup of the hinge from that ad: Battery systems vary a lot. Mine came with a pair of NP1 slots...but Anton Bauer and IDX are common too. The Flyer vest I have has plastic buckles on the shoulders. There is no leather anywhere on the vest. This site has been invaluable for trying to understand what model is what: https://www.johnfrysteadicam.co.uk/the-steadicam-database/ I've been tracking Pilots/Flyers for a while in the GTA. Most seem to ask roughly $600-700 for a Pilot and about $800-1200 for a Flyer. I suspect you can probably negotiate a lower price, those are asking rates.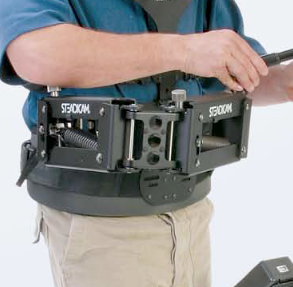
-
Hi folks Does anyone know how to remove this pin? There's a small hollow pin that fixes a cylindrical "flange" to the shaft of the post. The flange piece has four holes tapped for screws to hold the top stage, the pin seems to fix the flange so the shaft won't drop away below. It seems pressure fit in there, but before I jam something through it, I thought I'd ask, just in case it was threaded or keyed some way.

-
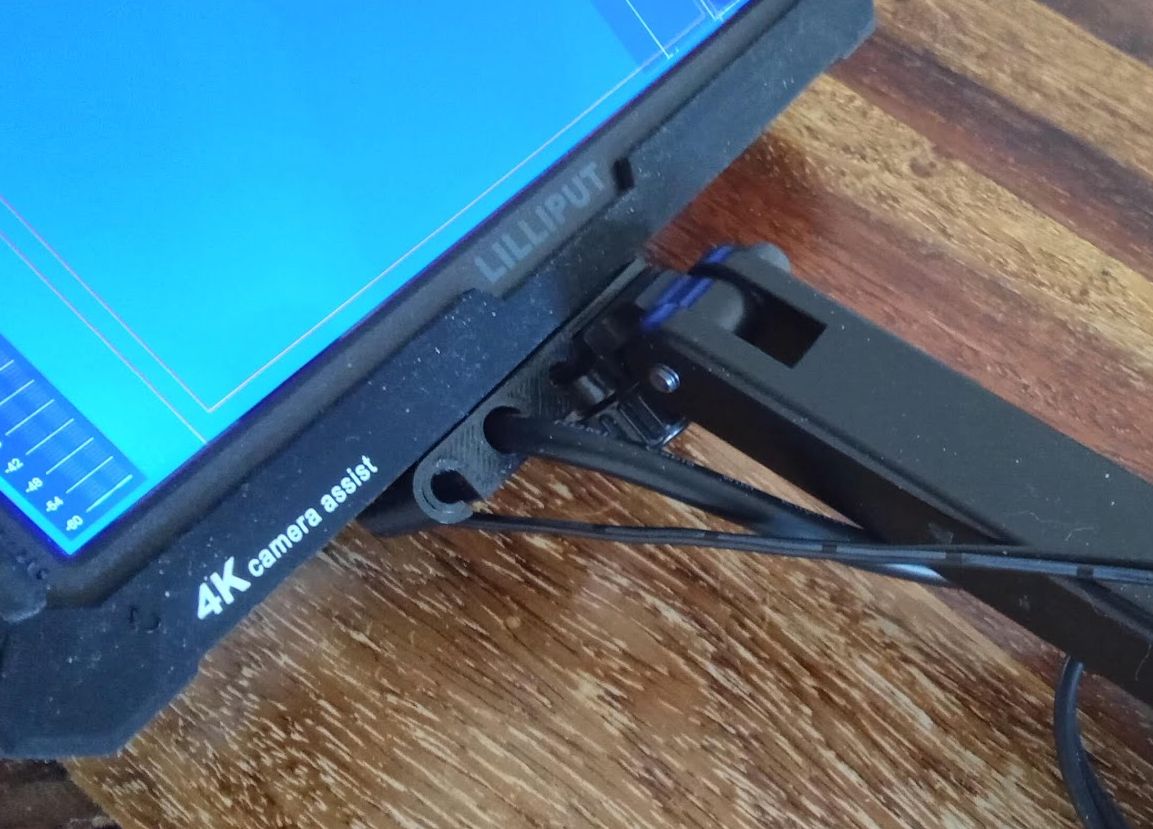
Thanks! After some more digging, it does look exactly like a Mini sled. The good news is the whole system as far as I can tell is mechanically functional. The extent of the modifications is vast and requires significant unworking :) I disassembled and washed the vest. Turns out it's like washing a backpack or stuffed animal toy. Several of the wing screws (socket block, docking stand) were broken, so I found the replacement on McMaster Carr and got them. I cleaned up the arm. There seems to be nothing missing from the arm. The monitor is dim and mostly useless, so I have purchased a new 7" HDMI monitor. I am working on rewiring the center post, which on this generation of Flyer/Mini sled, is very narrow Piping HDSDI is a nonstarter for me, so I'm trying to get a Micro HDMI connector through the post. I will leave the BNC in case I ever need to use it. I will probably reuse the Lemo 0B connector on the sled, in case I ever need to fly another camera, such as a C300. I have designed and printed a fairing for a new battery to sit on the bottom, which will fit a (don't laugh) Ryobi drill battery and include a LM2596 DC stepdown converter to run both the monitor and C100. As I don't quite want to invest in a V lock/D tap battery system yet, this is by far the lowest cost/risk approach. I have to figure out focus assist/servo zoom I have to figure out how to clean the case it came in. It's a giant square velcro bag and was left in a garage so it seems dirtied by rodents etc. This is a big science project for me, so it's been really interesting.
-
Hi folks I recently bought a used Flyer and am modifying it for use with my C100, eg plumbing it for HDMI video and a new battery system. As I'm just experimenting with it, my goal is the lowest cost approach to making it work right now. One question I was hoping to learn more about was what exactly I have. I believe what I have is a very early Flyer original model: The arm is what appears to be an original Flyer "grey arm". It has a label which says it was manufactured by Tiffen and has the "modern" Steadicam logo. The sled on the other hand has a label which says Cinema Products (but with a Tiffen QA sticker) and has reddish adjustment knobs and a red gimbal grip. It has dual NP1 battery holders which appear to be original as the "paddle" has holes machined exactly for it. The lower sled is missing the Flyer branding on the monitor arm. The power cabling on the other hand is completely hacked around to power a third party LCD SD monitor, but the upper stage has a two pin Lemo 0B on it. The post is narrow, with a 15.8mm OD and the dovetail plate is about seven inches long. From what I've read here, the sled appears to be for a Steadicam Mini, which is functionally identical to the early Flyer sleds, except for colour. Is it possible that early Flyers shipped with surplus Mini sleds? As far as I can tell, there's no difference in appearance or operation from the manual. Thanks!