Bryan Bullard
-
Posts
17 -
Joined
-
Last visited
-
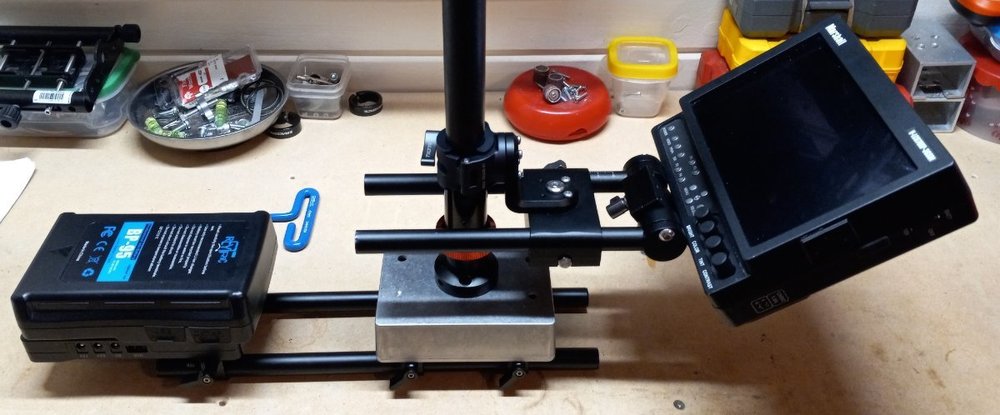
As some of you have seen over in the specific topics I was doing all kinds of crazy stuff to a Pilot rig. All to no avail. Haha!! Well I bit the bullet and cashed in some vacation time and bought a Scout. Scout sled, Flyer arm and Scout vest. Not really too sure which Flyer arm it is. As you can see in the pic I have done some mods. Added 2 more power lines and another HD-SDI line. I put some feelers out there for the Zephyr top stage housing skirts but Tiffen US and UK doesn't have any and Mr. Luna said the same. Still would like to get those pieces if anyone on here could help. I didn't really want to put all of that outside the stage but thanks to Steadicam there just so happen to be 2 tapped 5/32" holes on the bottom of the stage. No I idea what they are for but they worked perfect. Had to cut and file some channels for the mounts but no biggie... I also switched out the 3 pin Lemo for 2 pin because I have all 2 pin OB connectors. Used the IDX battery plate on changed it to a 1B 2 pin. Everything works as it should. I'll explain the bottom soon enough. And this can all go back to it's original state if needed. Notice I had to add a lot of weight to the top. Extra Glidecam weight plates sandwiched between a SmallRig Arri dovetail and the Steadi plate. Flies like a dream...(after balancing the gimbal yoke, PITA!!!! Haha!!) Feel free to ask any questions. Peace!!!
-
Zephyr top stage plastic housing
Bryan Bullard replied to Bryan Bullard's topic in Camera Stage/Donkey Box
So even though Tiffen sells new Zephyr units, they do not carry the parts for them.... They sent me the diagram for the top stage... I just contacted Tiffen UK and am waiting for a response. Kinda strange that they wouldn't carry any replacement parts for their products...??? topstage zephyr.PDF -
Hello all, I'm looking for the plastic housing for a zephyr. I need to add some wiring to my Scout and I'd like to have it all internal instead of a bistro box mounted outside of the stage. Anyone out there got one laying around? LOL I'm waiting to hear back from Tiffen, so I thought I'd put out some feelers. Thanks.
-
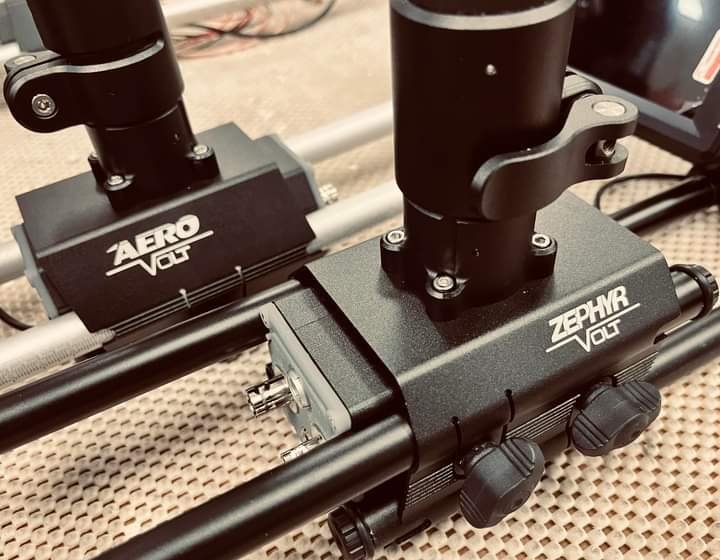
Holy Moly!!! When Jerry was giving the demo of the Zephyr Volt, mind blown!!! Now a motor for the pan??!! Crazy game changer!!! Those whip pans were wild!!!
-
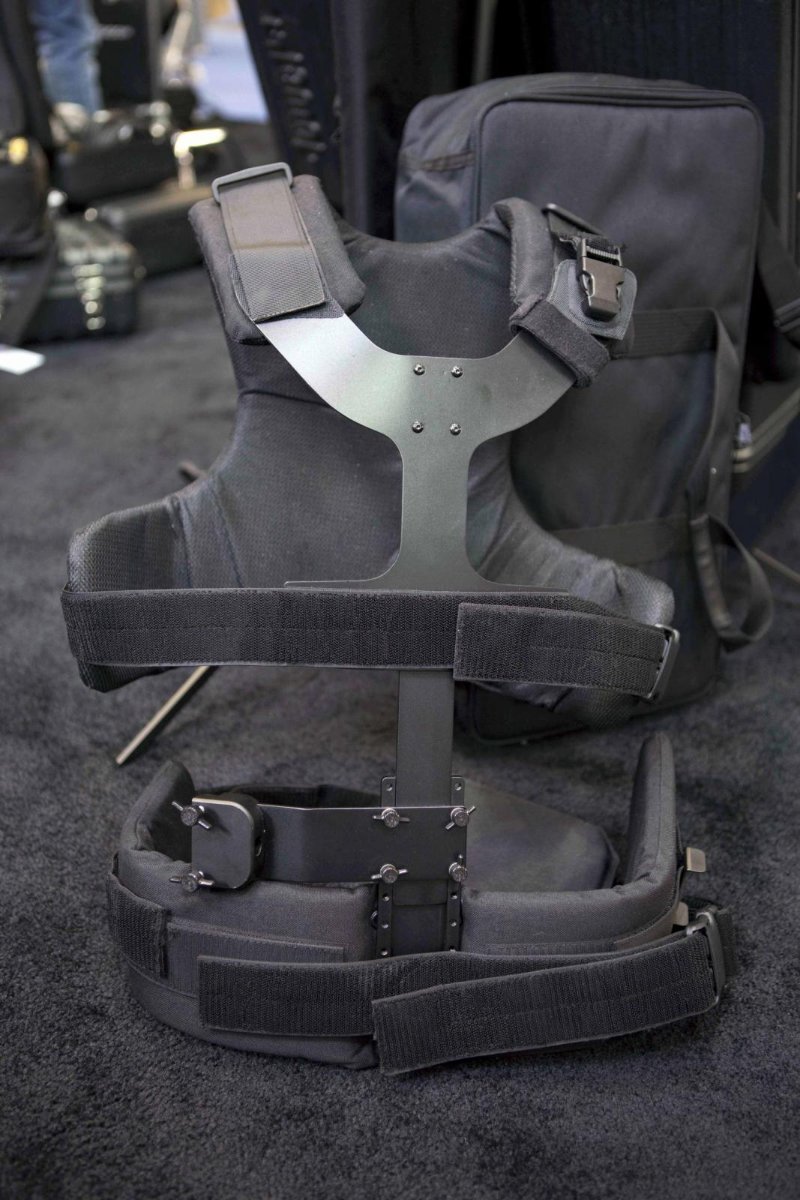
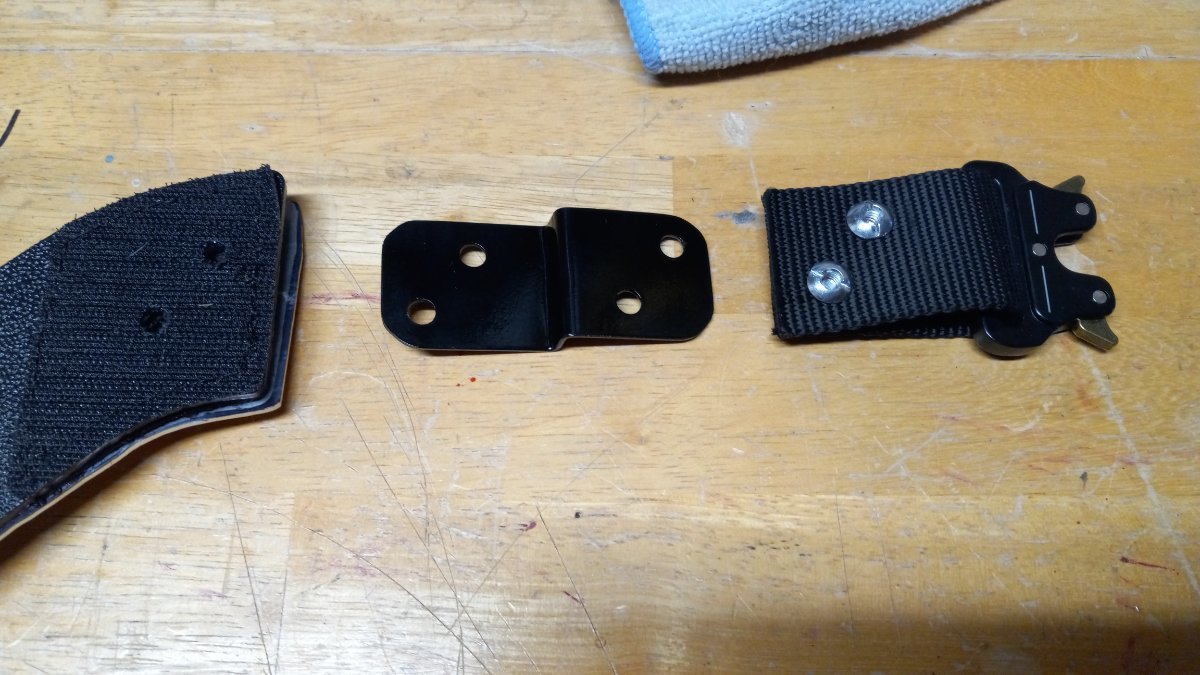
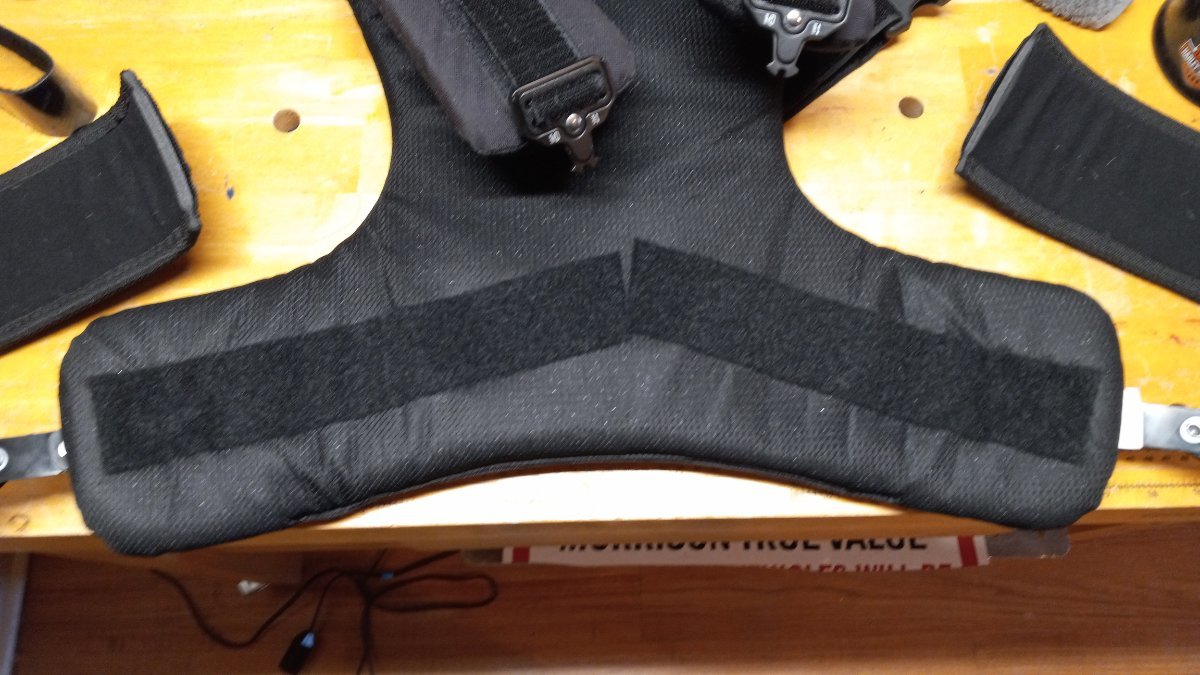
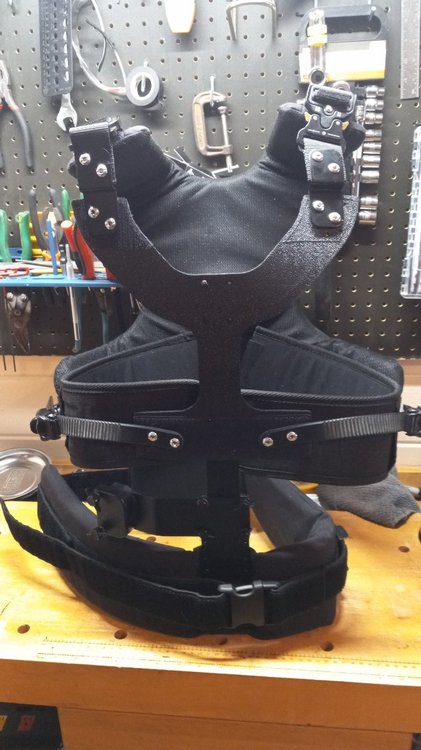
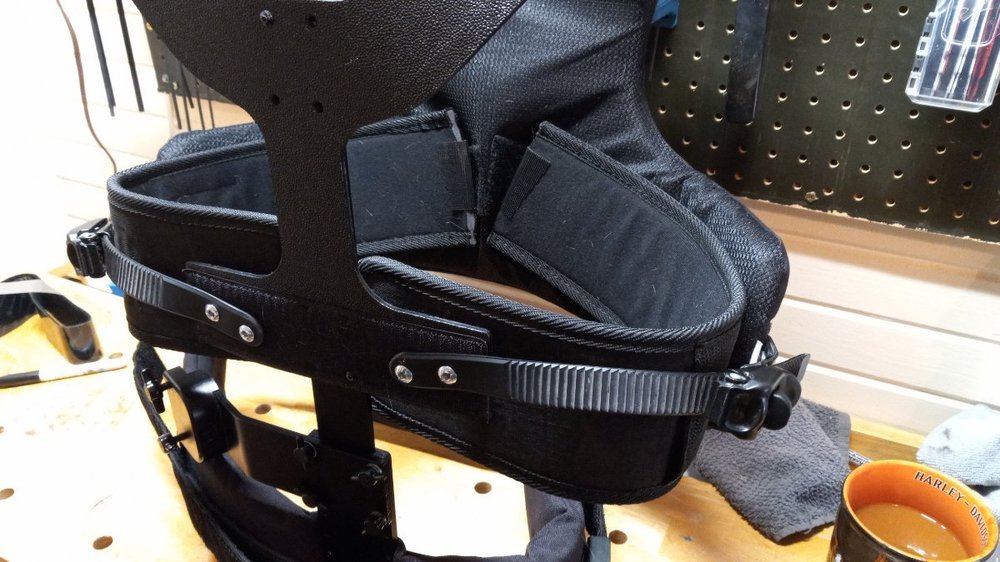
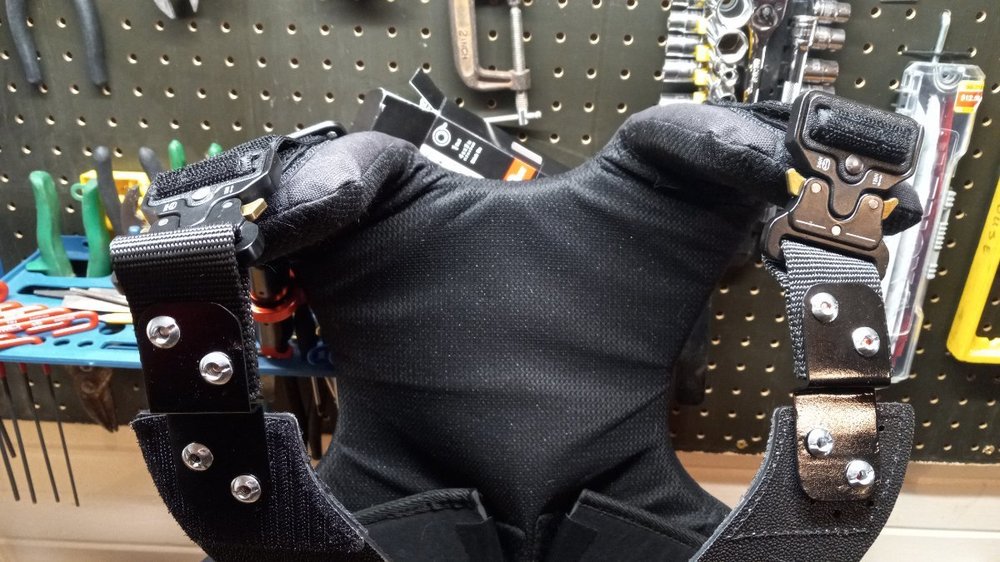
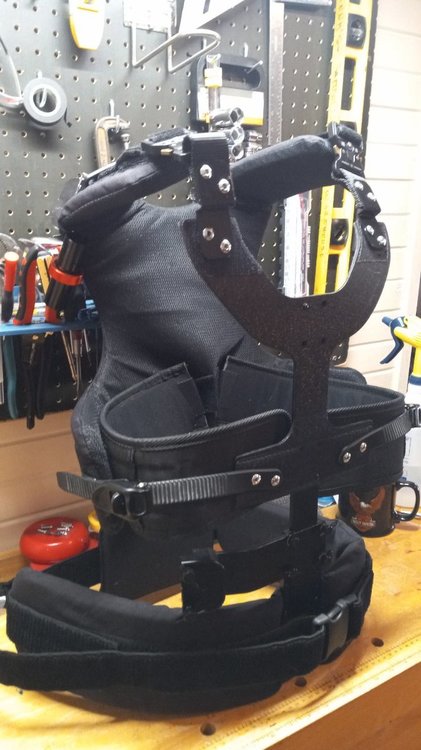
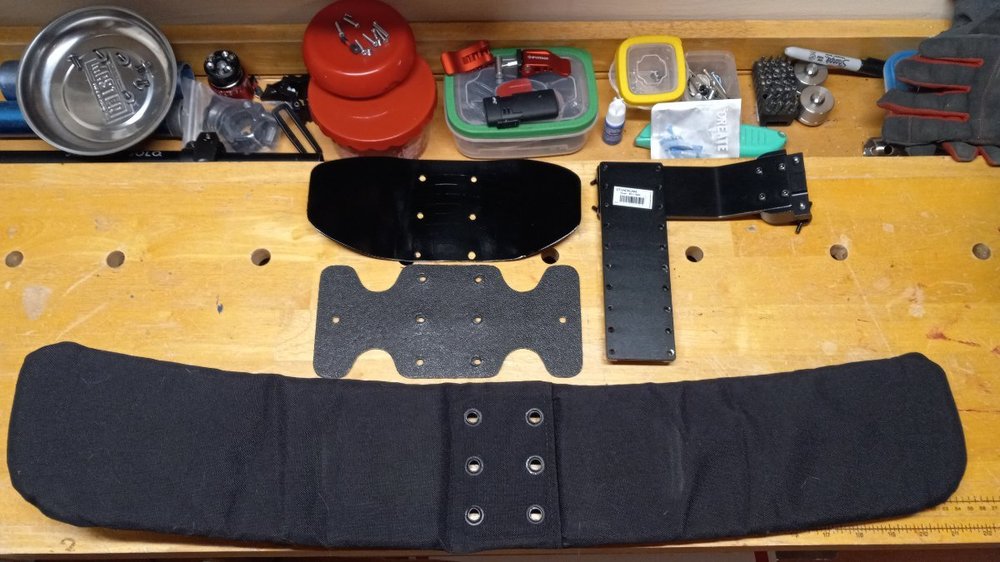
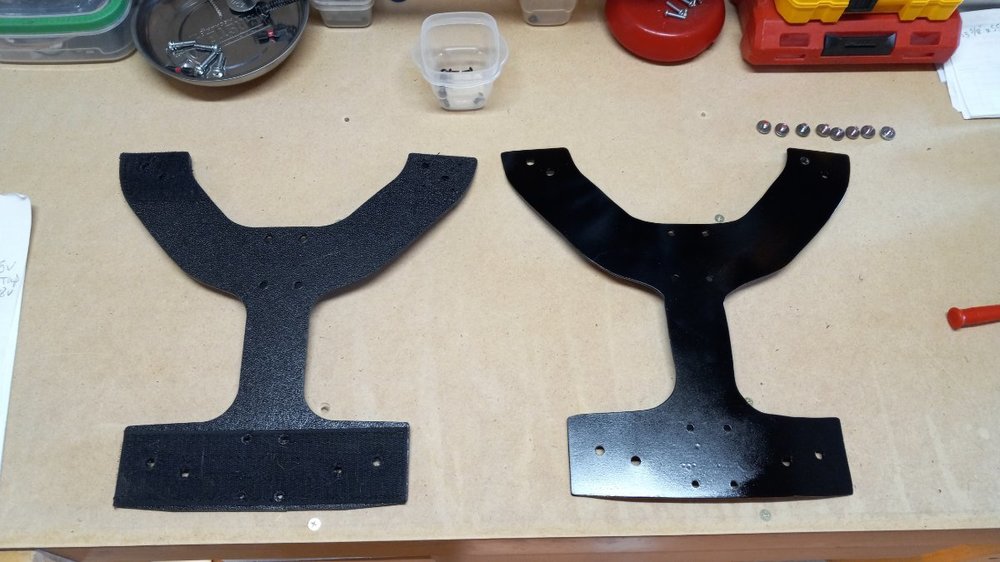
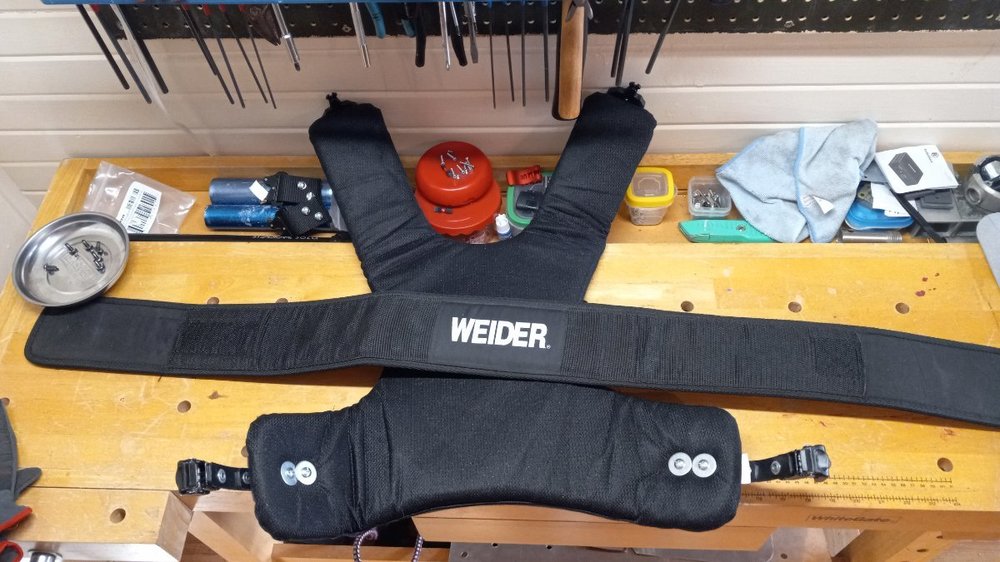
As you can see in the sled section I did quite a bit of modifying to the Pilot. I wanted to mod the vest as well to better fit me. I'm 6'2", 200lbs. The Pilot vest was not really made for me. LOL. And me being me, I had to put on my thinking cap and get to work. I have looked at so many different types of vests and wanted to emulate various parts of them. Mainly the chest plate area. While the vest itself does what it is supposed to to do, I wanted more. The connection at the top of the chest plate to the padding was weak. The middle area didn't fit my rib cage. And all the plastic just made it feel cheap. Where I live it's hard to find aluminum stock anywhere. I had to find it in everyday items. The plate I cut for the chest plate is from a tow away zone sign. It's 1/16" thick 5052 H38. So I knew it would work. The piece I cut to replace the plastic at the waist was from what's called a Hawk. Used for holding mud while doing drywall. Not sure of it's tensile strength but it works. Since I work at a hardware store our warehouse has various odds and ends laying around from either customer returns or damaged products. I'm lucky in that sense. The ratchets came from a set of drywall stilts. The stab buckles I got from Amazon when I bought a 4 pack of "tactical" belts. I found a weight lifting belt at a thrift store and used it for cushion under the ladder straps. I just happen to have quite a few of the small barrel bolts on hand so that made life easier. I'm always keeping an eye out for random pieces of aluminum that might come in handy. A thought I've had for awhile is getting ahold of a Flycam Vista II vest and just using the chest plate and spares from it with the Steadicam padding. I would change all the buckles and knobs and locating pins because from what I can tell they are not of great quality. Just a thought.


-
Am I seeing this right??? Aero Volt and Zephyr Volt???!!!! Wish I could be there!!!
-
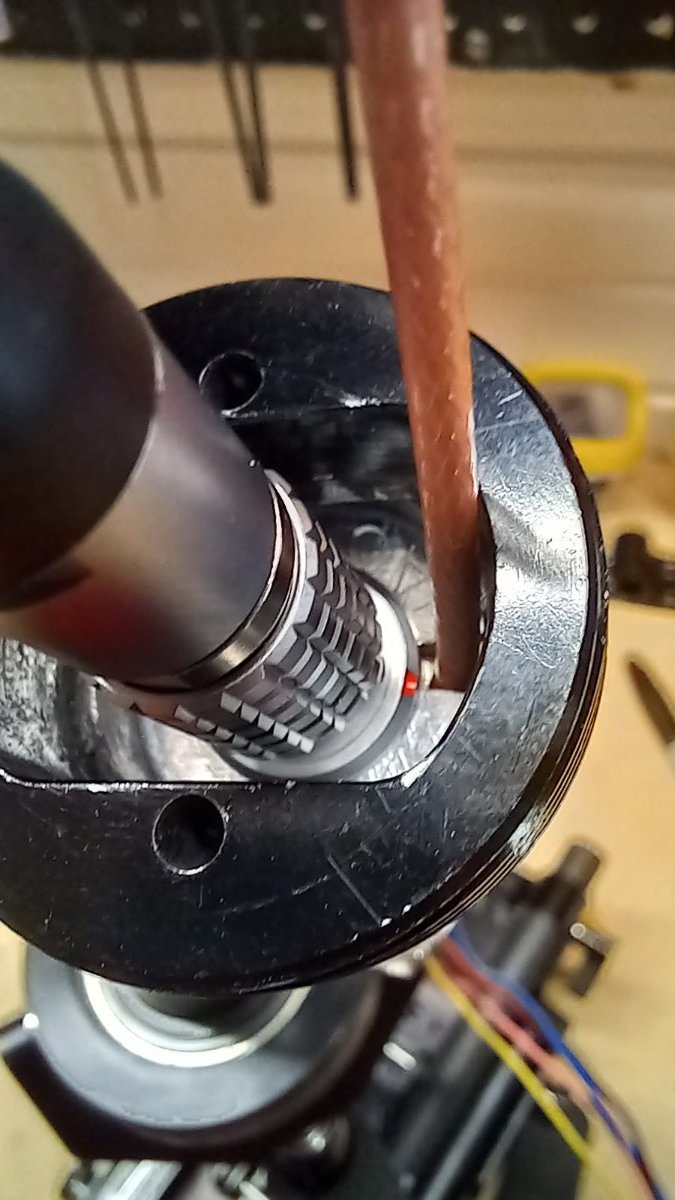
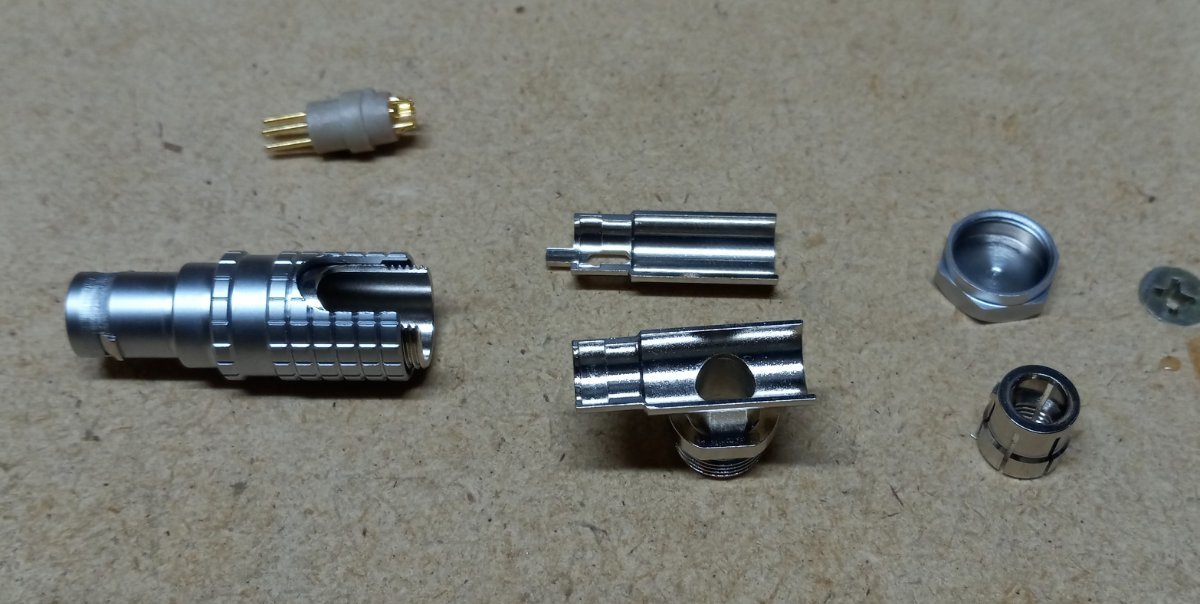
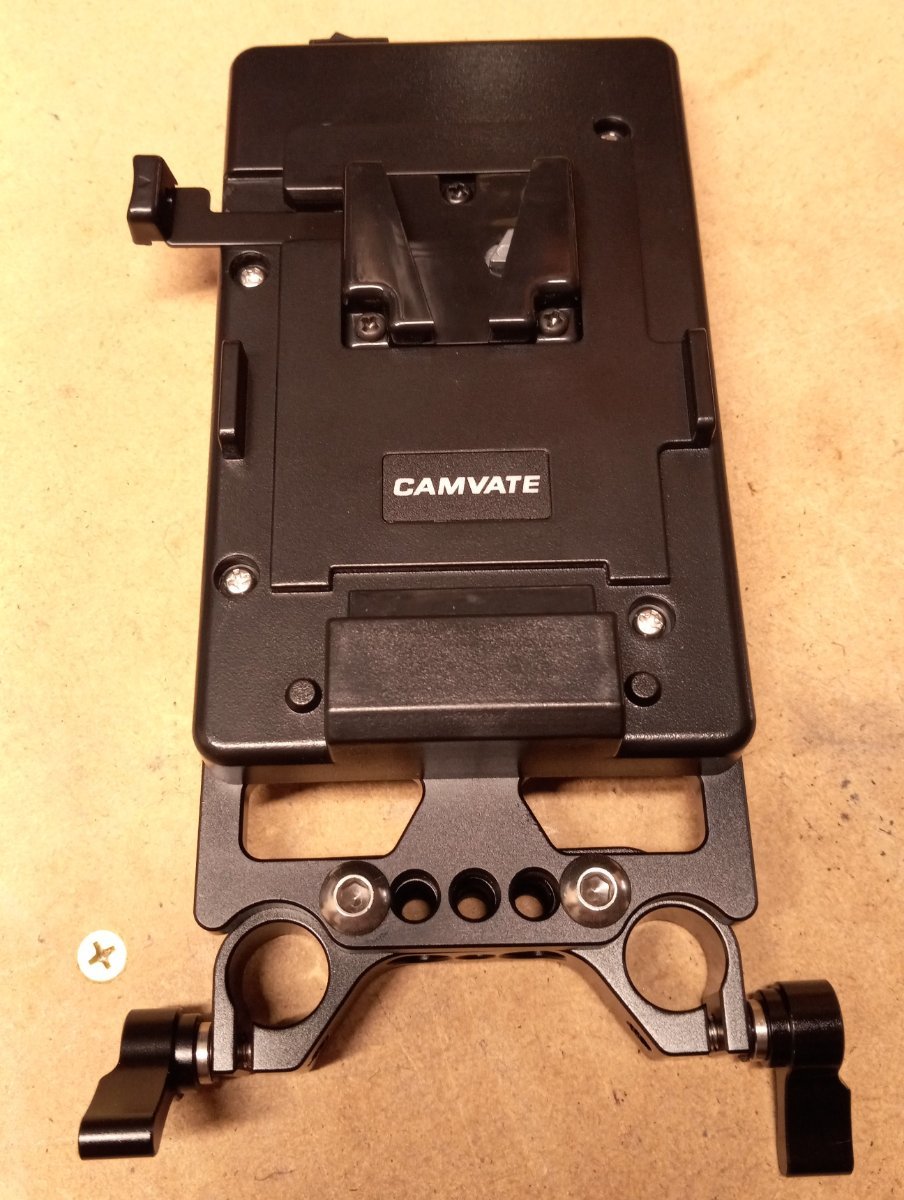
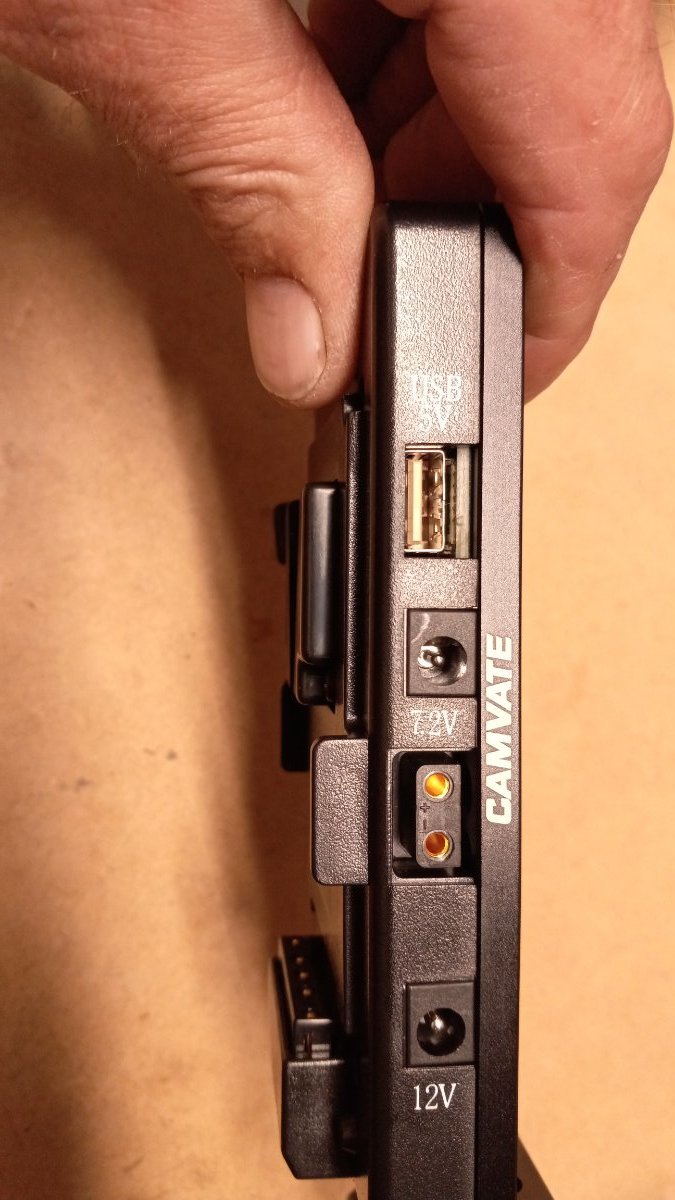
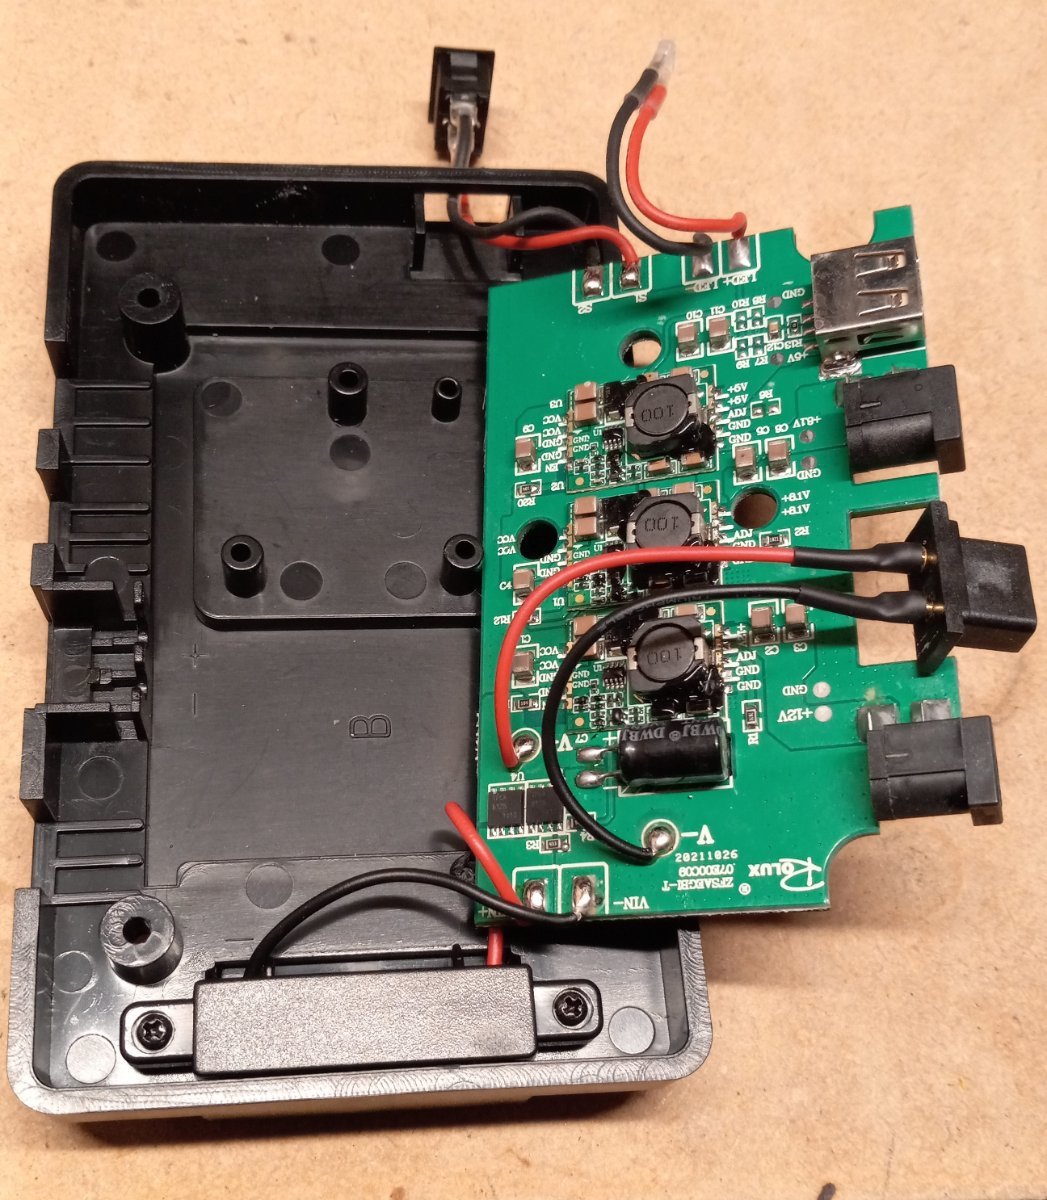
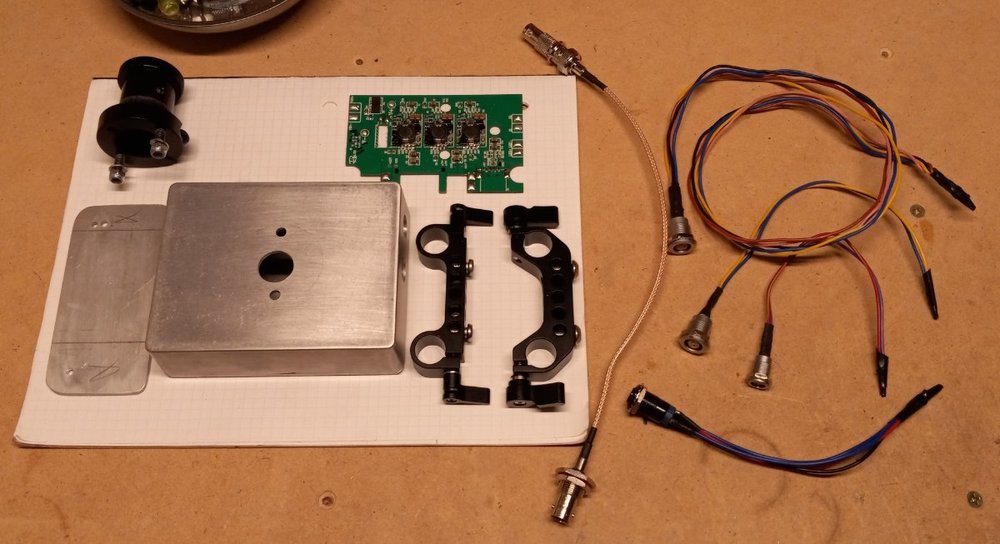
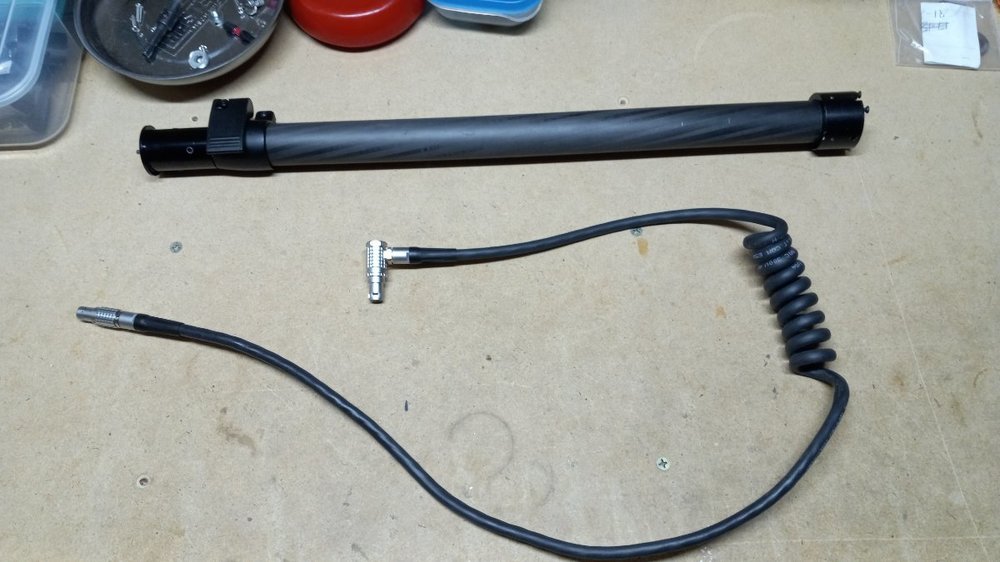
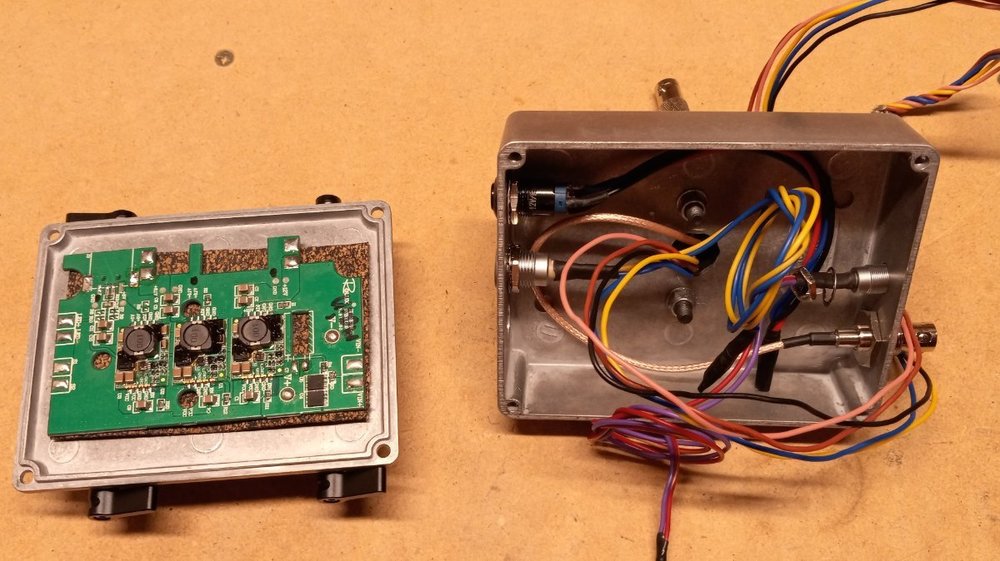
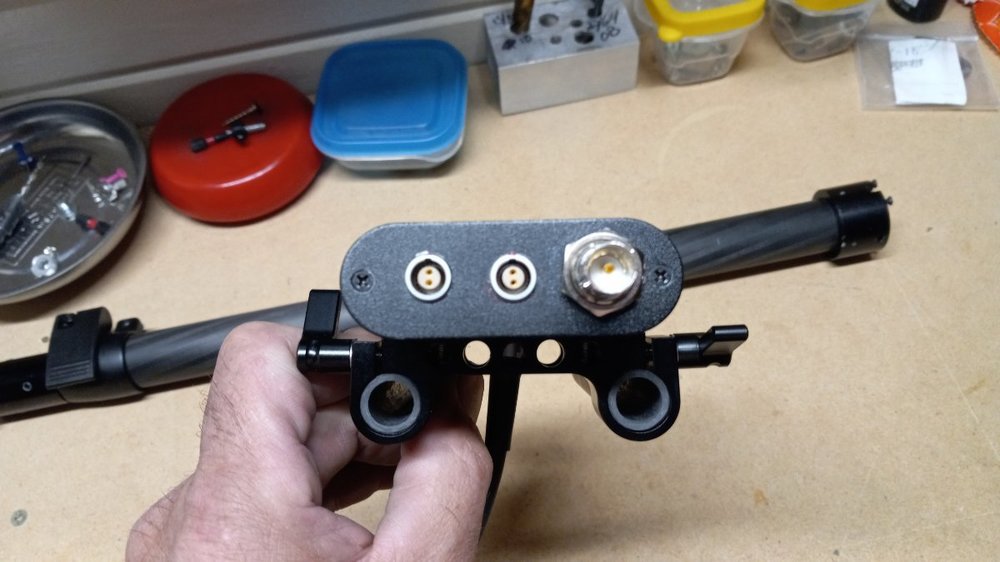
Thank you Nelson!! Ok so this part was a PITA!! I really wanted to have options for this build. I guess I had it set in my mind to build this like a big rig. You can see in some of the pics that I had 5 sets of 22 gauge wire running through the post. That was quickly scrapped! I had initially thought of getting LEMO to make a custom coiled cable for the rig but quickly realized how expensive and unrealistic that would be. Plus the connectors are expensive as well. So I came upon the LEMO compatible push-pull connectors and sockets on Amazon. Reasonably priced at around $20 or less a pop. I was hesitant at first so I just ordered an OB 2 pin socket and an OB 2 pin plug. Actually not bad!! Well made I must say. Now for the coiled cable. I chose to go with A cable from https://www.coilcablespecialist.com/ I went with a 4 core 18g cable. $50. It was 12" coiled and extended to 10'. A very well made cable!! Only problem was the diameter of the coil would not fit in the upper tube. So in my infinite wisdom (Haha!!) I had to cut the cable in half and straighten out one end and rewrap the coil around a screwdriver and use a heat gun to slowly change the structure of the cable. Yes it worked. Came out better than I thought it would actually. So the concept was that I could run all my positive leads and only one ground from bottom to top. I wanted a 12v, 7.4v, and 5v. I knew 18g could handle the voltage and the amps for my purpose. The only problem was the actual power distro. I first thought of using adjustable buck boards for voltage drop and regulation but I didn't really trust that. And knowing that all the companies use custom made circuit boards I needed to rethink my options. Then it dawned on me that why don't I just use a V mount board that has the needed voltages. So I came across a replacement board from Camvate. It had the needed voltages and the measurement were perfect for the aluminum box I had. I found the model on Amazon that it fit and it came with a Vlock mount and a rod mount as well as a cheeseplate. Well Murphy's Law came into effect and I burned up the first board because I wasn't paying attention to the leads and reversed the polarity!! Ugh!!! $80 down the drain!! Ok so I got another one. Got it all wired up and lo and behold a freakin washer fell on the 12v contact!! $80 down the drain again. They say third times the charm and I guess they're right because it all works great. I'm only running 12v, 7.4v and 5v up at this time. So now all I do is mount the battery and turn on the system and I am able to power the monitor and camera and a HDMI to SDI convertor from one battery. I soldered everything myself and let me tell you that soldering 18g wire to a 1B socket and plug is very tedious. Patience is a virtue!!! The only way to get the SDI line and the coiled cable was cut a notch in a piece of aluminum I got off of a LAING stabilzer I bought thinking the gimbal would fit the Pilot but it didn't so I just used some parts off of it. The socket actually fit perfect in the hole that was already drilled in it!! I mounted it inside the tube connector with 2 set screws to hold it in place. I can plug and unplug anytime I need to take the bottom off. Ok since I've written a novel about this and I'm sure I've left plenty out I will leave it to the pics to explain. Any questions just ask. Peace!!!


-
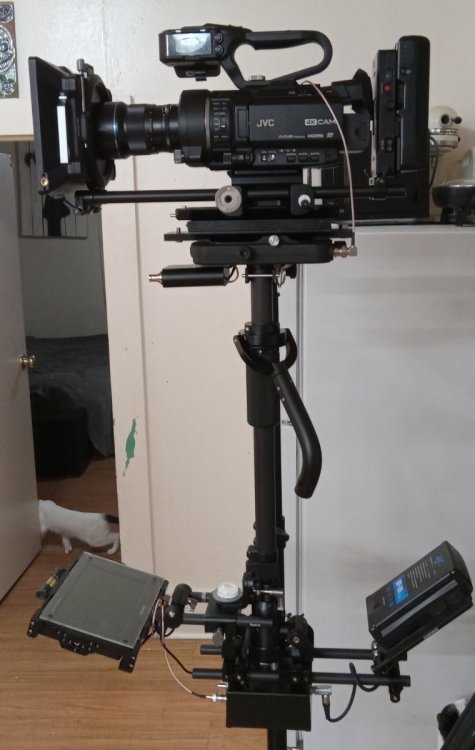
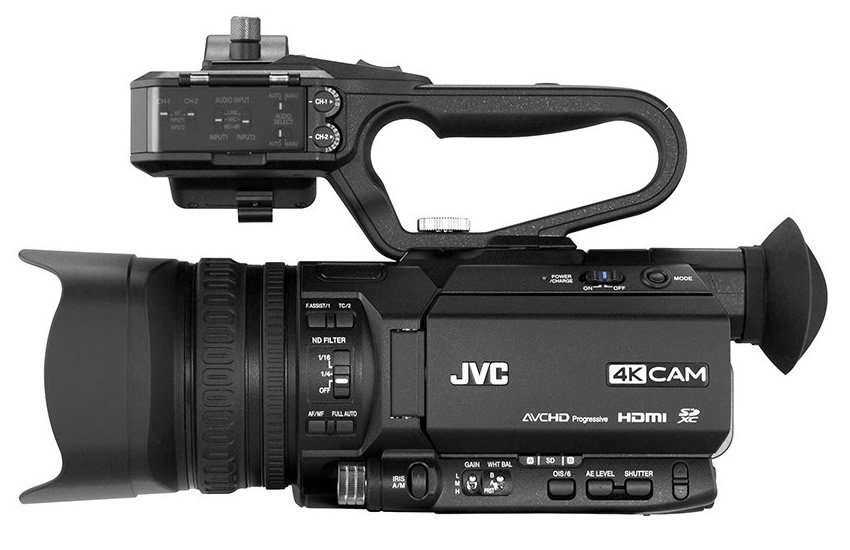
So I took my rig to work yesterday to get an official weight. We have a heavy duty mailing scale for sending packages back to our distributors. The sled with camera, battery and a Marshall monitor came in at 15.3lbs. My arm is pretty much maxed out! I'm at eye level(I'm 6'2") with the arm backed off from max about 4 quarter turns. UGH!!! Mind you this is with a Canon XH-A1 with a dummy battery. I have a new 4K monitor but for some reason it will not take the signal from the Canon. The Marshall takes it at SD. And the Marshall is heavy as hell!! So I know I'll shave a few ounces off with that. With camcorders being as light as they are these days (i.e., JVC GY-HM180 at 2.43lbs) it will be lighter. Only problem is that weight is from the top and getting the balance is going to be a nightmare!! Major problem is the yoke and handle of the gimbal not being able to handle the weight. Ah the trials and tribulations of DIY!! Haha!! Next up will be the wiring for this thing. Peace!!
-
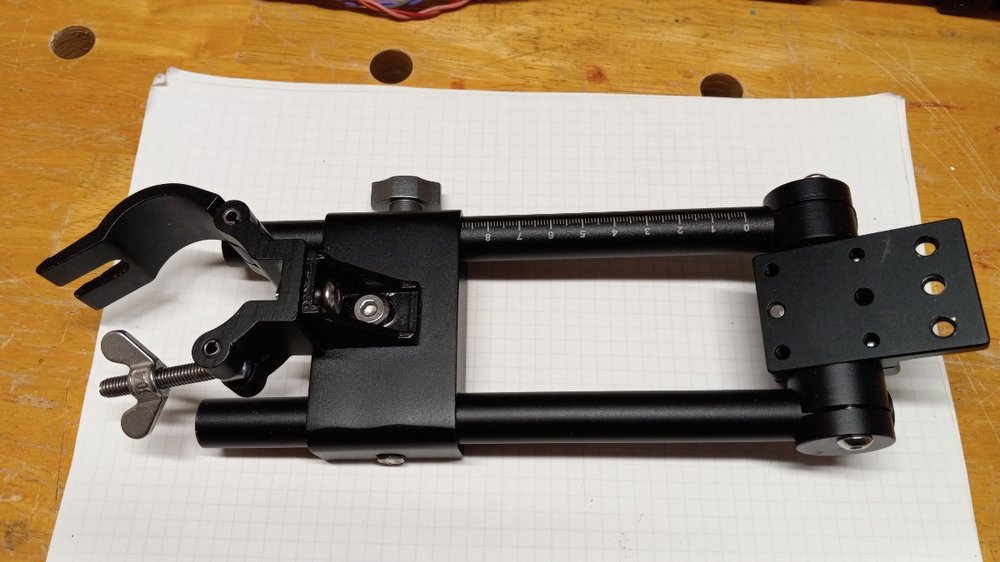
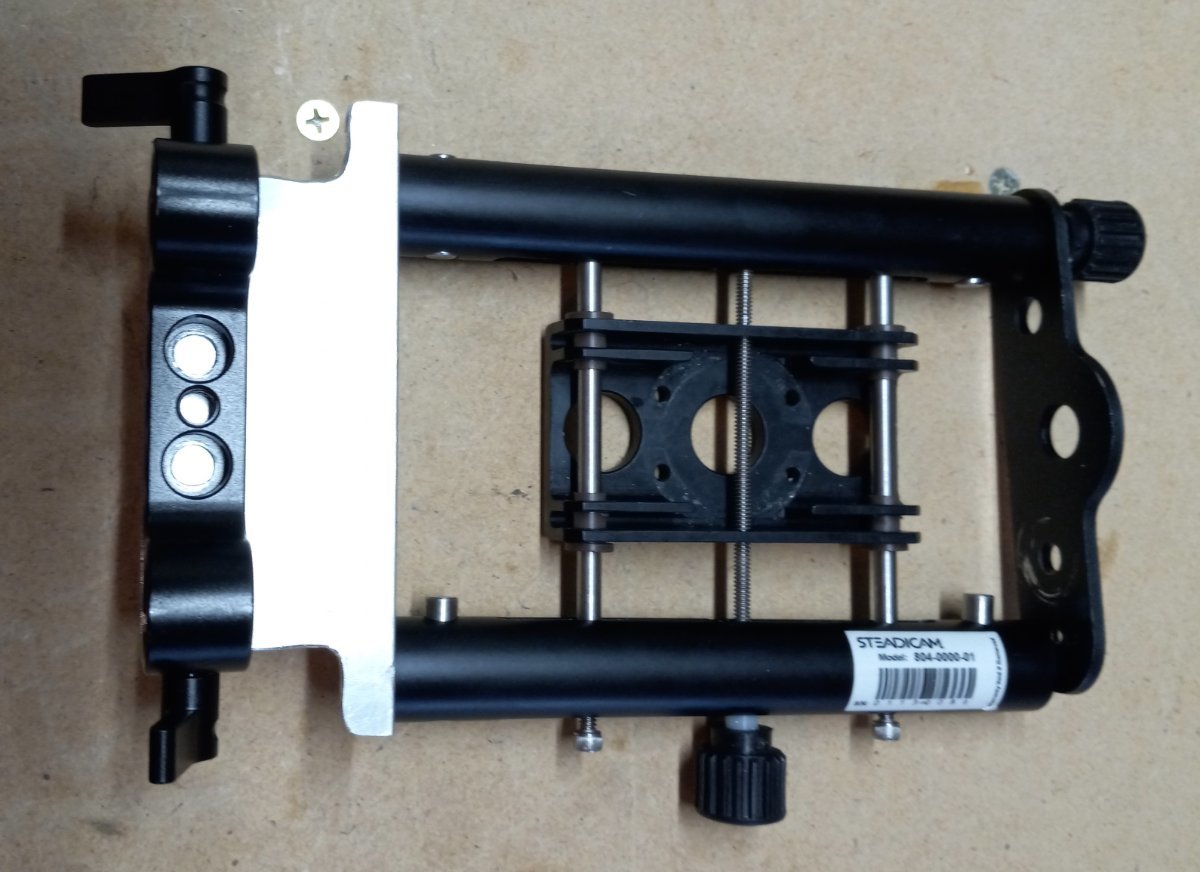
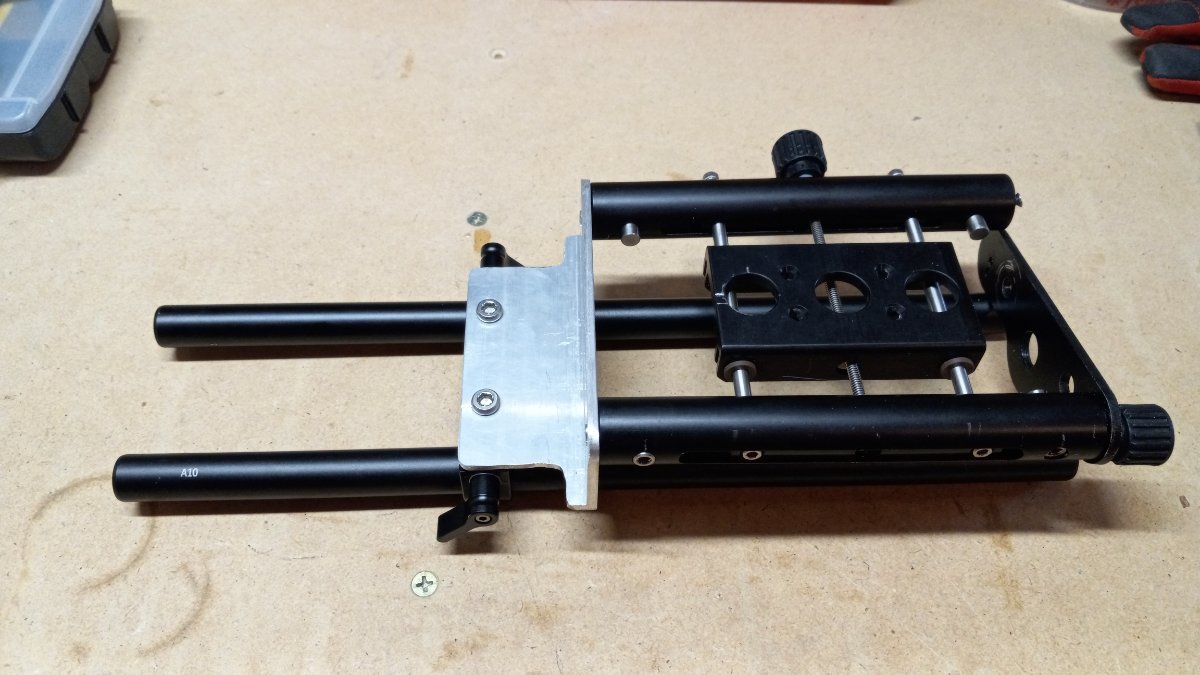
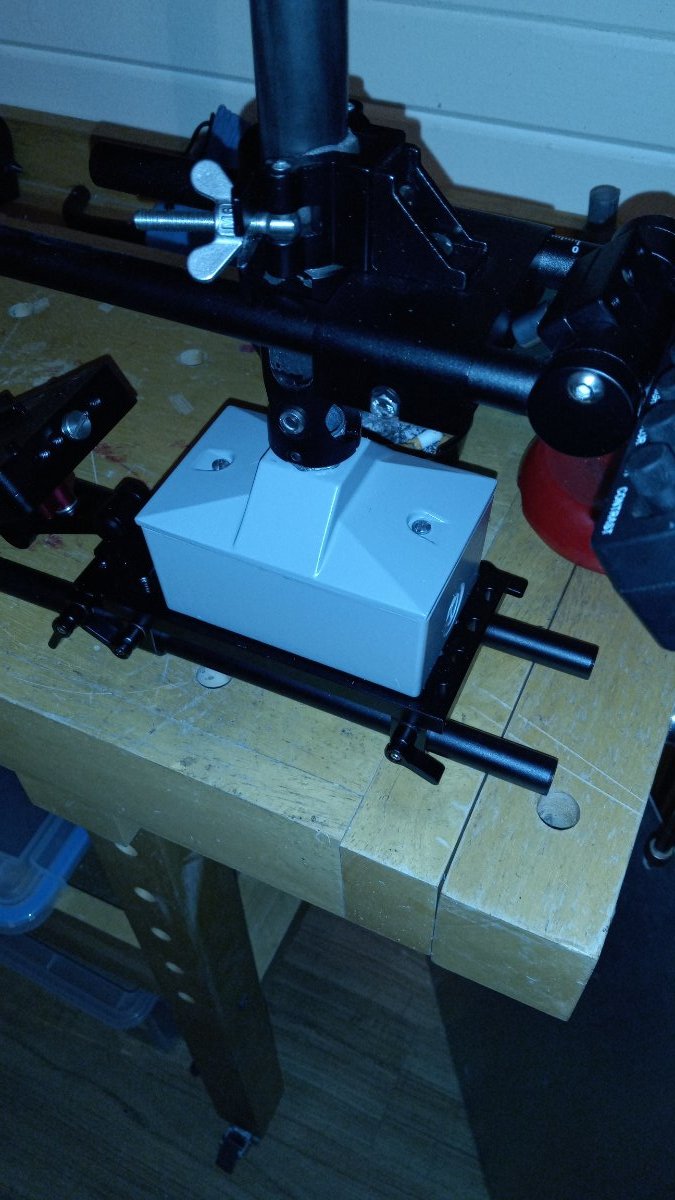
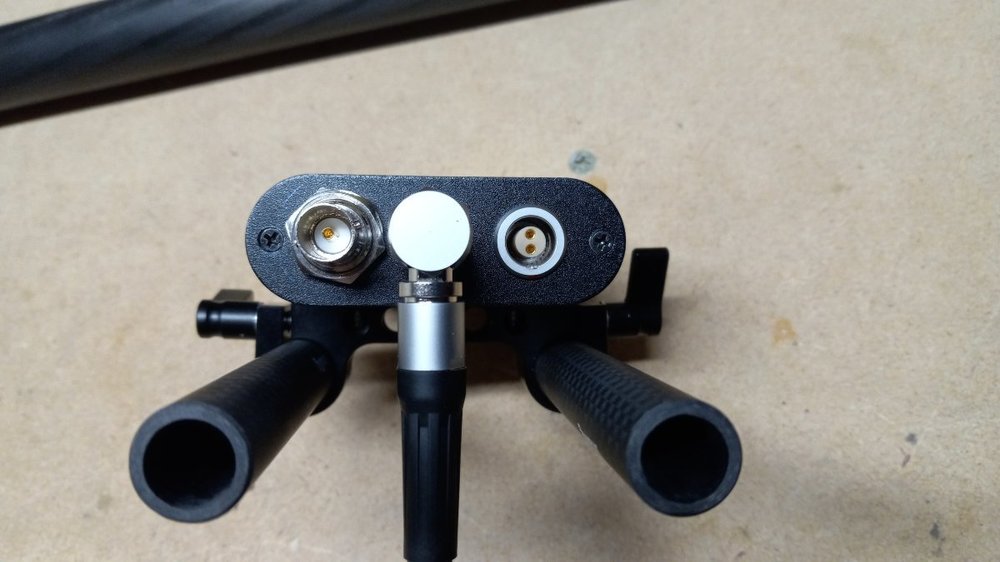
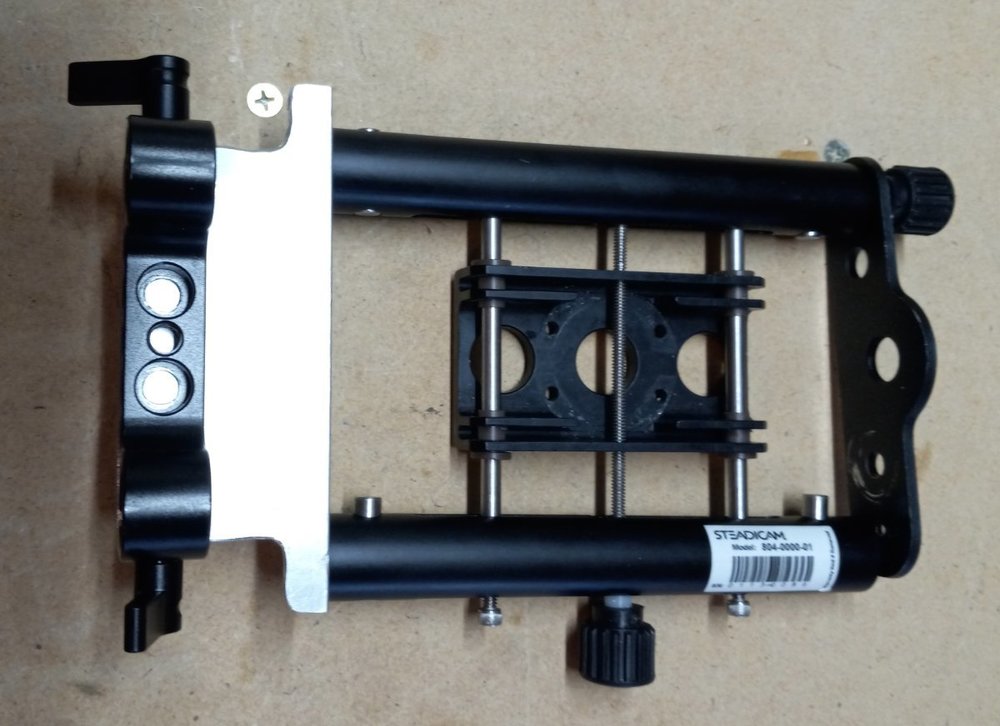
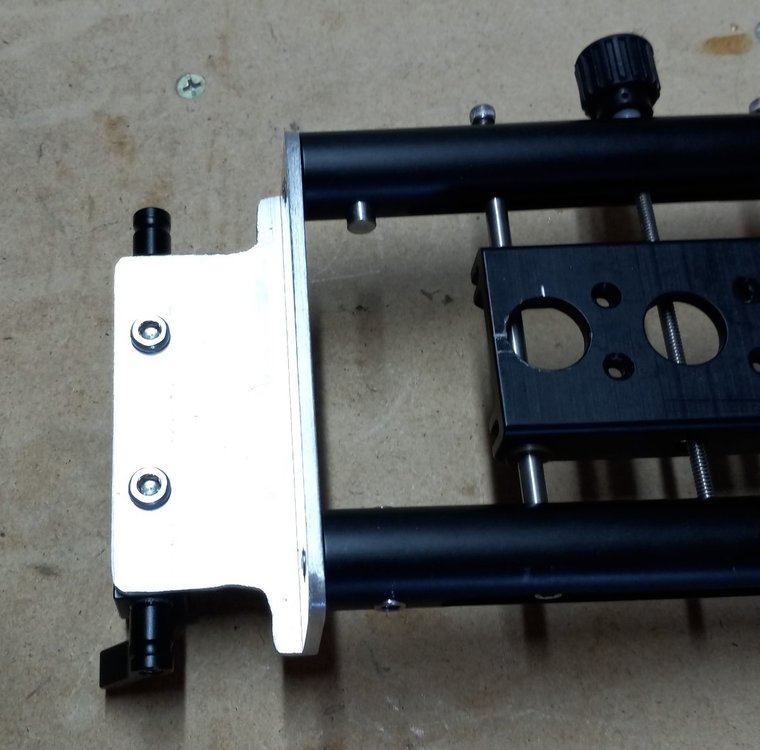
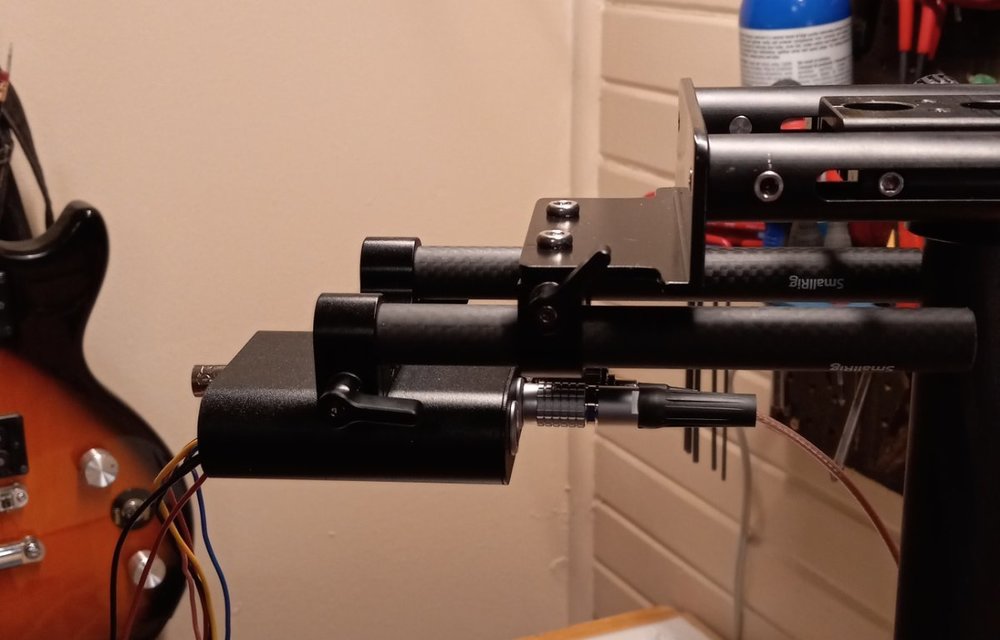
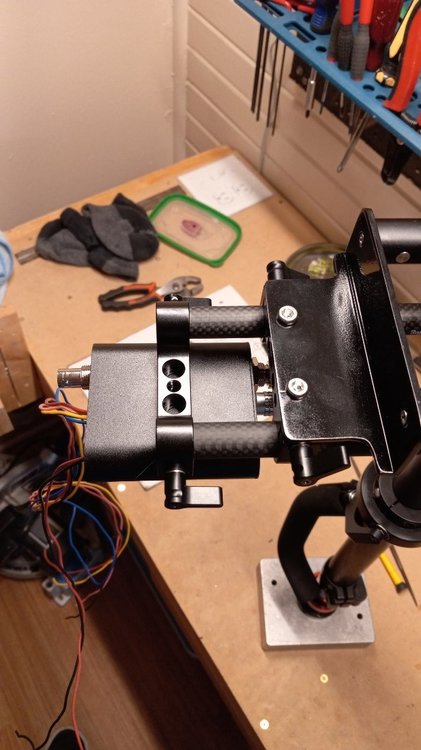
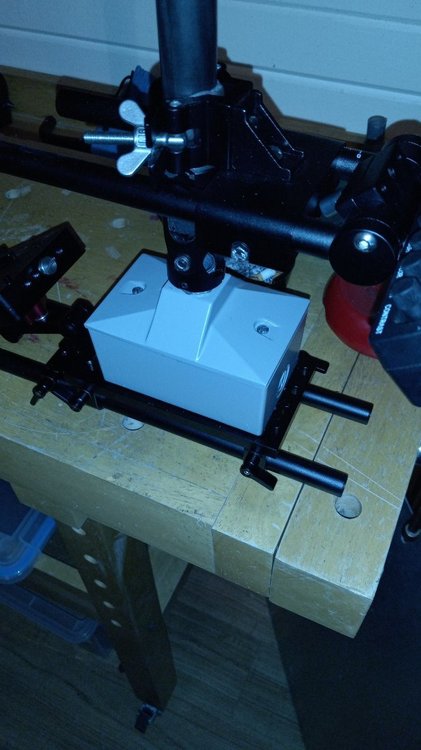
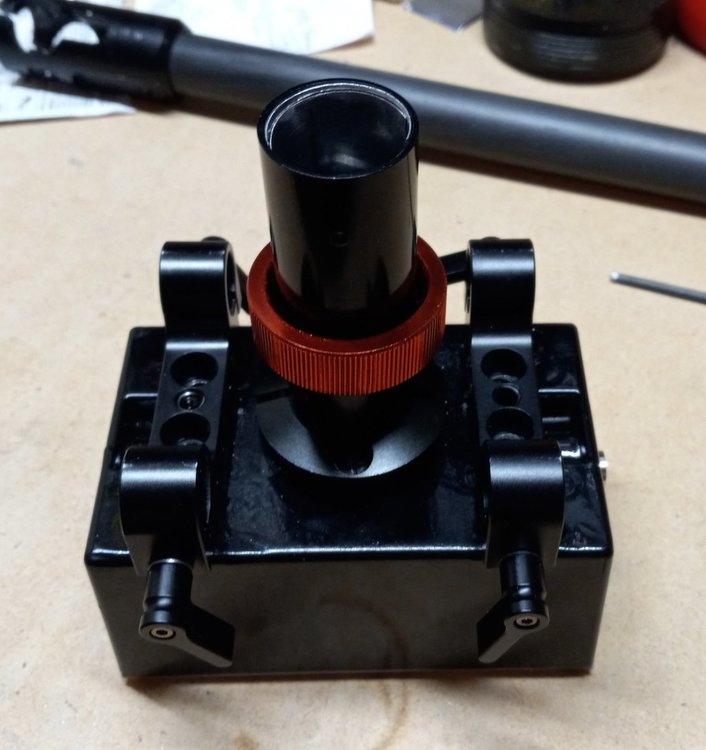
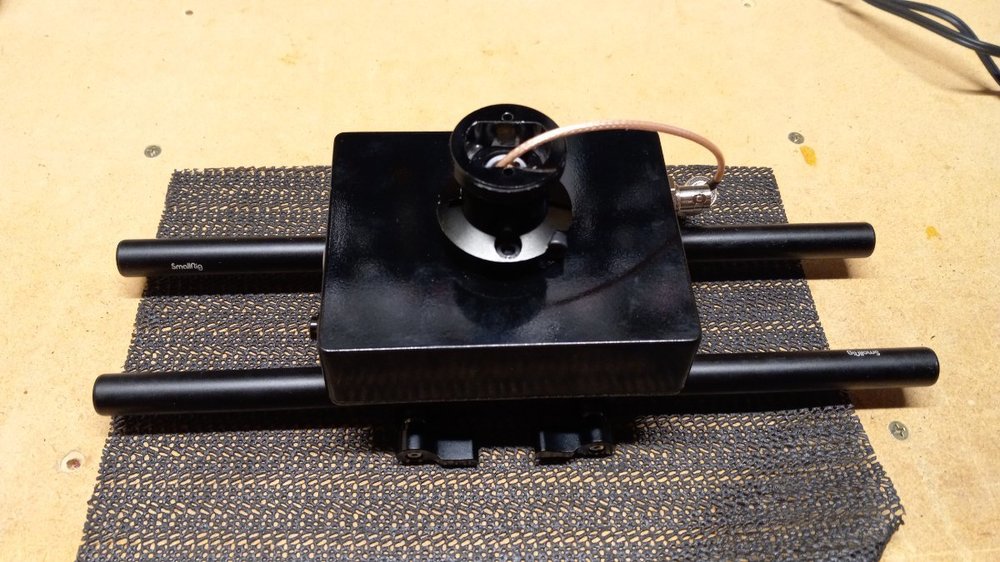
So moving up to the top stage. Being that the Pilot was wired for SD with an RCA jack I needed to update to at least 3G SDI. The end plates that came with the Pilot were not going to meet my needs so I used some 1/8" 6061 aluminum and made some new ones that could hold the 75Ohm BNC bulkhead barrel connector. And I figured I would run a few power lines as well. I quickly realized that this was not going to work. Well it would have but there would have been to many exposed wires to the elements. So I started looking at the big rigs like the EFP, MKV and various other setups that had the D box on an external bracket or diving board if you will. I knew I needed an HD video run and at least a 12v and 7.4v power run so back to the drawing board. Took me awhile to find a small project box to house these connections and I needed a bracket to hold it. The Pilot end plates were not going to work so I used a piece of 1/8" 6061 angle stock to hold said box. I came up with the plan to use 2 rod brackets and some shorty rods to achieve this goal. I won't show you how I cut this piece because it was super sketchy!! Haha!! I did have to do alot of hand filing and sanding so that the thumb screws would fit. In the beginning I didn't think I would be adding that much weight to the top. In a sense I didn't because I really just replaced what the steel weights would have added. I do not have access to any anodizing equipment so I spray painted it and added a few coats of poly. I do want to note that the holes have line up just right so as not to bind the topstage. I have since gotten rid of the rods and brackets and simply bolted the box to the plate. It took some strain off of the cable assembly I installed. It works as it should. It is strong enough to hold the box and to hold the top stage together.


-
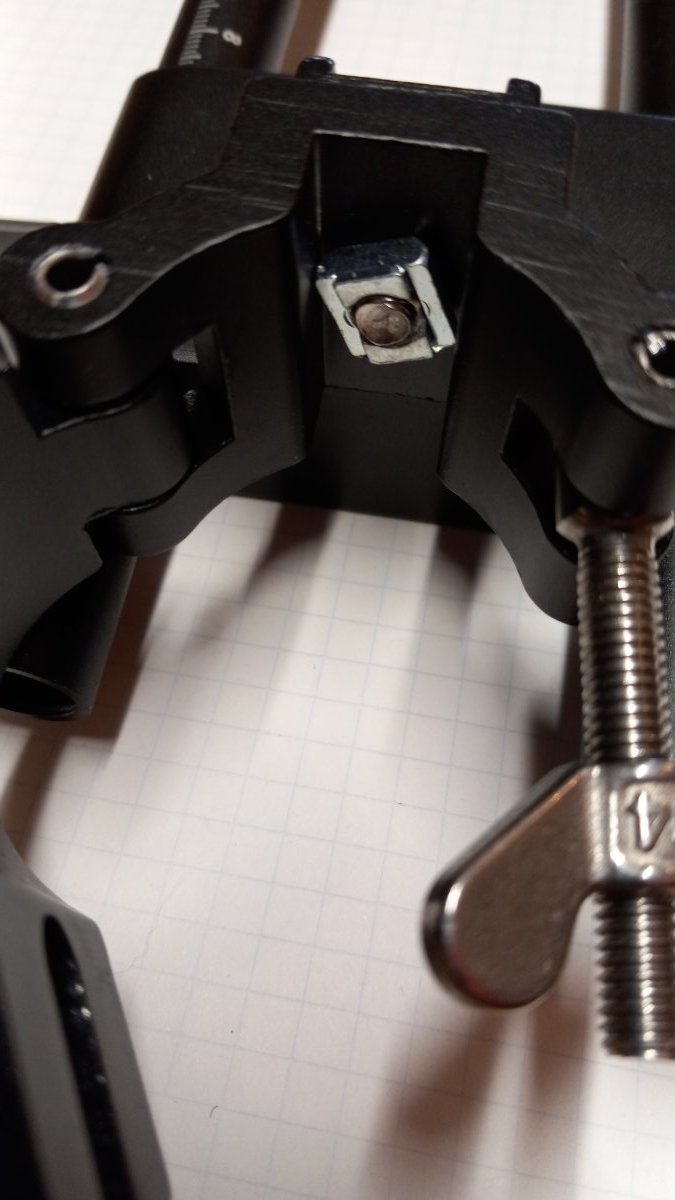
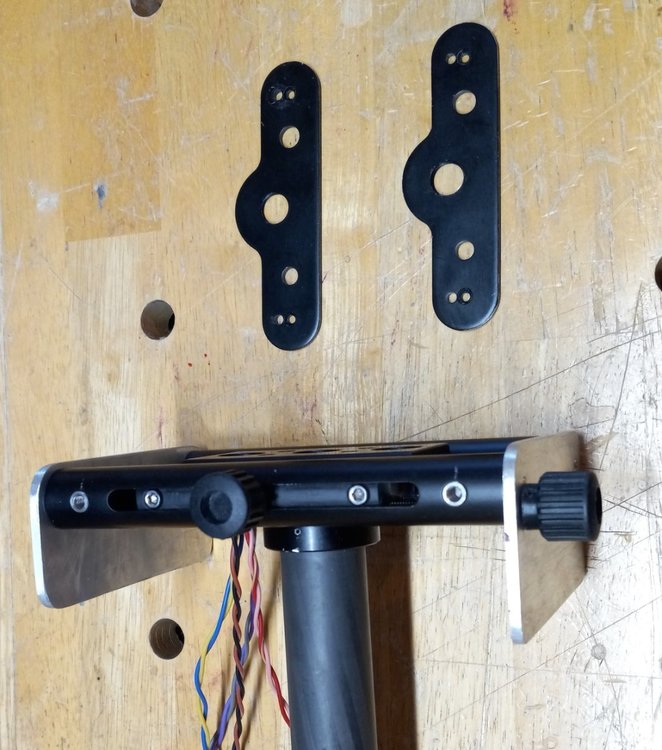
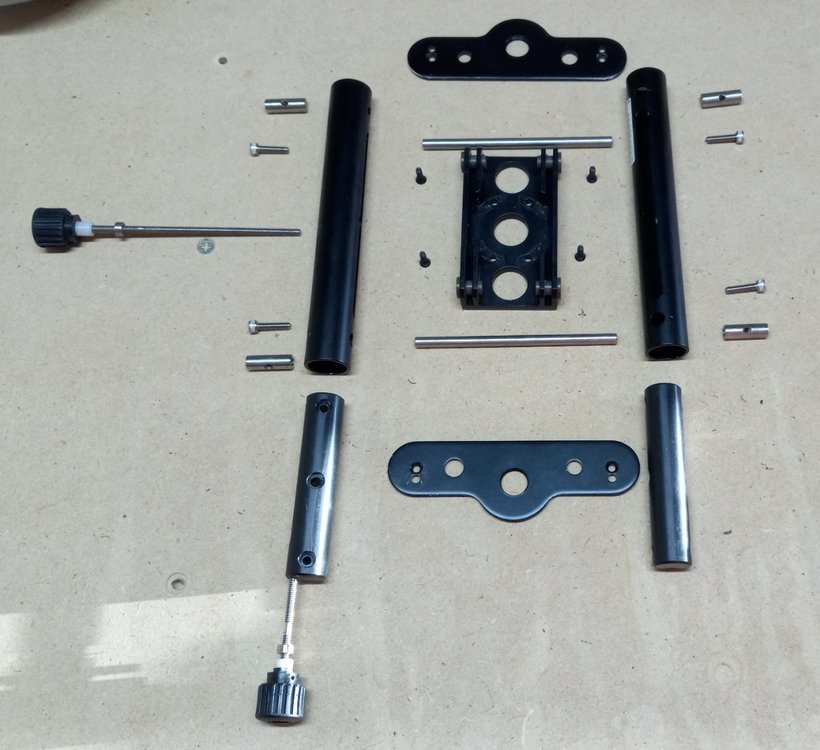
This the exploded view of the Pilot top stage. haha... For anyone thinking of running new cable through the post, the disassembly of the top stage is not that hard. I recommend taking pictures during the process. The one thing that really holds this thing together are 2, 1.5mm pressure pins. These are on the knobs for adjustment. They are quite fragile, so taking them out is a pita... Keep in mind that there is locktite on all the bolts so a little pressure is needed. Do not lose the nylon washers!! They are made with exact thickness for this stage. And always use locktite when you put it back together.
-
Just throwing this out there. I'm in the market for a JVC GY-HM180 4K camcorder. Yeah it's not cinema worthy but for what I need it for it doesn't have to be. New, I'm looking at $1,500 at least. Maybe someone on here has got a used one "laying" around? Even the 250u would work. It's light enough for me to be able to add accessories like a matte box and a wireless transmitter up top on my Pilot. Any leads would be greatly appreciated!!
-
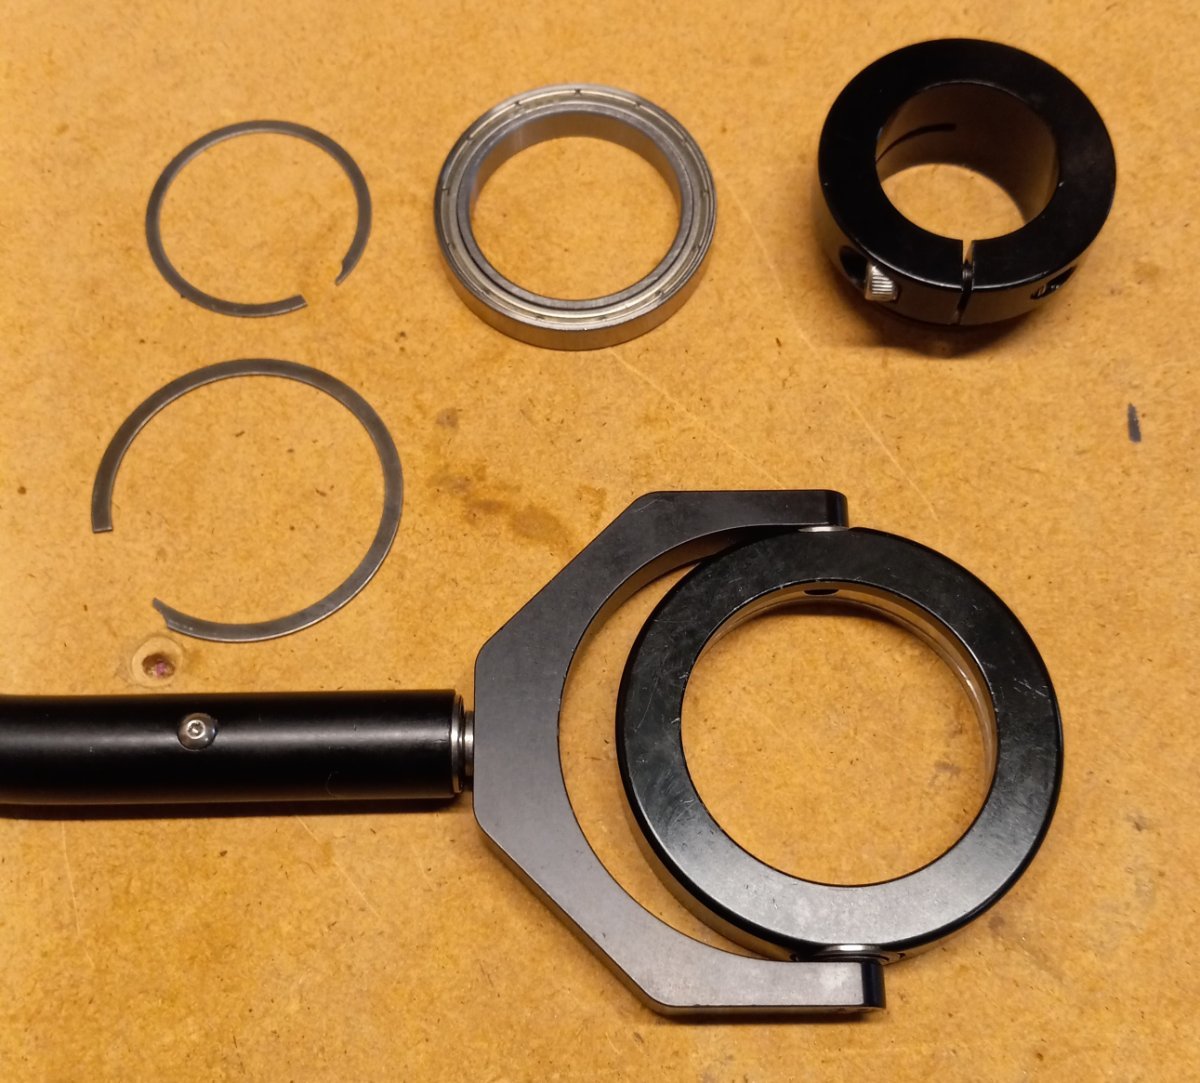
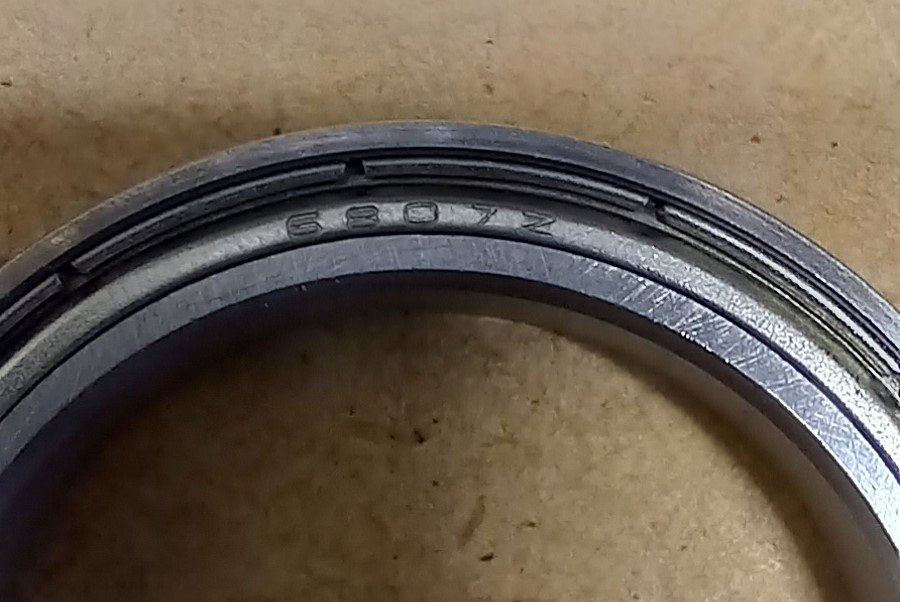
Just thought I'd share this with anyone who owns a pilot. The gimbal on the Pilot and the Solo are the exact same gimbal. I bought a Solo on ebay for like $80. I like the handle on it so I figured wth might as well try it on the pilot. Perfect... Same exact gimbal except the handle. I just switched gimbals. And for anyone who wants to know the bearing is a 6807z which measures 35mmx47mmx7mm. These are readily available online if ever need to replace it. And if you need another gimbal just look for a used Solo.

-
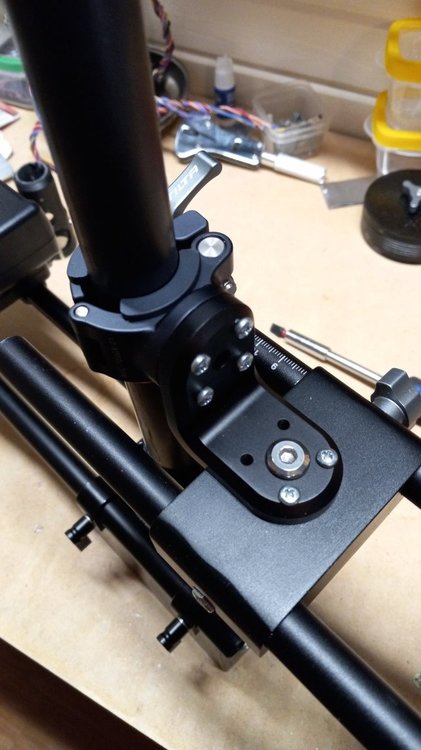
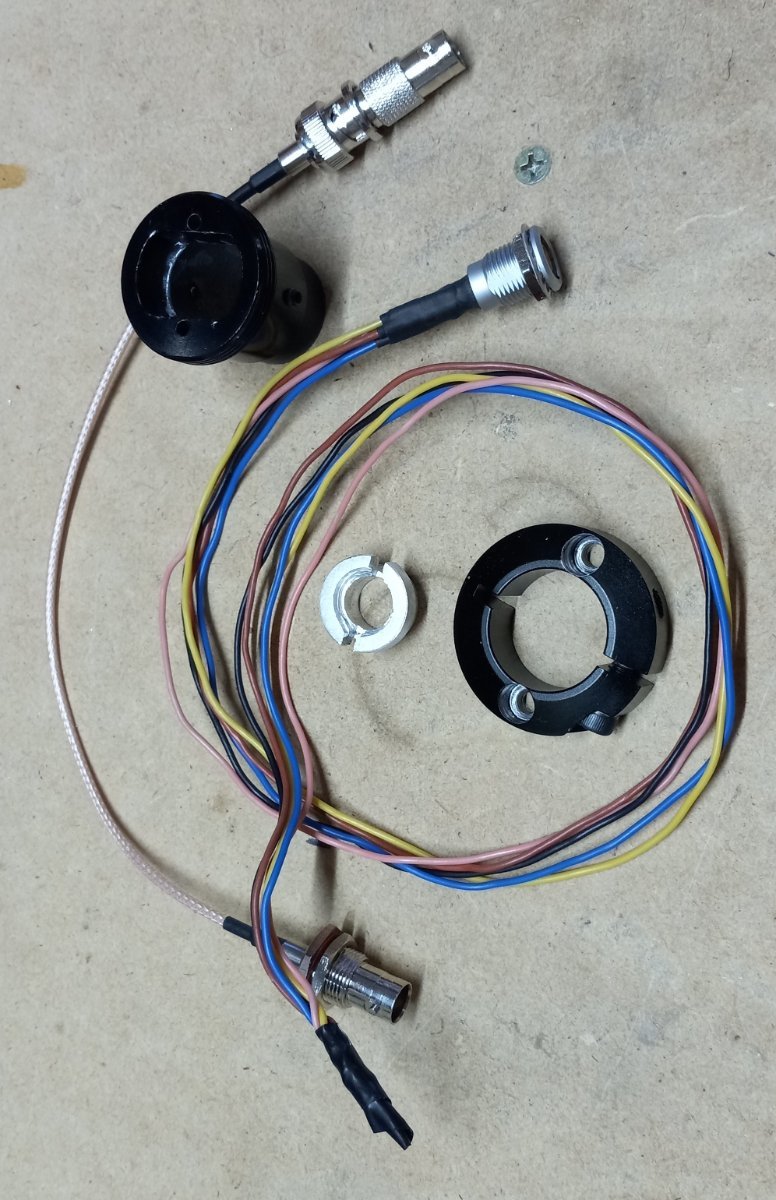
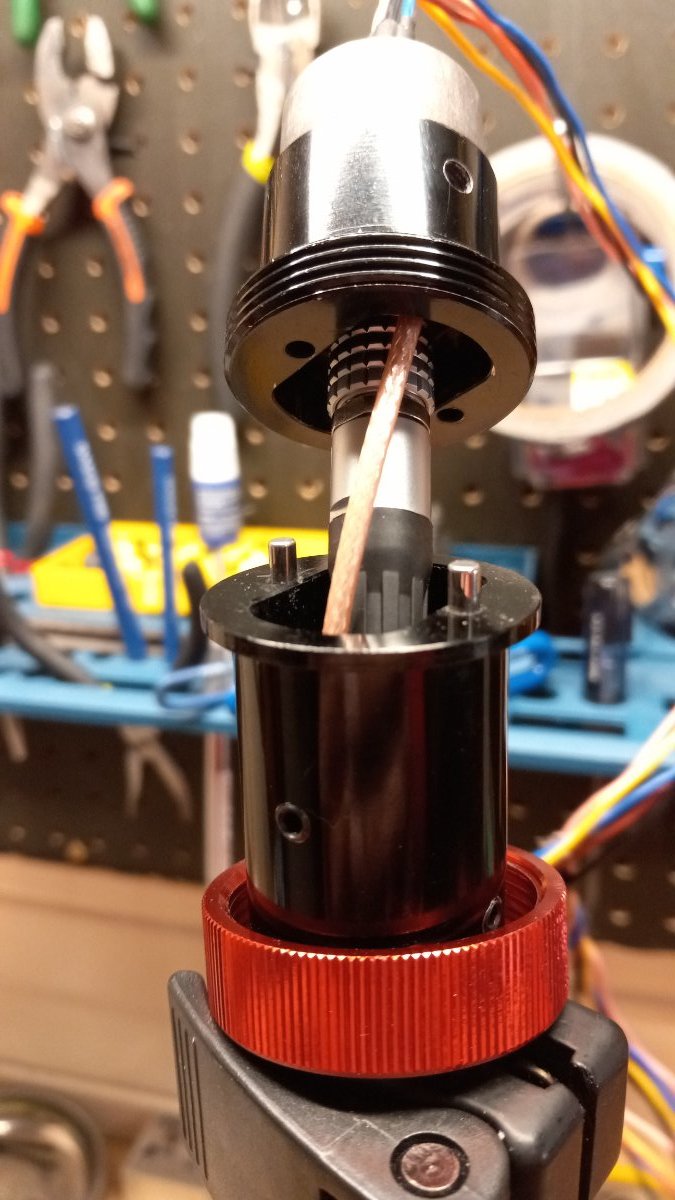
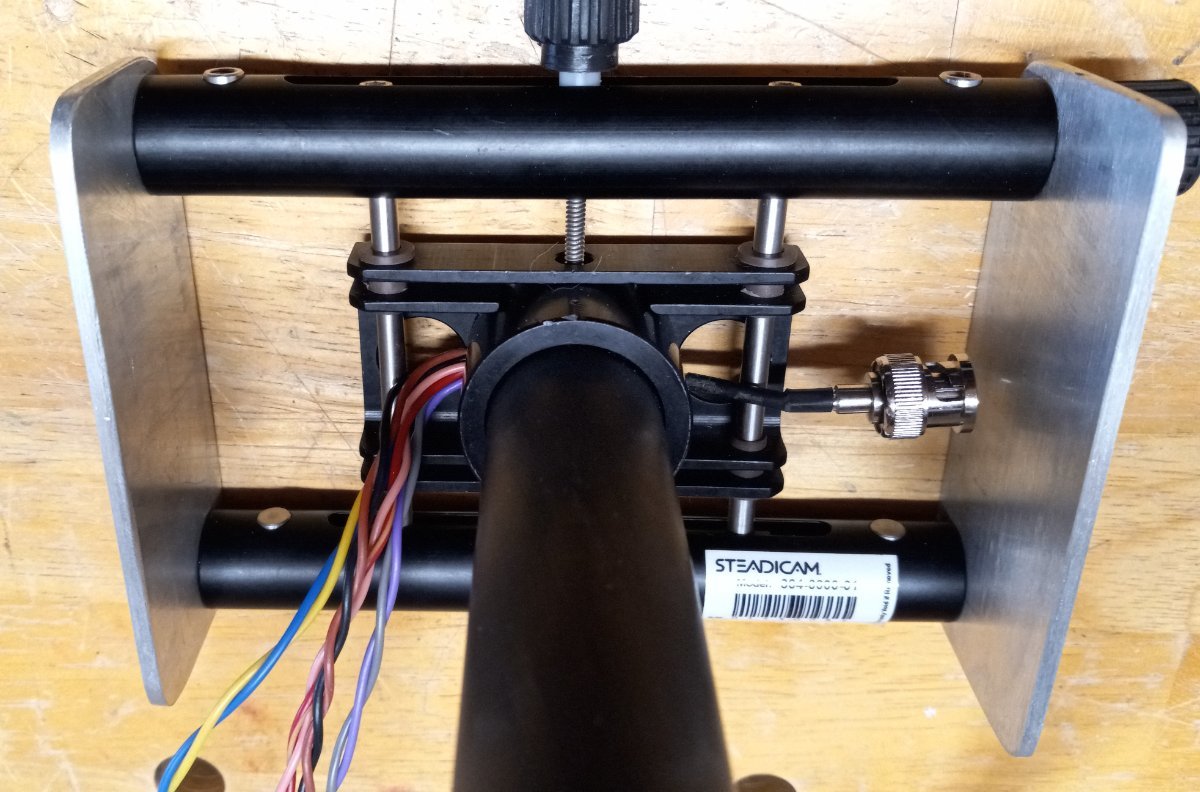
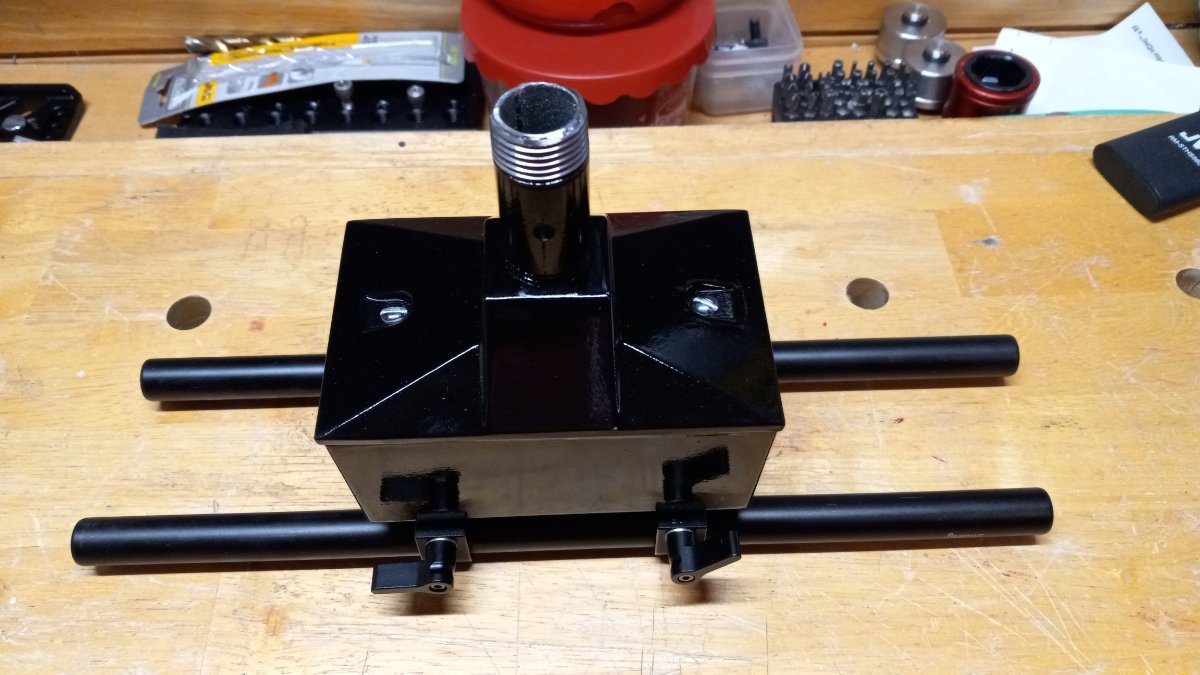
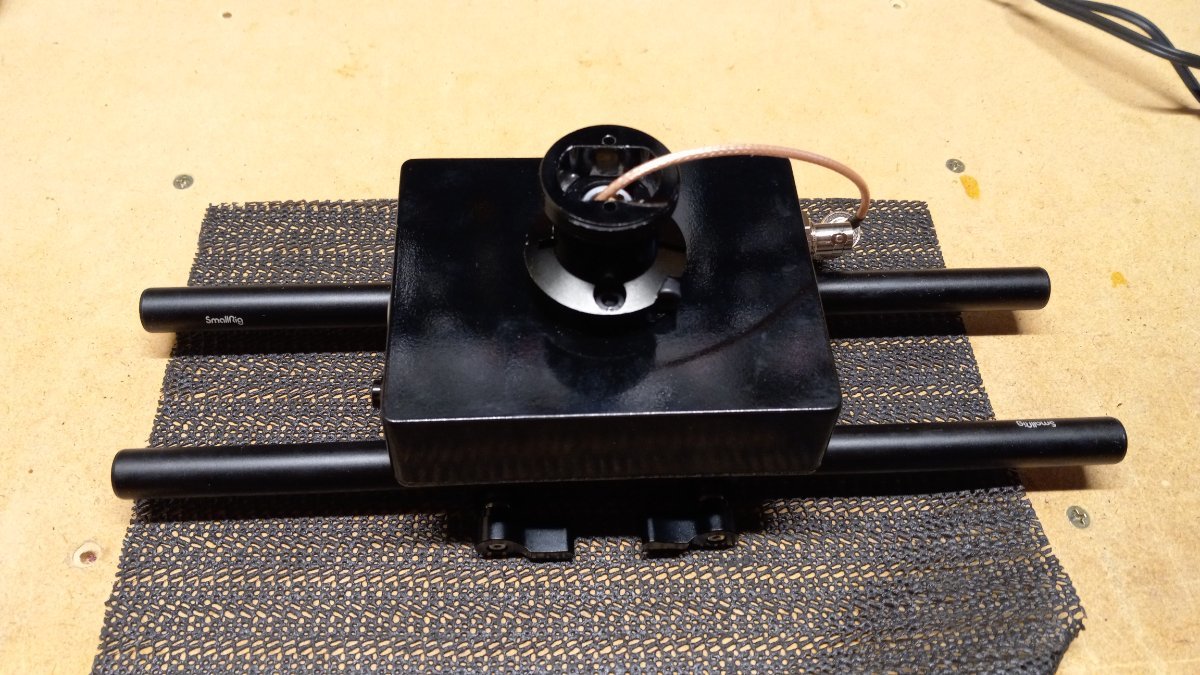
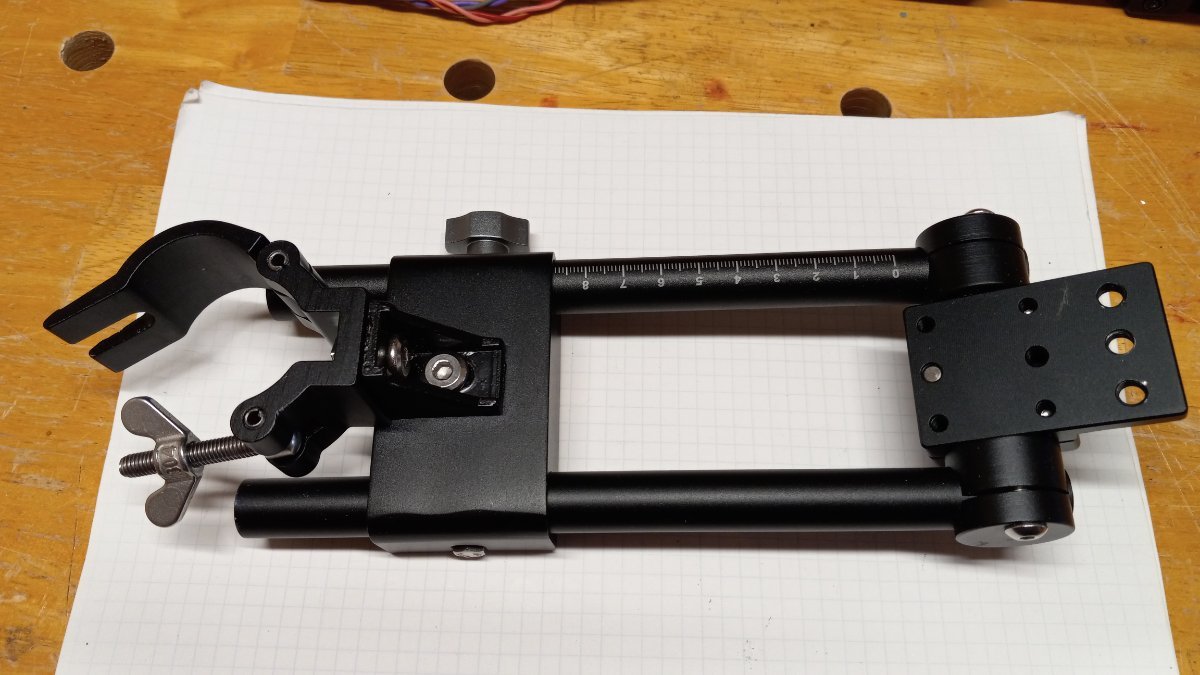
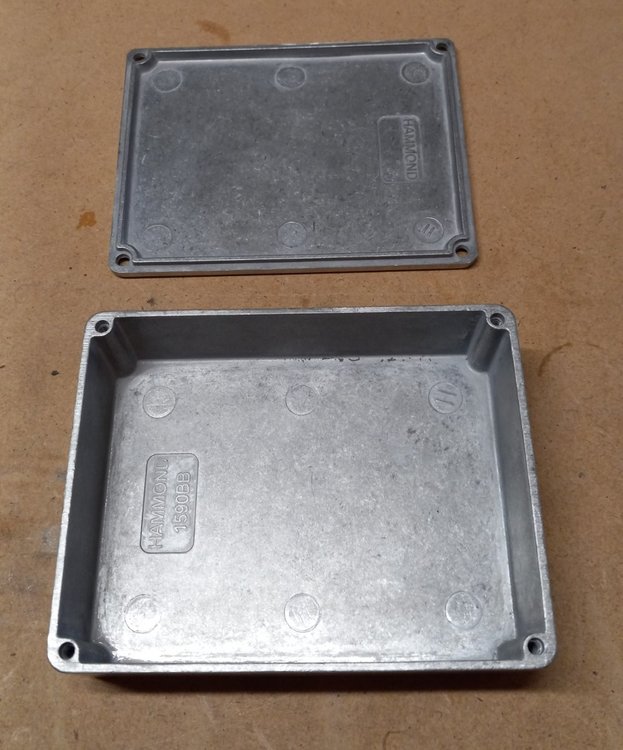
Hello. Back again with another installment. This time I want to go over the bottom of the rig. While the original setup did make sense I didn't feel like it was for me. Basically I wanted a mini big rig. The first thing I knew that I needed was to update the video feed. I thought about just using a BNC bulckhead where the original rca was but logistically speaking it wouldn't work. I needed more room to house the cable without binding. So I came up with the first setup. I work in a hardware store so I spent a lot of time just staring at stuff, haha. So I used a one gang grey cast aluminum box with the aluminum cover for exterior lights. I then used a steel 1/2" nipple that fit in the opening of the bottom bracket. At first I just used the pressure from the clamp but I didn't feel comfortable with that so I got a longer nipple and drilled a hole through it and felt more at ease. I had already taken the top stage off and ran the new 75Ohm RG179 BNC cable through the post. I used a 75Ohm bulckhead barrel in the 1/2" hole on the side of the box and it fit perfect. At this time I was already ordering various LEMO compatible plugs and sockets. Mostly OB but we'll get into that later. Now I had to figure out how to attach the rods for the battery holder. I had bought the SmallRig V-lock power distributor and figured I would use that for all the power I needed from the bottom to the top. Figured, right? It's amazing how much time can be spent searching the vast amount of information on the web!! I knew that the first setup wasn't going to fit my needs. So on to the next stage. As you can see in the pics the electrical box went through a few changes. Having very little resources here in my small town I had to order everything online and wait weeks to get some pieces. Having seen how different companies use different ways to attach the post to the top and bottom I had a plan... I bought a used stabilizer off ebay thinking the sleeve of the gimbal was going to fit the pilot but it didn't. So I repurposed a few pieces from it. I ordered a few of the tube couplers from China. They are for agricultural multicopters. They would become what is currently on my rig. Let's just say epoxy, set screws and patience play a big role in achieving this goal. haha. And when it came to actually cutting the carbon tube to do this I was making a huge leap because there was no going back. It works very well. I used a DIY guitar stompbox for the base. Yes it is cast aluminum. But other than the battery it's not holding a lot of weight. I went through 2 of these boxes due to pure oversight. I painted it and put like 3 coats of poly on it. If anyone would like to see more pics of the evolution just ask. We'll get into the wiring later.

-
Help with opening Pilot/Flyer gimbal for cleaning
Bryan Bullard replied to Herman Wong's topic in Gimbal
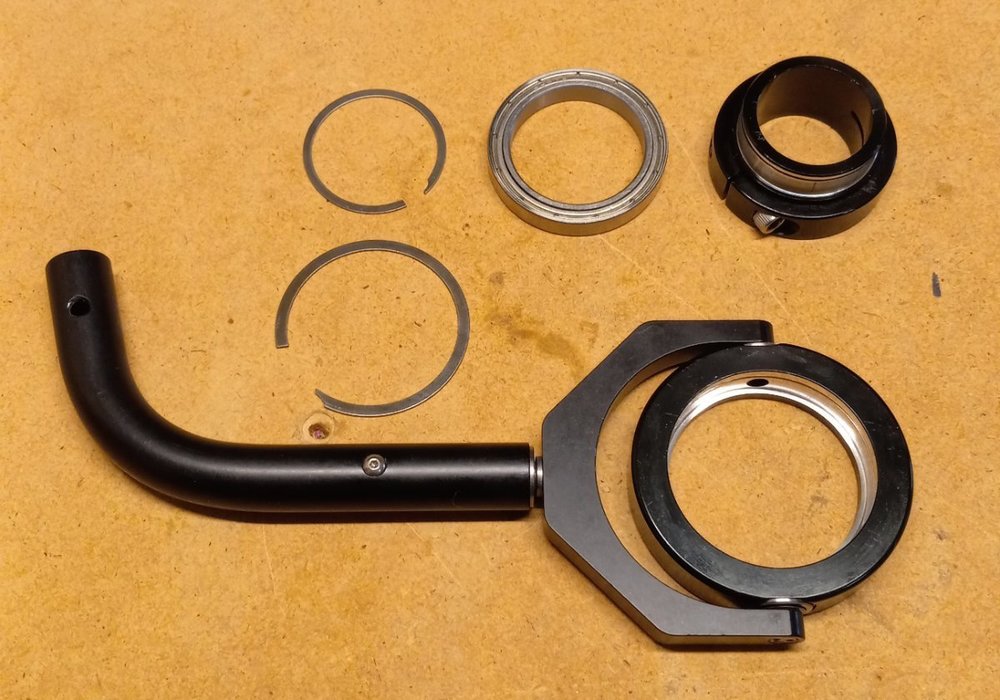
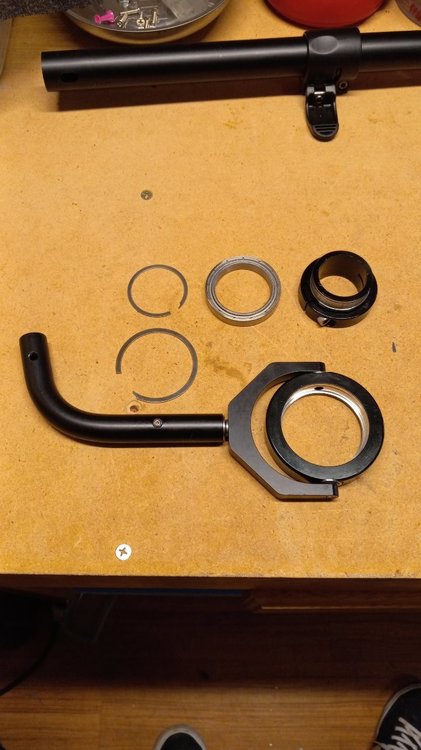
Hey Herman. An old thread but here is the gimbal taken apart. There are 2 pressure rings. 1 outer and 1 inner. Take a precision flat head screwdriver and get under the exposed end with the lip. gently slide the head around the circumference of the sleeve. It will easily pop off. Now the sleeve will come out. Just use finger pressure and wiggle back and forth. The ring holding the bearing is done in the same way. The bearing will come out the same way as well. While this is the way to get to the bearing it not to be done over and over as the rings will lose their tension over time. Putting it back together is just as easy. Just press the ring around the sleeve starting with the squared end in the channel and it will go into place. Same with the bearing. If you need to replace the bearing they are readily available online.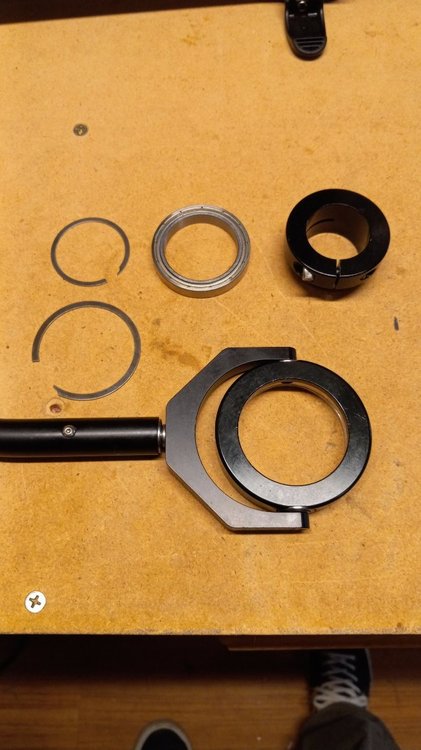
-
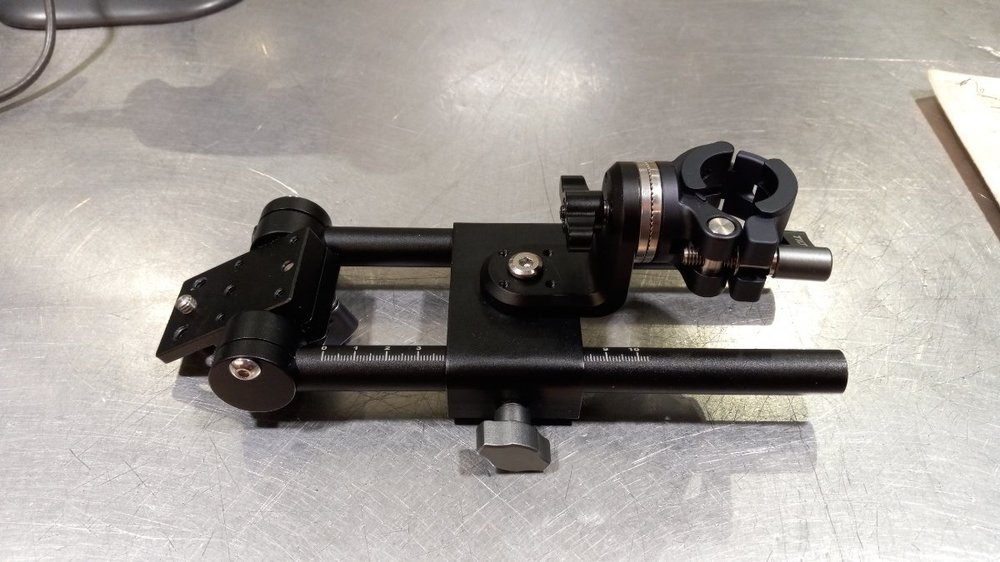
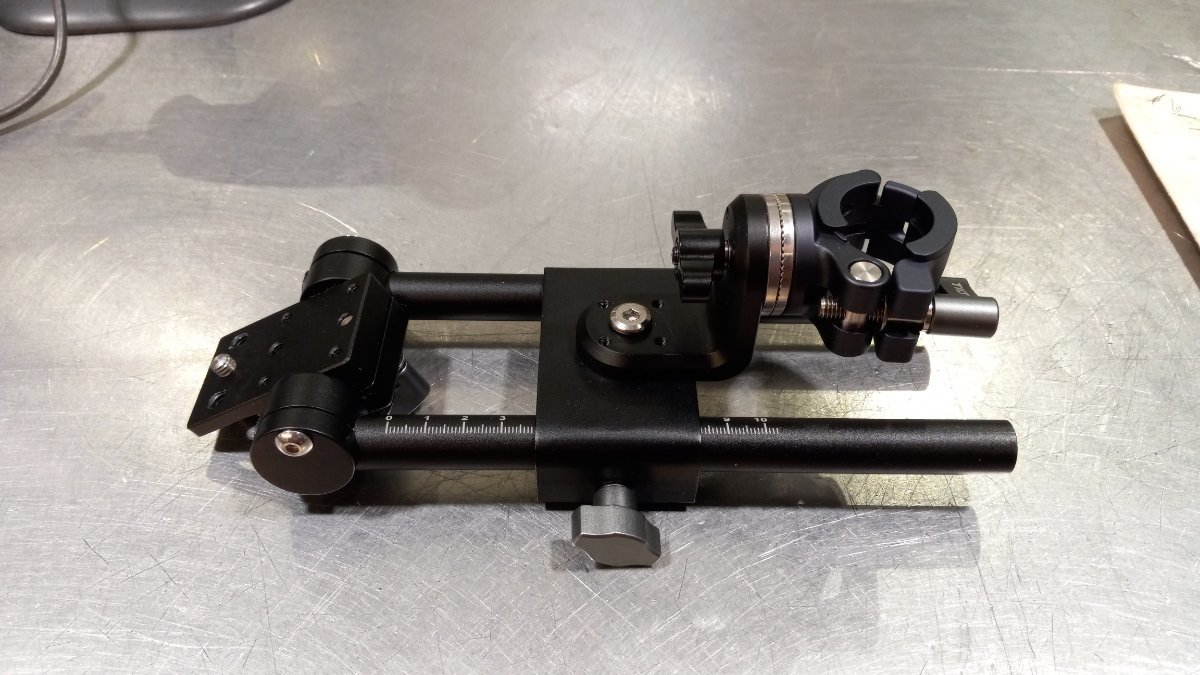
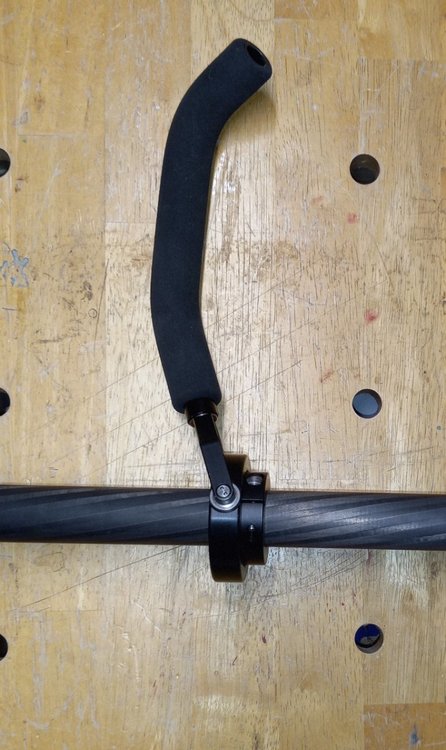
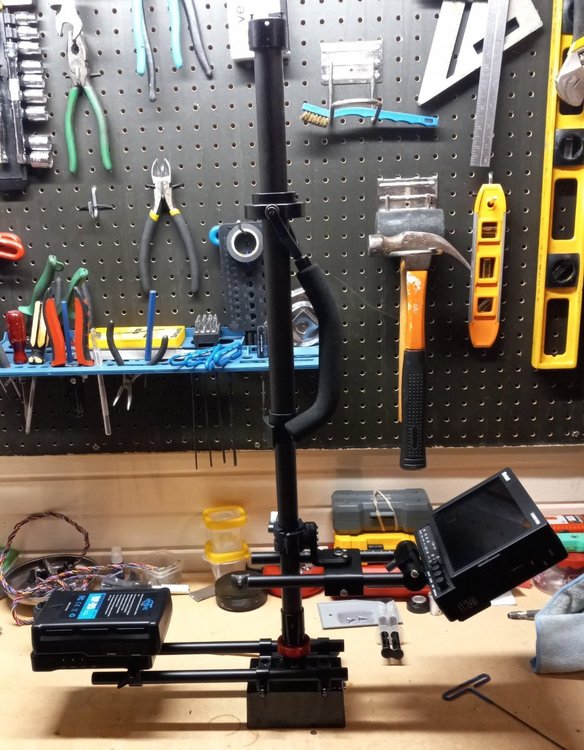
So I guess I will start with the first thing I bought for this rig. I happened upon this monitor mount from the LAING website under accessories. It was $100 USD. The clamp was a little to big for the lower section of the post but I figured I could make it work. Well after about 2 weeks I finally got the mount in the mail. Not what was in the picture on the website. The clamp as you can see is a piece of @#*@ DJ light clamp and the 90 degree bracket is from some cheap profile assembly. They even used a nut from the profile kit to hold it on the clamp. I contacted LAING through their messenger on the website and I explained the situation. They said that I received the "new" version. If you look closely at pics of their Master rig you can see the mount that was pictured and what I thought I ordered. They have since taken down the mount for sale. So on the search i went. Came across the Tilta mounts with rosettes. I also bought a 90 degree rosette bracket from Camvate. Lo and behold it "worked". The rosettes did not match up just right to keep it true 90 degrees. So I took them off and just mounted it with the 4 M4(?) bolts. I used 2 more for locating pins on the bottom. Worked like a charm. I then replaced the aluminum rods with some SmallRig carbon fiber ones. All in all this mod has been great. I was able to take weight from the D box but that will be explained in another post.